5 Common Vegetable Garden Problems and How to Solve Them

5 Common Vegetable Garden Problems and How to Solve Them

Having a successful, productive garden is so satisfying that I look forward to it every year.  Even though the harvest is always well worth it, each year there seems to be a new issue, problem, disease, or pest that requires some sort of treatment.

After many years of gardening, there are a few vegetable garden problems that I have come to expect or look out for which if caught early can be easily treated if not prevented all together.

This article will illustrate 5 common vegetable problems that you could face this year and how to properly treat them.

Dreaming of Having a Vegetable Garden this year?

Grab the Your Dream Vegetable Garden Plan for FREE to get you started today!  Start growing your groceries this year!

1. Powdery Mildew

powdery mildew
As one of the most common vegetable garden problems, powdery mildew is a white fungus that can affect the quality and quantity of the plant’s harvest of tomatoes, peppers, and zucchini.  It can affect many plants such as squash, pumpkins, melons, tomatoes, eggplants, pepper, beans, and peas.

Powdery mildew spreads by fungus spores being transmitted and carried through the air where it will then settle onto other plants. You can identify powdery mildew because the fungus gives the appearance that plants have been dusted with flour.  The white mildew sits on top of the plant leaves. In addition, once damage sets in, the leaves will start to turn yellow.

In order to treat, you can either use an organic fungalcide which can be found at local garden centers, or you can make a DIY version.  The DIY bicarbonate solution is easy to make and only takes four common ingredients: baking soda, vegetable oil, dish soap, and water.  This DIY recipe was taken from MIgardener with a few adjustments to make a smaller batch for my needs.

Mix 1 teaspoon baking soda in 1 quart of water.

Add 1 teaspoon of vegetable oil to help it stick to the leaves

Add 1-2 drops of dish soap.

Mix together and add to a spray bottle.

Spray infected plant, thoughroughly coating the leaves.

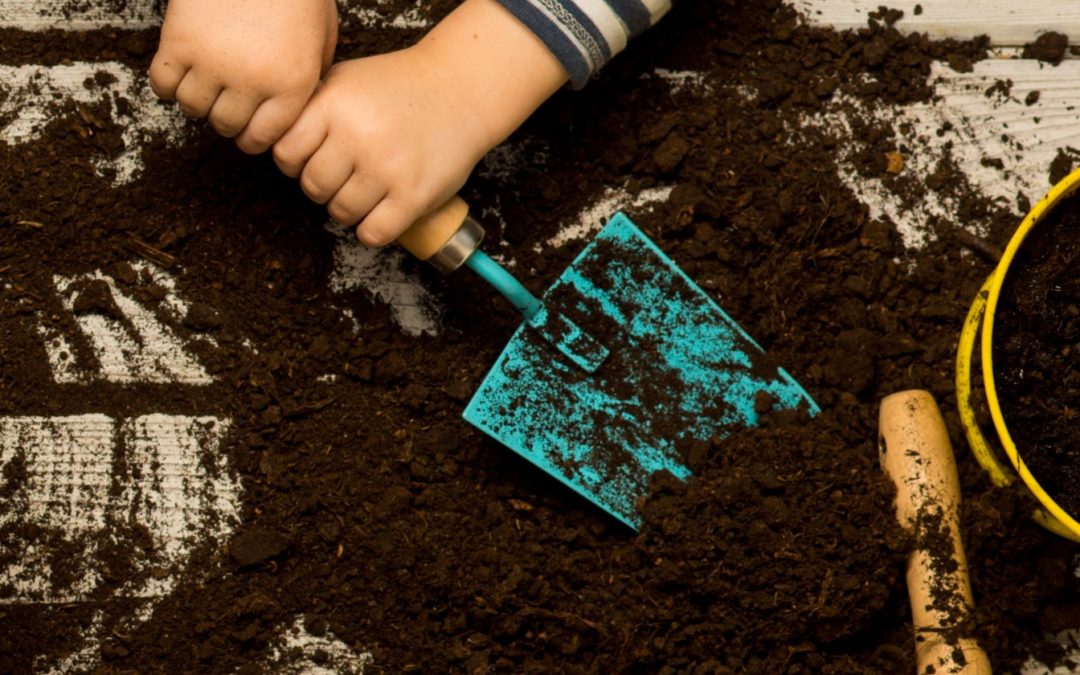
This is a great job for kids! Kids love spray bottles and because this such a safe formula, I usually just whip up a batch and let my kids go at it.

2. Cabbage Worms

cabbage worm
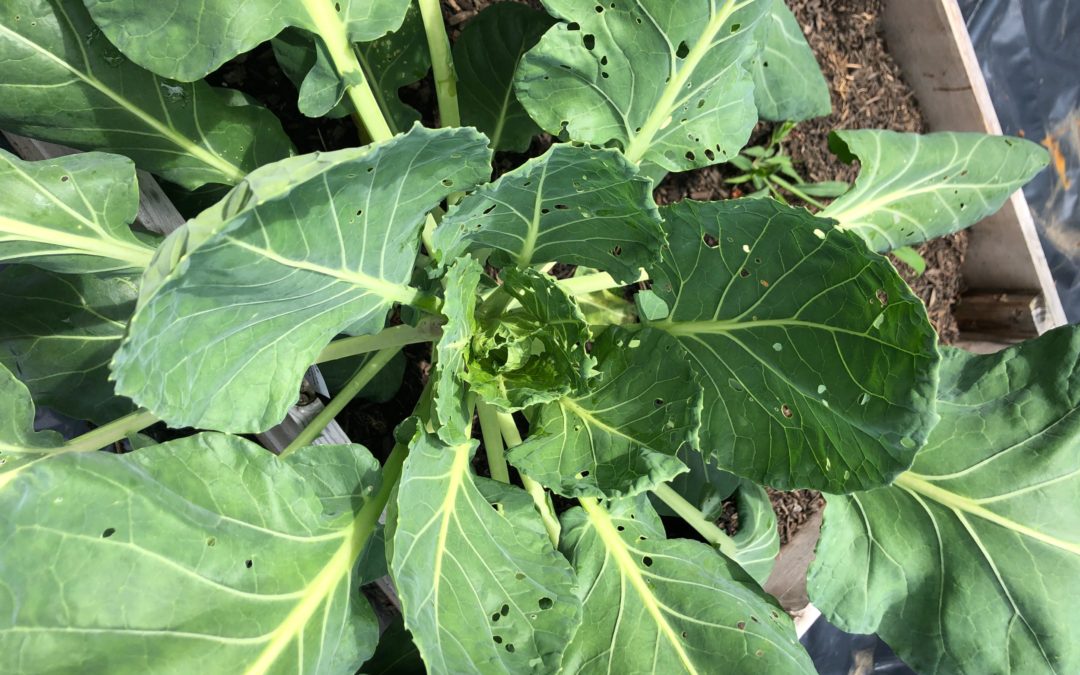
I have not had much luck in the past with brassica plants (broccoli, cabbage, Brussel sprouts, etc. ). Everytime I have planted them, they start off really promising and in what seems like overnight, have been ravaged by cabbage worms and are riddled with holes.  The only real solution for treatment is to manual pick the cabbage worms from the plants.  Once you get an infestation though, this is a very tedious task.

Cabbage worms is a blanket term for several different types of caterpillars/worms that are attracted to brassicas.  Cabbage worms and cabbage loopers typically refer to diamondback moth larvae and zebra caterpillars. The first indication that you have a cabbage worm problem is the appearance of small holes in the leaves.

The best way to deal with cabbage worms is to prevent it all together.  This can be achieved in several ways:

1) Utilize row cover over your broccoli, cabbage, brussel sprouts, etc.  These plants do not need pollination so covering them to avoid the moths laying their eggs to start, is a really great option.

2) After watering, sprinkle cornmeal onto the infested plants.  The worms will eat the cornmeal and die.

3) Use a store bought pesticide like Bt or Sevin.

For more information about battling cabbage worms, check out the very helpful article: The Old Farmer’s Almanac – Cabbage Worm Treatment


3. Leggy Plants

leggy plant
While a healthy plant will usually grow pretty quickly if it is being kept happy, sometimes when a plant grows quickly it can be because of insufficient care.

When a plant becomes “leggy” it refers to the plants growth.  Typically a leggy plant will have grown tall and have large spaces between leaf sets.  Initially it may look healthy because it has experienced rapid growth, but it is actually a sign that something in the care is lacking.

The majority of the time a plant will become leggy with it is not getting enough sunlight.  This forces the plant to reach in a direction to get the sunlight it needs. An easy way to treat and prevent this is to ensure that the plant is recieving enough direct sunlight. Move the plant to a sunnier spot in the garden or window sill.

Another possible cause of legginess is that the plant has been planted in soil which is too hign in nitrogen.  Nitrogen high enviornment can over promote leaf and greenry growth of the plant.  This will cause the plant to have increased growth of the greenery before the roots have had a chance to really be established, resulting in a leggy plant.

For new plants, make sure you are planting in soil sufficient with potassium, or upon observance of legginess, add potassium to the soil.

Another great treatment to legginess is proper pruning.  I experience this with my mint and basil almost every year.  The plant becomes leggy but after a good, proper pruning, the plant will fill out and start developing a more bushy apperance.


Stop wasting your fruits and vegetables!

Grab the Ulimate Fruit and Vegetable Seasonal Guide for FREE to start properly storing your produce so you can stop throwing it away and start enjoying it longer.

4. Blossom End Rot

blossom end rot
Blossom end rot is one of the biggest vegetable garden problems that I routinely face in my garden each year.  It can occur in zucchini, squash, tomatoes, or melons but I typically experience with my zucchini.

Blossom end rot results in a fruit forming but due to some reason, the plant is unable to continue the growth of the fruit and it starts to rot on the blossom end.  The fruit will stop growing and will turn yellow, brown, or black and begin to rot.

There are two common causes of blossom end rot:

1) Calcium deficiency in the soil

2) Inconsistent watering (Check out this helpful article on how to water properly)

Both of these can be treated but are also easily prevented.

In my experience, blossom end rot occurs because I do not water consistently.  In past years, I may not water for a few days and then blast the plants with a large dose of water or a large rainstorm will come through.  The easiest way to prevent this is to water frequently and consistently.

If a calcium deficiency is the cause of the blossom end rot, you can add calcium tablets and egg shells to the soil or add a calcium rich fertilizer either prior to planting in the spring or once you notice the issue.

You do not want to eat fruit that have blossom end rot but many times, it will only be a portion of the fruit that is produced, not every one.

5. Bacterial Leaf Spots

bacterial leaf spot
Bacterial leaf spot is a common disease that can be found in both household plants and garden plants.  Bacterial leaf spot occurs when a plant becomes infected by bacteria either through air transmission or through the soil.

Many times bacterial in the soil is splashed onto the leaves of the plant during watering.

Bacterial leaf spot causes black or brown spotting on the leaves and will eventually cause yellowing.

If caught early, a copper fungicide is a great treatment for killing the bacteria, however prevention is the best way to combat it.


I have come to realize after several years of gardening that I can expect certain issues to arise.  Learning what problems you are most likely to face only comes from experience.

This best advice for a new gardener is to take plenty of notes on the problems that you may face so that you can learn to properly treat it and then work on methods to prevent it for the next year.

Eventually you will gain plenty of knowledge on the topic of vegetable garden problems and issues that you can be one step ahead of them.

While dealing with these types of issues can be frustrating and dissapointing, the energy put into growing a garden that produces fresh food for your family is well worth it.


Dreaming of Having a Vegetable Garden this year?

Grab the Your Dream Vegetable Garden Plan for FREE to get you started today!  Start growing your groceries this year!

We participate in the Amazon Associates Program. Please assume that all Amazon links are affiliate links. Affiliate links are links to third-party products and services. If you use those links and make a purchase, we will receive a small commission. Using these links will not cost you any extra money. An affiliate relationship does not change or influence the nature of the recommendation or opinion.
6 Reasons to Start Homesteading Today

6 Reasons to Start Homesteading Today

It is funny to be how some people believe that homesteading requires you to buy a farm, move to the mountains of Tennessee and live off the grid.  While that is one form of homesteading, and sounds pretty awesome to me, this is not what homesteading looks like for many people.  In fact, there are so many motivating factors and reasons to start homesteading, they really are different for each person.

The awesome thing about homesteading is that you can incorporate practices of homesteading  to whatever degree you want to.  Homesteading is not all or nothing.  You can live a busy life and still take time to start living a more simple life.

What Homesteading Looks Like to Us

We consider homesteading to refer to a lifestyle where we incorporate time honored practices and skills into our daily lives in an effort to marry simple living with modern advances.  We are not planning on going all in and moving to a remote ranch with no electricity.  Instead, we are working to be self-sufficient in several areas of our lives.

For one, we are working to garden and preserve our own vegetables.  We have been growing vegetable gardens for a few years now and will hopefully increase our output to producing the majority of our own vegetables.  We would eat fresh and preserve the rest for use throughout the year.

Another area is learning self-sufficient skills so that we can do many of the jobs that we would otherwise pay someone else to do.

A common misperception of homesteading is that you need a large farm, tons of land, and plenty of free time to homestead.  This is completely not true!

There is a growing movement of people embracing urban homesteading, which means homesteading in apartments or with very small amount of land.

It is amazing what you can do and grow on a 1/10 acre lot!

Don’t get me wrong, there are many aspects of homesteading that are not easy and are time consuming but this doesn’t not mean that a busy mom who works full time can’t start homesteading.

With a little planning and organizing, you can start homesteading easily.

Why would you want to homestead?

The reasons are actually endless, there are SO many awesome benefits to homesteading and learning the skills that go with it.  Read on for more reasons to start homesteading today!

1) Vegetables, Fruits, and Herbs

Obviously, being able to walk outside and pick your own vegetables is a huge benefit to homesteading.  Gardening can be hard work but it is probably easier than you think.

Growing your vegetables not only brings healty eating practices to your family but knowing where your vegetables are grown and how they were grown is so important for awareness and health.

Knowing what chemicals were used on them is important.  Also growing your own vegetables is extremely satisfying.

Imagine growing your own tomatoes, being able to enjoy them during the summer while they are fresh and then preserving them to use in sauces or dishes through out the year.  Being able to feed your family by growing your own food means you will always be able to provide for them because you have this skill and knowledge.

2) Teaches your Kids Important Values

Homesteading has SO many benefits for children. This is the main reason we decided to start homesteading.  We have two small boys and it is our goal and responsibility to make sure that we mold them into confident, responsible, and knowledgeable humans.  For us, we really believe this can be done through homesteading.

Homesteading teaching kids so many values and life lessons. I have a hard time thinking of any other project or lifestyle that will help shape all of these interpersonal skills like homesteading can.

The awareness of where your food comes from and how it is processed also encourages gratitude.  Being able to work on a project with such a satisfying outcome as feeding your family helps build confidence and resourcefulness.

One of my previous articles discussed some awesome reasons to garden with your children, the benefits really are endless: insert article link: 17 Essential Reasons to Teach your Children How to Garden

3) Make your Own Home and Personal Products

Eliminating harsh chemicals and replacing them will all-natural, simple ingredients by making your own products is surprisingly simple! 

By making your own home products you can not only save a lot of money but you also know exactly what you are making and using in your home.

You can make all-natural alternatives to cleaning products, cosmetics, personal care, pest control, weed killer, laundry detergents, anything you buy at the store!

When I used to clean, I use to want to use harsh chemicals.  Really get in there and make sure the bathroom is scrubbed and super clean.  However, since  transitioning to more homemade products, I am finding that they are just as good and effective!

4) Save Money and Live Frugally

Saving money is also a large motivator for us.  While the cost to homestead is initially more than we expected, we needed to do some work to our yard and property, in the end the ability to produce our own food should save us a good amount of money each year.

Making your own products is also a great way to save money. While the initial cost of purchasing raw ingredients will be a little expense, the amount of cleaners and products you can make with it far outweighs the initial investment.

Living simply also encourages a frugal mindset that will transfer to all areas of your household operations.  Reusing, repurposing, and creating your own products will save you money and will encourage a lifestyle of being frugal and thoughtful of how your family spends money.

5) Learn Time-Honored Skills

I have always, since I was really little, loved learning about how life was in pioneer times. I went to a Living History Camp at a local farm museum several years and I absolutely adored it. 

We learned to make butter, candles, they had all of the old outbuildings so we learned about preserving food and taking care of animals. It was just awesome.

While this simpler way of life (if you can even call it that)it  is not by any means easier, to me it always had a certain romance and appeal to it.

I am excited to take time to learn how to do these time-honored tasks, not only for fun, but also for self-reliance.  My family will be prepared and will know how to live in the event that we can no longer buy our food or consumer goods from the store.  Essentially, we will never starve or not be able to take care of ourselves.  That reality is absolutely what we are chasing.

It is important that we do not let these traditional ways of living life fall by the wasteside. They absolutely have a place in our modern society.

We are striving to incorporate them when necessary to find a balance to living a happier, and more simple life.

6) Build a Strong Family Unit

One of my dreams for my family is for them to be a strong family unit.  I believe that one way to do that is to have all members of the family contribute to a higher goal, which in our case is taking care of and providing for our family.

Everyone will have their responsibilities and duties but we will be working to as a team to make it all come together.  We are just in the beginning stages of this, but our boys are young.  If we enforce these values and encourage these behaviors, we can raise them to be responsible, hard working, and respectful human beings. 

The positive reasons for homesteading really are endless.

By taking own a homesteading lifestyle, we are introducing a certain level of extra work and effort that may seem unecessary to some in today’s world. 

For us, it isn’t necessarily about giving up modern technologies and advances but embracing traditional, proven methods to providing your family with thier necessesities. The ability to be self-sufficient and take care of your family extends beyond bringing home money to pay for these necesitties. 

It really comes down to self-reliance and passing these skills down to our children to ensure they are well-rounded, grateful, thirsty for knowledge, and confident to do all of these things for thier family.

From impacting your family dynamic, your health, your finances, your outlook on life, we have faith that homesteading will bring our dreams to life.

We participate in the Amazon Associates Program. Please assume that all Amazon links are affiliate links. Affiliate links are links to third-party products and services. If you use those links and make a purchase, we will receive a small commission. Using these links will not cost you any extra money. An affiliate relationship does not change or influence the nature of the recommendation or opinion.
17 Essential Reasons to Teach Your Children How to Garden

17 Essential Reasons to Teach Your Children How to Garden

It is no secret that gardening has so many positive benefits and rewards.  Gardening is so special because while the ultimate goal is to grow and enjoy whatever vegetable, fruit, flower, or tree has been planted, the entire process provides the gardener with the opportunity to learn and practice a variety life skills and knowledge that can benefit them in all aspects of their life.

I know that when you have small children, it is sometimes easier to avoid including them in some projects and chores because they may not understand or may increase the time the tasks take.  This is an easy habit to get into when you are trying to check off your to-do list and complete important projects.

I know that I am guilty of this.  With small children, it is many times easier to wait until they are napping to work in the garden.  Sometimes after I have considered the muddy mess that will come from allowing them in the garden or the extra attention that is required when we are spending time outside, I have decided against bringing them with me to the garden.  However, this year will be different!  My children will be older this year and my hope and goal is to include them with me while I garden and teach them these skills that I love so much.

While it could be so much easier to work on a garden without involving children, not including them is a lost opportunity to teach them some amazing life skills and lessons right your backyard.

Here are some of the AMAZING benefits that gardening will have on your children:

1) Provides fresh healthy food

One of the most important reasons to have a garden at all is for the fresh, healthy food that it will produce.  The ability to have fresh food grown in your own backyard, make its way into your kitchen and onto your dinner table is just awesome.  Establishing and encouraging the importance of eating healthy fruits and vegetables will be so much easier when your child can see the entire picture of where their food comes from.

My two boys LOVE broccoli and I buy it so much that we tend to have a lot of frozen broccoli.  Nothing wrong with that but how awesome would it be to show them how it grows, have them water it, pick it, wash it in the sink and then have it for dinner!

2) Gets them outside

Fresh air! Having your children come outside with you to the garden will get them some much needed fresh air and sunshine.  Gardening is a great way to enjoy the outdoors with your children.

Making sure that your garden is fenced in, will not only to deter pests, like deer or rabbits, but it will also allow you to garden with some piece of mind that your children are safe within the garden with you.  This way they are also fenced inside the garden with you and can let you focus on exploring all of the wonderful plants that you have growing.

3) Practice planning and organization

Gardening requires planning and organization.  Having your children help with the planning and organization can really get them invested in the project from the beginning.  Proper planning and organization is necessary for almost every project or activity that we take on in life, so this is a great opportunity to emphasize the importance.  Children can get involved in the decisions of what to plant, where to plant, and how much to plant.

Not only is gardening a great way to encourage forethought and proactive actions, but it also allows the child to see the big picture of the garden and really understand what it takes to grow and prepare the food that we eat.

4) Promotes physical exercise

Gardening is definitely a physical activity.  Digging in the soil, carrying bags of mulch or harvested vegetables, and weeding are just some of the physical activities that are apart of gardening.  Gardening allows you to incorporate some physical activity into your day without having to structure an activity or game.

While any reason to get your kids up and moving is a great thing, I love the idea of physical activities that are also productive and benefit a larger goal.

5) Strengthens problem solving skills

You are guaranteed to face some problems and challenges with your garden each year.  Many of these problems are ones that you will have never faced before.  One of the skills that tending to a garden teaches you is to be able to ask questions and do research.  You will have to utilize your resources to come to a proper solution to the problem.

Teaching children to become good at asking questions and conduct research is so important for many aspects of their life.  They will need to learn to think creatively and critically to overcome challenges that they face in any project they take on.

For example, having your children help with projects such as; developing a means of protecting the garden from deer or having them find a way to support the tomato plants, can really get them thinking critically and creatively.  If their solutions are effective, they will gain confidence in their abilities.

6) Supports importance of goal setting

Children may not fully understand the importance of setting goals and working toward them, however this concept can still be implemented into their daily lives without making it a chore.  With gardening, you can easily incorporate this important skill by talking about your gardening goals with your children during the planning phase.  Speak to your children about what would make a successful garden and set up some milestones that can be celebrated along the way.  This practice not only allows your children to see progressive growth in their hard work but also allows them to celebrate all of the mini successes that come along with gardening. 

Celebrate when you see the seeds first start to sprout, when your first cucumber can be identified, or when you harvest your first carrots.  Incorporating the idea of goal setting also allows for reflection at the end of the season.

Remember this may seem advanced for children but it does not have to be overly structured and painful! Just including them in discussions on what a successful garden looks like can really help them see the bigger picture and develop some great proactive habits.

7) Instills an appreciation for hard work

Some good old-fashioned manual labor is, unfortunately, something that not all kids experience regularly.  While initially your children may groan and protest at the idea of outside physical chores, if it becomes a routine expectation, then it begins to transform into a lifestyle instead of just an annoying chore.  Physically working to achieve a goal is something that should be valued and encouraged.

The benefit of physical labor is that typically at the end of the day you are able to step back and visually see what you have accomplished.  It is so important for small children to be able to see their progress and appreciate the work that they have just completed.  While you wouldn’t be trying to create little labor horses, you would be trying to eliminate the negative feelings of having to do physical work and instead help develop courage and strength in your children.

8) Teaches them self sufficiency skills

I love gardening for many reasons but one of the biggest draws for me to want to share it with my children is to teach them self sufficiency.  I want my children to be able to live their lives without being dependant on the decisions of others and instead have the knowledge, skills, and confidence to live freely and successfully on their own reliance.

I am not a doomsdayer by any means but I truly believe that old-fashioned skills such as gardening, food preservation, scratch cooking, and animal husbandry still have an important place in a modern society and passing this on to our children will make them well-rounded individuals.

9) Promotes sensory stimulation

It is really never too early to start exposing children to your garden.  One of the struggles with trying to garden while having small children is how to contain them and keep them busy and occupied while you get some work done!  Some options are taking them outside to sit in a stroller while you weed or harvest.  You could also set up a pack-n-play or play yard in the garden so that they can safely play.  If they are able to move around, sit, crawl, or walk you could also let them wander around and investigate. 

Gardening can really awaken the senses and allows children access to some brand new smells, sights, sounds, and textures to feel.  Kids can play in the dirt, roll cherry tomatoes around, pick up bugs and worms, and splash in a bucket of water.  Some of these simple sensory activities can keep children occupied while you get some much-needed gardening done!

10) Fosters an appreciation for nature

I must admit that even as an adult, I didn’t really have a huge connection to nature or fully appreciate the earth and animals until I started gardening.  In today’s fast-paced world it is so difficult to slow down and spend some time taking in the joys of nature.  By gardening with your children, you can emphasize the importance of taking care of the earth and all of its living things and develop a real connection and appreciation for the nature that is accessible right in their backyard!

11) Teaches them a sense of pride and responsibility

Independence is an extremely important thing for little kids.  My boys are constantly pushing me away when I try to help them so that they can “do it themselves”.  Gardening is a perfect way to allow them some controlled independence, which will help them develop a sense of pride and responsibility.  Doing new things by themselves encourages confidence and allows them to be responsible and proud of their successes.

My oldest loves to carry baskets of vegetables and it makes him so proud to be able to fill a basket full of tomatoes and carry it to the house.  What an awesome feeling for both your children and for yourself!

12) Teaches them to overcome failure

Gardening is full of failures.  Every year you are pretty much guaranteed to face at least several different challenges, obstacles, or setbacks with your garden.  While it may be frustrating, if you are already anticipating this, these challenges can provide some great learning opportunities for your children.

One of our last gardens was a HUGE failure.  That season we experienced a record-breaking amount of rain and major deer and rabbit problems which made for an awful gardening year.  We barely harvested anything that year.  We were very disappointed but the experiences forced us to learn how to handle and prevent these challenges in the future.  Understanding and dealing with failure is a very important lesson that children can learn from gardening.


13) Encourages them to try new foods

One of the great things about getting children involved in gardening is that it allows them to be more connected to the food they eat.  Watching the entire growing process of a green bean plant can encourage much more excitement about trying something new than just buying it at the store.  Actually having a part in growing, harvesting, and preparing the vegetable, could encourage curiosity in a child making them more likely to try a vegetable they would otherwise be opposed to.


14) Teaches them patience

Patience is a virtue!  Gardening definitely teaches all of us patience.  Once you plant that initial seed, you will have to wait for the plant to grow, then wait for the vegetable to grow and be ready to pick, and lastly, wait to eat it.  These steps requiring patience will help your children understand that not everything can be obtained instantly.  Instant gratification has no place in gardening and in my opinion, that is so refreshing!

15) Emphasizes family bonding

I LOVE the idea of treating the garden like an entire family project.  As there are so many tasks in gardening, everyone can have a special responsibility and job.  This not only encourages teamwork among the family but also allows the child to own a part of the garden where they can see the benefits of their individual efforts of hard work.  A family should rely on each other but also encourage and elevate each individual.  Gardening is a wonderful way of incorporating this into your family’s lives.  In the end, you all get to reap the benefits and eat the food!

16) Introduces intentional living

Today, there is so much instant gratification and social media that sometimes it is so refreshing to have something real, natural, and intentional.  The term “intentional living” basically means that you are aware of the values and beliefs in which you want to live your life by and you make your decisions and actions accordingly.  There are many reasons as to why someone would choose to live a homesteading lifestyle. 

It seems that all of those reasons are generally based on the desire to provide their family with security, love, and protection.  For our family, we want to provide our children with security and protection in the way of teaching them to be self-sufficient so that they can be successful regardless of the actions of other people. We also want to foster a close family unit which to us looks like teamwork to complete family projects and work towards a family goal that will be beneficial to all of us.  These values and beliefs are the driving force for our decision to homestead and by living out those dreams, our children are also learning to create their own dreams and take action.

17) Nurtures thier creativity

What I love so much about gardening is that it can be a personal and private endeavor for you and your family.  This allows you the freedom to really manage and care for the garden however you see fit. (It may not always be successful depending on some decisions but that is ok!)  This allows you a certain level of freedom to be creative and experiment,  what an awesome opportunity to let your kids express their creativity.

You could let them paint the inside of the fence whatever color they want, let them make signs and markers for the vegetables in each garden bed, or you could let them pick out a crazy colored carrot to plant, or a vegetable you have never heard of.  The possibilities are endless and you all will have fun doing it!

There are so many reasons to garden with your children this year. Even if you have never had a garden before, start slowly and try out a small garden this year.  Your family is sure to love all of the exciting benefits and rewards that gardening can bring you. 

For some tips on how to successfully garden with small children, check out this past post: 6 Easy tips for successfully gardening with small children

We participate in the Amazon Associates Program. Please assume that all Amazon links are affiliate links. Affiliate links are links to third-party products and services. If you use those links and make a purchase, we will receive a small commission. Using these links will not cost you any extra money. An affiliate relationship does not change or influence the nature of the recommendation or opinion.
13 Gifts Every Gardener and Homesteader Will Love

13 Gifts Every Gardener and Homesteader Will Love

If you have anyone on your gift list who is an aspiring homesteader or beginner gardener than this is your ultimate gift list.

To be honest, this is basically MY wish list.

Several items included in the list I already own and use.  I wanted to share them with you because I LOVE them.  Others, I just really want myself.

There is something for everyone on this list so hopefully, you can find something for the gardener/homesteader in your life!

I also want to include an extra affiliate disclaimer here.  Please assume that all external links to products are affiliate links. I am an affiliate for Amazon and Burpee.  I am including only products that I trust and own or would purchase and use myself.  I do receive a small percentage for any purchase made using these links, with no extra cost to you.   Please be assured that an affiliate relationship does not and will not influence my opinion on a product.  I choose to be an affiliate ONLY with companies that I trust, use, and would confidently recommend to my readers.

Books and Resources

1) Gardening Journal

One thing that I am really going to improve this gardening season is my notetaking and planning process.

I am not great awful at notetaking and I am even worse at remembering notes that I was supposed to take.  I always think that I am going to remember the details like; what kind of seeds we used, what type of pests were a problem, or how long we waited to harvest a particular vegetable, and I can never remember any of it.

THIS YEAR I will be purchasing a good gardening journal and really spend some time taking notes.  Any gardener would love a pretty and organized journal. It is a thoughtful gift for any occasion!

This journal got some great reviews on Amazon, but if you aren’t crazy about this one, there are hundreds to choose from!

2) “Welcome to the Farm”

by Shaye Elliott

I bought this book for myself after reading rave reviews about how it is the ULTIMATE beginner homesteader book.

First of all, the photos in the book of her homestead and life are just beautiful.  Her story and journey to homesteading is inspiring and really helped me hone the vision of what I wanted for our homestead.

I have only read parts of it and will read more as I take on the different homesteading projects that she writes about but I think this is an awesome book for anyone interested in homesteading.  It is a really great inspiration to take the plunge.

I can’t wait to read more of it.

3) “The Chicken Chick’s  Guide to Backyard Chickens”

by Kathy Shea Mormino

I have heard great things about this book. I have not read it myself but I would love to purchase it when I get closer to planning my chicken coop this spring.

I originally heard the author, Kathy Shea Mormino, speak on the “Living Homegrown” podcast that I frequently listen to and she was so knowledgeable about all things chickens that her book is on the top of my list of resources when it comes time to planning.

Kitchen Tools and Gadgets

4) Rapid Thaw Defrosting Tray

I want this now!  I am constantly forgetting to pull our meat for dinner out of the freezer.  While I would hope that the Homesteader in your life is more organized with their meals than I am, I am sure they forget once in a while.

Defrosting frozen meat is a necessity for every Homesteader so this tool will be perfect for them (or really any cook you know!)  This Defrosting Tray has gotten great reviews on Amazon.  This holiday, I plan to get one for several of our family members.

Getting a gift that will solve a problem for your loved ones is awesome, and forgetting to take out the ground beef and having to resort to frozen pizza for dinner can definitely be a problem.  It is also highly affordable.

5)  Lodge Cast Iron Skillet

I wrote a previous post on the cleaning and care of cast iron pans.  When I first started using them, I had to clean the rust and dust off of them.  They also needed to be reseasoned.

Since then, I use my Lodge Cast Iron Skillet several times a week.  I love it, and I swear it makes me a better cook!

They are actually very affordable, durable, and a great gift for any new cook.

6)  Kitchen Compost Pail

This compost pail would be an awesome gift for anyone interested in composting. 

A couple years ago, I began composting and my husband built me a compost bin made out of cinderblocks up in the woods on our property.

Needless to say, it is far walk from the house and not one I wanted to take on a daily basis.

I reused a coffee container as my kitchen compost bin but this pail would be awesome to have to keep under the sink.

Click the Image above to check out compost pail on the Burpee website

7)  Herb Scissors

These herb scissors look awesome!  I am not great at dicing herbs and these would save me so much time.

For the gardener who enjoys growing and using fresh herbs, these would be a perfect stocking stuffer!

Click the Image above to check out herb scissors on the Burpee website

Garden Tools

8)  Felco F-8 Classic Pruner

Every gardener needs a good pair of hand pruners.  A good hand pruner is a necessity.

I previously posted an article on choosing the best garden hand pruner for any job. The Felco F-8 Classic Pruner came out on top.

While the price tag is heftier than other garden hand pruners, the reviews show that this pair is well worth the price.

You do not want to purchase a cheap hand pruner. They can be dangerous and most will not last more than one season.

Invest in a good one for the gardener on your list and they will thank you for many seasons to come!

9)  Gardening Cart

This gardening cart would be such a thoughtful gift for anyone.  According to the description, it is easier to use than a wheelbarrow!

It would be so helpful to have this type of cart when doing gardening or yard work.  It looks durable and easy to use!

Click Image above to check out Gardening Cart on the Burpee website

10)  Gardening Hat

I really want to purchase a hat this season and this one is really cute.

It is unisex so it would work for anyone on your list.

This hat would protect them and let them look the part of expert gardener!

11) Burpee Gift Card

You can start planning your garden at any time of year! It is never to early to start.

For the person in your life who loves to garden, a Burpee Gift Card is the perfect gift.

Soon they will be busy planning which vegetable and fruit they will start from seed indoors and which ones they plant directly in the ground.

Even a seasoned gardener loves to try something new, and a gift card will give them the freedom to do so this spring!

Burpee has everything you need for seeds so it really is a one-stop shop. I have used it for our seeds in the past and they have been wonderful!

Click the image above to check out the gift card options on the Burpee website

Food Preservation Tools

12)  Herb/Flower Drying Rack

I would love how this rack would look hanging in my kitchen or pantry in preparation for making dried spices. 

It is compact but can accomodate a good number of herb bunches at one time. It is also a very affordable gift for anyone interested in preserving thier herbs or flowers.

Click the image above to check out the herb drying rack on the Burpee website

13) Easy Ferment Kit

I am not experienced in fermenting so I would definitely want to purchase a kit when I first start learning.

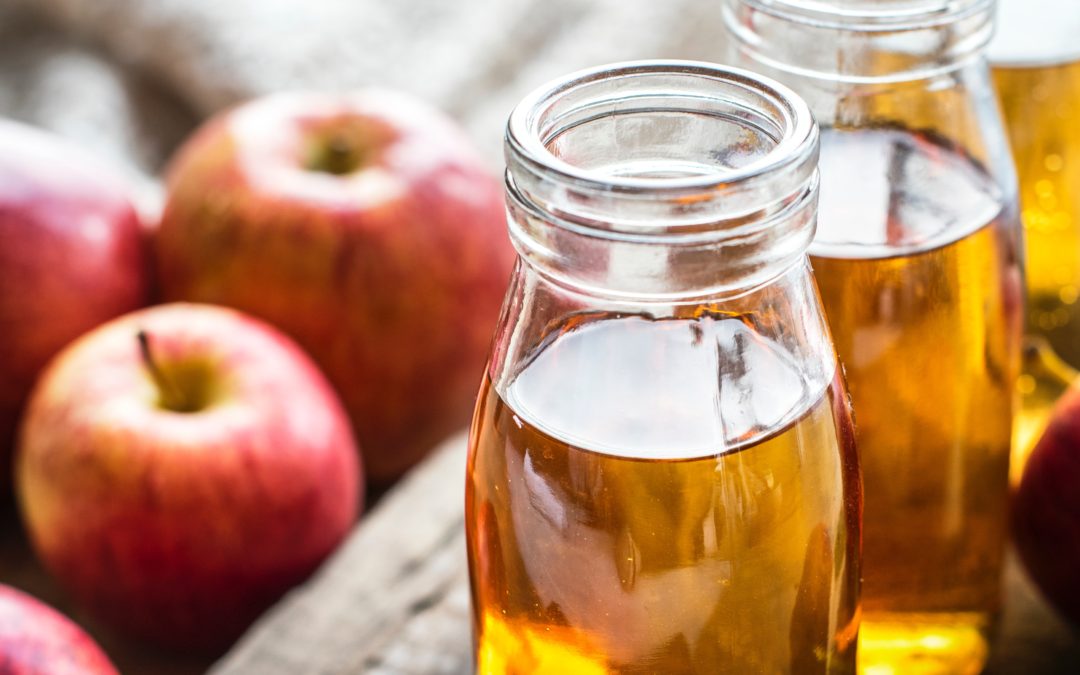
While I have made some vinegar without any special tools, I would love to purchase a kit and ferment some vegetables in the future.

This kit is the best rated one on Amazon and the reviews are really good.


We participate in the Amazon Associates Program. Please assume that all Amazon links are affiliate links. Affiliate links are links to third-party products and services. If you use those links and make a purchase, we will receive a small commission. Using these links will not cost you any extra money. An affiliate relationship does not change or influence the nature of the recommendation or opinion.
7 Easy Steps for Homemade Apple Cider Vinegar

7 Easy Steps for Homemade Apple Cider Vinegar

Making vinegar is not something that I have ever really thought about doing.  If you had asked me before how to make vinegar, I really wouldn’t have known where to start.  However, I have recently learned how to make it and it seemed so easy so I thought I would give it a shot!

This is the first time I am going to attempt to make it so we will see how it goes!

A little science lesson


Vinegar can be made in two ways.

1) The first way is done by taking an alcohol such as wine, beer, or cider and fermenting it with bacteria. The product of this reaction is vinegar.

2) The second way is done by making the alcohol with fruit scrapes first and then turning that alcohol into vinegar by fermenting it with a bacteria.

While I am using the first process this time, I definitely plan on making vinegar starting with fruit scraps at some point.  For my first attempt at making vinegar, I chose to use an old apple cider beer that has been sitting in my fridge for about 2 years.  Sounds like a great way to use something that I would normally throw away (and should have thrown away a long time ago) into something useful!

Once you have chosen your alcohol, you will need to have it undergo a process called fermenting.  In order to ferment it, you need a bacteria culture that will do the work.  This bacteria is often referred to as  scobys or symbiotic cultures of bacteria and yeast.  When the scoby is added,  it will work to eat the sugars in the alcohol. It then produces carbon dioxide and acetic acid. What you end up with as a  final product is a vinegar.

A scoby is also referred to as a mother.  It is called a mother because once you have grown a scoby, you will continue to use it as you make batch after batch of vinegar. The scoby becomes a mother that you use to produce more vinegar. I find this concept so interesting because as a mother grows, it becomes more and more active.  Apparently the older and more used a mother is, the better!

In the old times, an established mother of vinegar was considered a kitchen essential.  Women would pass down their vinegar mothers to their children and grandchildren and they would be treated as treasured heirlooms.  I love that idea! I am going to start my mother now and by the time my children are out of the house, they will have a vinegar mother of epic proportions to take with them. I am only half joking, however, I do think that it is a very sweet tradition and I wish it was still around today.

Let’s talk about this scoby thing.  It looks like a gross jellified alien floating in your bottle. If I didn’t know better I would think it was moldy and throw the whole bottle out.

There are really only a few materials that will be needed to make a batch of vinegar.

Materials:

1) Alcohol (We used apple cider ale, 2 years past expiration)

Red/White wine – Red/White wine vinegar

Beer – Malt vinegar

2)  Vinegar with mother (established scoby)  I purchased this at the grocery store

3) Mason jars

4) Paper towel or cheesecloth

5) pH strips

Step 1) Pour old alcohol into mason jar

Put some of the old alcohol into mason jar with a little bit of water.  I could not find a specific measurement for the amount of water to add so I added 2 tblspoons of water to a 12 oz beer.

I also testing the beer/water  with the pH strips to determine what our starting pH was. It was 3.0.

Step 2) Remove mother from store bought Vinegar

I bought the vinegar with mother from a local grocery store.  The vinegar bottle had a very small mouth and I was not able to remove the mother directly from the bottle.  I decided to pour the vinegar into another mason jar so that I could easily remove the mother.

We also took the pH of the vinegar to see what that was at. It was a 3.5

Step 3) Cover mason jar with paper towel or cheesecloth.

You want to cover the mason jar with either a paper towl or cheesecloth so that dirt and dust will not get into the vinegar, but oxygen can still get to the mixture.

Step 4) Place jar in pantry or somewhere out of direct sunlight.

I chose to put the jar on a shelf in our pantry.  It is dark but it is not hidden away in a place where I will forget.  You will be checking it every so often so you want it accessible.

Step 5) Let scoby do the work!

You will want to leave the jar in your dark spot for a period of time. It could be 1 month or it could be 3 months before it is ready. The only time you want to open the vinegar is to change out the paper towel when necessary.

Step 6) Test for pH periodically to see if it is ready.

How do you know when it is ready?  There are a few signs that the scoby is busy working.

– You should be seeing bubbles in the jar and the liquid should turn cloudy.

– It should smell like vinegar.

– A pH test should be at a 3.0  and no more than 4.0.

Step 7) Stabilize vinegar by boiling

Your next steps will depend on how you plan to use the vinegar.  Raw or active vinegar is unstable and will continue to ferment.  If you are planning to keep the vinegar raw, you should store it in the refrigerator so that it will keep the bacteria alive but will slow down the fermenting process.  If you are planning on giving the vinegar as gift or store in the pantry, you should stabilize (pasteurize) it so that the fermenting process is halted.  If you try to store unstable vinegar, it can continue to produce carbon dioxide which could burst the lid off of the bottle if not packaged properly.

In order to stabilize it, you should first separate out about a 1/2 cup of vinegar with the mother and put it in a glass jar with a clamp top. You want to make sure this is stored properly.

– Start with a stainless steel stock pot.  Do not use aluminum.

– Bring the vinegar to a temperature of 185 degrees

– Hold the vinegar at that temperature for 10 – 15 minutes.

– Turn off the heat and let it cool down.

– Transfer to the desired storage container.

It is recommended to avoid using any homemade vinegar if your canning process, especially if you are just learning and starting out. If your vinegar is too unstable, it can really cause problems if it is used in your food preservation.  Preserving food through the canning process can be tricky enough and adding another unstable element can be unpredicatable.

Our Next Steps

We are in the waiting stage with our vinegar.  I plan to monitor the vinegar pretty regularly by observing the jar and making sure that bubbles are forming.  In one month, I plan to pH test the vinegar and see where we are.  Stay tuned for an update and some great tips, gift idea, and recipes on all using that awesome homemade vinegar!

We participate in the Amazon Associates Program. Please assume that all Amazon links are affiliate links. Affiliate links are links to third-party products and services. If you use those links and make a purchase, we will receive a small commission. Using these links will not cost you any extra money. An affiliate relationship does not change or influence the nature of the recommendation or opinion.
How to Clean Your Cast Iron Pans and Start Using Them Today

How to Clean Your Cast Iron Pans and Start Using Them Today

I have never used cast iron skillets for cooking until just the other week.  I was cleaning out my kitchen cabinets and came across three cast iron pans that I had tucked away.  They looked disgusting which is why I never used them.  My husband has always talked about how his grandmother made the best scrapple, fried eggs, and sausage gravy in her cast iron.  I decided that I would see if it was possible to try to clean them up and start using them.

Before I go any further, let me tell you that chances are your old cast iron pans are totally savable, easy to use, and totally worth the little time and effort needed to get them back in working order.

The materials you will need:

1.Cast Iron Pan

2. Stainless steel scouring pad

3. Mild dish soap

4. Vegetable oil

Here are 7 easy steps to refurbish your cast iron pans!

1. Scrub any rust, dirt, or food from the pans using a scouring metal brush and mild dish soap

While there were certainly rust and dust present on the pans, they were not severe.  This method will work for most degrees of rust, the elbow grease needed will vary with the severity.

I used a stainless steel scouring pad and a sponge.  I used mild dish soap and after some scrubbing, the residue and rust were removed.

2. Rinse Pans Thoroughly

Rinse the pans to remove any and all remnants of rust or old food.  You also want to make sure that all of the soap is rinsed away.  If there is any soap left on the pan when you heat it, that soap will be cooked into the pan and it will come out next time you cook.  You do not want that to happen!

3. Dry Pans Thoroughly

Make sure that you dry the pans very thoroughly also. You do not want to leave any excess water.

4. Cover pans, including outside bottom and handle with vegetable oil


We chose to use vegetable oil for seasoning the pans.  Using a paper towel, soak up some vegetable oil onto the towel and coat the entire cast iron pan with the oil.  Do not forget to get the outside, bottom, and handle.

5. Place pans face down in the oven for 1 hour at 350 degrees

Heat the oven to 350 degrees F.  Place pans face down on the middle rack.  Put a baking sheet underneath them to catch any excess oil.  Let them cook for 1 hour.  It will smell like hot metal!

6. Let pans cool in oven.

These pans will be hot!  I recommend just leaving them in the oven until you need to use the oven.  You should plan to let them sit and cool in the oven for a few hours.

7. Start Using and Enjoy!

Just start using your pans next time you would saute something. Whip out your cast iron pan next time you make breakfast.  My husband was not exaggerating!  It is great for cooking up sausage, bacon, scrapple and fried eggs and that is an easy place to start.

Here are some tips for caring for and using your cast iron:

  • Use oil when cooking. It is the oiling, heating, and cooling process that builds up the “season” on a cast iron.  The more this process is done, the more “non-stick” your pan will be and the more flavorful the food cooked in it will taste.

  • To clean, scrub any food particles out of the cast iron, rinse, and wipe clean. If soap is needed, use it sparingly.  DO NOT let the pan soak in water and DO NOT put it in the dishwasher.

  • Store your cast iron dry.  If you are stacking pans for storage keep cardboard or paper plate between them.

We participate in the Amazon Associates Program. Please assume that all Amazon links are affiliate links. Affiliate links are links to third-party products and services. If you use those links and make a purchase, we will receive a small commission. Using these links will not cost you any extra money. An affiliate relationship does not change or influence the nature of the recommendation or opinion.