How to Properly Store Preserved Food

How to Properly Store Preserved Food

One of my favorite ways to boost your food supply is the start preserving your own food.  It can take a lot of time and effort but the satisfaction and security you will experience once you have the skills and knowledge and a stocked pantry are so worth it. Knowing how to properly store preserved food is the next step.

Once you have put forth the time and effort necessary for food preservation, it is important to make sure that your jars they are being stored properly and safely.

While preserving food using a method such as water bath or pressure canning, depending on the food, will allow the food to be shelf stable, you could ruin your seals, spoil your food, or damage your jars if not stored correctly.

Read on for all the information you need on how to store preserved food properly.
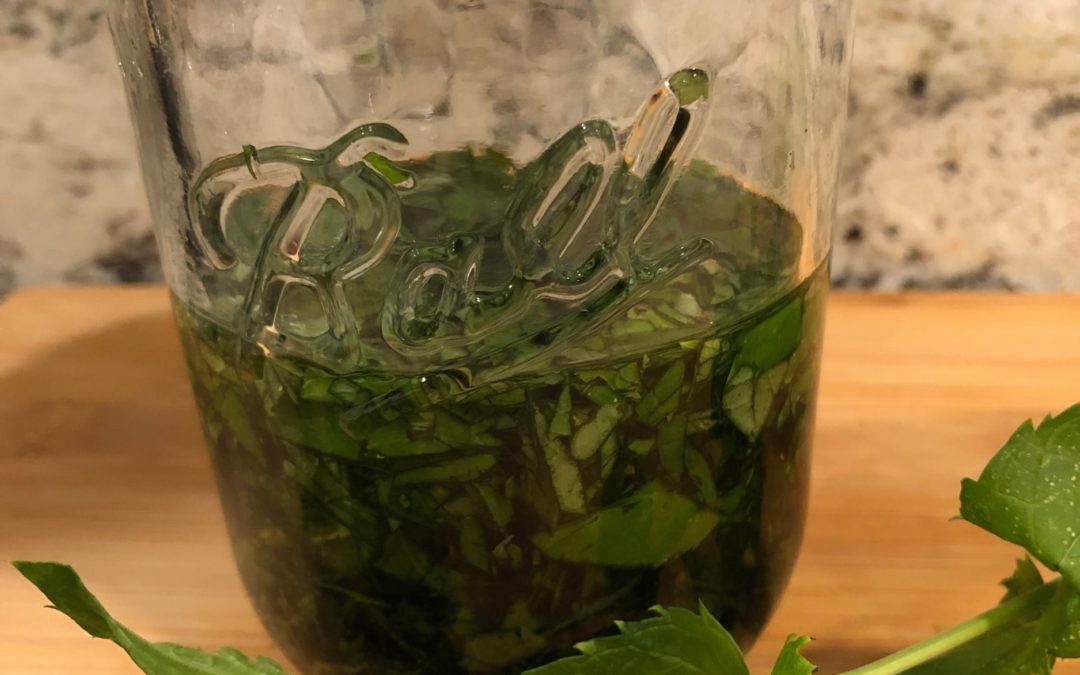
properly store preserved food

Should I remove the rings?

Once you have processed a batch of something using waterbath or pressure canning, and after you let the jars sit for several hours and enjoy the lovely sound of pinging.  The very first thing you want to do with your jars once they have cooled down, is to remove the rings and check the seals.

I always remove the rings for several reasons.

  1. I only have so many rings, so I don’t want already jarred food to be taking them up on the shelf.
  2. If you keep the rings on, you may not know if your seal breaks and you may have what is called a false seal.  A false seal is wheren the seal will stick but it won’t actually be airtight or safe.

I definitely recommend removing them before putting away for storage.  You may find varying opinions on this, but from the research I have done, removing rings is necessary to store preserved food properly.

Should I stack my jars?

In addition to removing rings, you also want to avoid stacking your jars. Do not put them on top of one another to store for long periods of time. I know that can make storage very difficult since it usually leads to wasted space between shelves. It has taken me a few years to figure out the best space to store my jars and my canning supplies and honestly it seems to change every year depending on how much I preserve.

Stop wasting your fruits and vegetables!

Grab the Ulimate Fruit and Vegetable Seasonal Guide for FREE to start properly storing your produce so you can stop throwing it away and start enjoying it longer.

Ideal Storage Environment

There are a couple of important factors to consider when choosing a safe place to store your jars, Make sure you are choosing somewhere that is out of direct sunlight and a place that is between 50-70 degrees F.  

Direct sun and high temperatures will cause your contents to spoil.

If your temperatures are too low, you could run the risk of freezing and your jars may break or your the texture of your contents could be altered.

You also want to make sure that the location is a relatively dry location.   If your storage location has too much moisture, it could cause your metal lids to rust. 

dried pasta

Storage Solutions

I have changed the location of my jar storage several times, it really depends on how much room I have and how much I have preserved at that time.

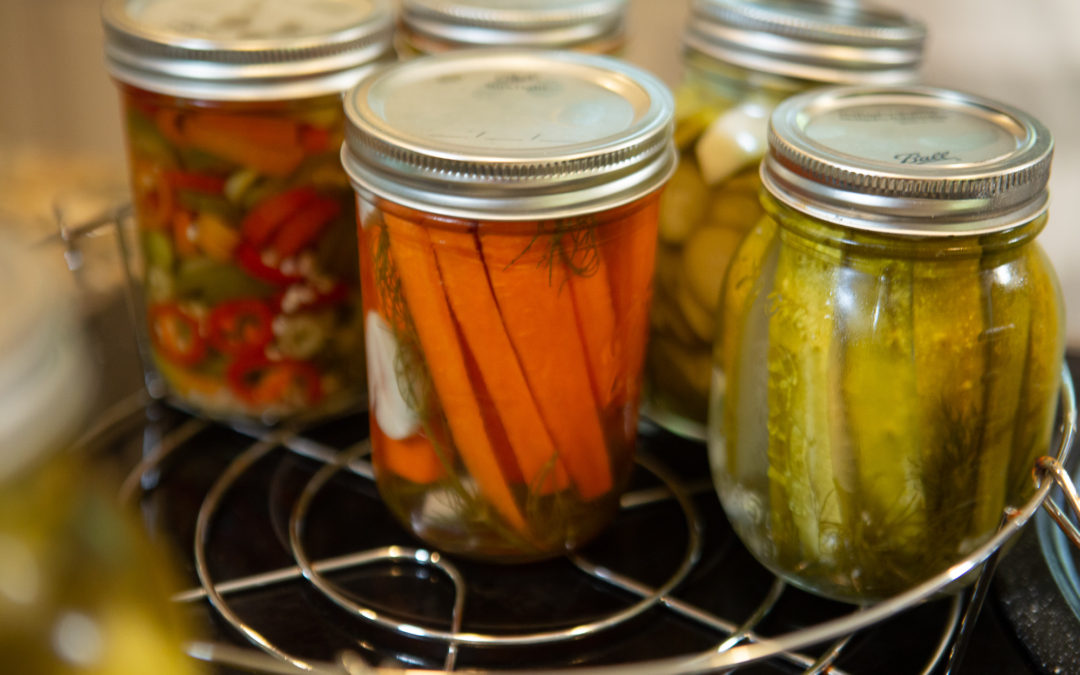
Some of my prettier jars,  I love to store in a built-in that I have in my kitchen and  show it off as a seasonal decor.  This past year I made some pickeled zuchinni which were so pretty.  The vibrant green and yellow colors with the spices was the perfect jar to keep up front in my built-in.

Anything that isn’t so pretty, like the really ugly sliced peaches I stored a few years ago (perfectly edible though) I sent downstairs to the storage shelves.

I would love to purchase a jelly cabinet, but my kitchen has no room for one. The benefits of a jelly cabinet are that the shelved are make specifically for mason jars so there is very little wasted space, like you may find if you are using a larger shelving system.

One of the biggest hesitations that I hear from people about home food preservation is that they don’t have the room for all of the storage needed.  You can always find room, even if it isn’t th most convenient. I have seen people store their jars under their beds for example or use bedroom closets to keep large amounts of canned food.

You can definitely make it work! 

For more information, listen to the podcast epsiode: Storage Solutions for your Preserved Food

Stop wasting your fruits and vegetables!

Grab the Ulimate Fruit and Vegetable Seasonal Guide for FREE to start properly storing your produce so you can stop throwing it away and start enjoying it longer.

We participate in the Amazon Associates Program. Please assume that all Amazon links are affiliate links. Affiliate links are links to third-party products and services. If you use those links and make a purchase, we will receive a small commission. Using these links will not cost you any extra money. An affiliate relationship does not change or influence the nature of the recommendation or opinion.
How to Start your own Vegetable Garden

How to Start your own Vegetable Garden

Have been wanting to start growing your own groceries for awhile now, but don’t know where to start?

Starting your first garden may seem overwhelming but with a few easy steps and a plan, you can set yourself up for a bountiful garden with fresh vegetables all season long!

While starting a vegetable garden is a lot easier than you may think, there are a few things you should plan and consider before breaking ground.  Considering and planning for these few points will get you off to a great start and help you see a bountiful harvest in no time.

Benefits of starting your own vegetable garden

There are many reasons as to why having a garden is beneficial to your entire family.  The benefits range from being a good physical activity to providing some wonderful tactile therapy for depression and anxiety.

Getting your whole family involved in the gardening process is a wonderful way to introduce more family time.  There is a duty and responsibility for every member of the family.  Everyone can get involved and contribute to feeding the family.

Here are a few of them:

  • Have access to fresh food at your fingertips.
  • Great activity for the whole family. There is a job for everyone!
  • Teaches kids many different skills and values such as patience, hard work, and problem solving.
  • Encourages food awareness and appreciation for where food comes from and how it is grown.
  • Learning food skills ensures that they will never go hungry.
  • Wonderful outdoor activity.
  • Allows them to become more self-sufficient and join the self-reliance movement.


Vegetable Garden Basics

Starting a vegetable garden can seem very overwhelming because there are many decisions that need to be made before you can even break ground!  Some of these decisions seem like they could make or break your success.  Good news is, that if you make a few important decisions very carefully and plan diligently before starting, a bountiful garden is much more achievable!

A few important decisions to make:

  • When to plant
  • What to plant
  • Where to plant
  • Seeds or Starters
  • Tools and Equipment

Taking some extra time to consider these points will make all the difference. I walk you through all of it in this post.

You can also grab my FREE Vegetable Garden Guide to download to have this information easily available, as well as, some really handy plotting graphs, and observation sheets for taking notes throughout the season.

GRAB THE FREE GUIDE BELOW:

Dreaming of Having a Vegetable Garden this year?

Grab the Your Dream Vegetable Garden Plan for FREE to get you started today!  Start growing your groceries this year!

When do you plant your vegetable garden?

One of the most common questions that I get about starting a vegetable garden is: When can I put the plants in the ground?

Knowing your growing dates is very important in order to avoid planting too early and risking a frost that may kill your vegetables or planting too late which could result in late harvest or none at all.

One of the first things you want to do when planning your first vegetable garden is to get familiar with your growing location.

You want to determine the following:

  • Growing zone, also referred to as your harvesting zone
  • Last freeze date
  • First freeze date

I like to use the Old Farmer’s Almanac for researching this information.  Just input your zip code and you will get a lot of useful information about growing in your area.

The United States is broken up into growing zones which are based on average climate.  Knowing your growing zone is great when troubleshooting problems, determining what plants will thrive in your specific area, identifying plants or pests, and determining a successful planting and growing timeline.

Your freeze dates are also very important to research.  Knowing your first and last freeze dates are necessary for determining a successful timeline.  Your first freeze date is the average date in the fall that you may experience freezing temperatures overnight that could kill any frost intolerant plants.  It is important to do any harvesting of the plant before this dates.  Working back from this date will help you determine the last date for planting a specific vegetable by considering its growing timeframe.

Your last freeze date is the average date in the spring that you can expect your last winter freeze.  You will want to be careful planting any frost intolerant vegetables prior to this date and the freezing temperatures may kill them off.

I typically take a look at my estimated last freeze date and plan to get may vegetables in the ground about a week later.  Of course, I continue to monitor the overnight temperatures for about a week out before I actually break ground and plant them. For us, our last freeze date is mid to late April, so typically a rule of thumb for my area is to get your garden in around Mother’s Day.

planning

What to grow

Another decision you must make before putting anything in the ground is what you are going to plant.  It is so easy to go overboard and be temptedto grow every plant imaginable but that is is unrealistic.   

We made this mistake our first year gardening,  I bought just about every plant I found at the store and threw them in my garden.  Needless to say, many of them were unsuccessful and we wasted a lot of harvest.

To determing what plants you should spend the time, space, and money on growing, you should as yourself the following questions:

  • What vegetables do I buy the most?
  • What vegetables do I but the least?
  • What vegetables are the most expensive in the store?
  • What vegetables are hard to find?

Answering these questions will help you narrow down your list of vegetables to the ones you will truely benefit from and enjoy.  It will also help you avoid tempetation from buying all of the seeds and/or plants at the nursery when planning your garden.

Our first year, we planted radishes and eggplant.  Which we rarely eat.  I just don’t have the recipes to support them in abundance.  Since then, we don’t grow them in order to save space for something else.


Dreaming of Having a Vegetable Garden this year?

Grab the Your Dream Vegetable Garden Plan for FREE to get you started today!  Start growing your groceries this year!

Where to grow

After planning when and what you are going to plant this year, it is important to take a look at your availabel space and determing where you are going to plant.

There are many options for where to plant your garden.  You can utilize an in-ground garden plot, raised beds, containers, or existing landscapes for planting your vegetables.  All of these options have benefits that may depend on your available area.

Raised beds and a garden plot are great if you have a larger property but for small spaces and first year gardens, I definitely recommend starting with containers.

Containers will offer you the most flexibility without deciding on a permanent location.  Using containers for the first year will allow you to observe your area, test some things out, and provide more information for you to make a more permanent decision the following year.

Containers are also great for small spaces, patios, or even balconies.  They can be moved around if necessary and the posibilities of small space options utilizing containers are endless.

Grab my FREE Planning guide for a step by step process for choosing the ideal location for your garden.

Grab that here: FREE Garden Planning Guide

Should you start your plants from seed or buy plants?

For anyone starting your first garden, I definitely recommend grabbing some plants from the nursery and trying that for a few years before taking on starting your plants from seed.

Starting your plants from seeds yourself is not difficult but it is a step in the process that does require quite a lot of resources such as lighting equipment, heaters, plant food, and different containers.  If you really want to ensure a successful garden, I would let them do that beginning work for you so that you can better practice harvesting the food.  After a few years, I definitely recomend trying to start from seed yourself as it is a great money saver.

I typically start from seed several months before I put the plants in the ground and figure that if some of them do not survive, I can always go to the store buy the plants I need to replace them.

seedlings

Dreaming of Having a Vegetable Garden this year?

Grab the Your Dream Vegetable Garden Plan for FREE to get you started today!  Start growing your groceries this year!

Choosing the right soil

Wether you are starting seeds, filling container or raised beds, or adding soil to a garden plot, it is important to use the correct soil.

The most important mistake you can make when starting a garden, in my opinion, is to use the wrong soil.  There are so many types of soil to choose from, that choosing the correct one for your garden project can be confusing.  Check out my post on garden soil here: How to Choose the Right Garden Soil for any Project

Tool and Equipment you need to get started

It is so easy to walk into a garden center and want to buy all of the cool tools and supplies that they have available but in reality, you really only absolutley need a few tools. 

Some of my must haves for gardening are:

  • Garden towel and shovel
  • Garden rake
  • Garden pruners
  • Hose with spray attachment
  • Gardening gloves
  • Bucket

These are the absolute essentials and you can do most gardening set up and maintenance with these.  For a more extensive list of tools and equipment that may be useful, grab my FREE garden guide.


pretty vegetables

Good luck with your garden this year! I hope you have a blessed harvest and enjoy all of the benefits that gardening can bring you and your family!

We participate in the Amazon Associates Program. Please assume that all Amazon links are affiliate links. Affiliate links are links to third-party products and services. If you use those links and make a purchase, we will receive a small commission. Using these links will not cost you any extra money. An affiliate relationship does not change or influence the nature of the recommendation or opinion.
The Best Homesteading and Gardening Podcasts for Self-Sufficiency

The Best Homesteading and Gardening Podcasts for Self-Sufficiency

One of the first steps to starting a homestead is conducting a LOT of research.  When we really started entertaining the idea of becoming more self-sufficient, I read many articles, watched lots of  videos, and listened to many podcasts.  What I love about homesteading podcasts are that they are typically FREE and that I can utilize dead time, like doing dishes, folding laundry or commuting, by listening to them.  Podcasts allow me to mutiltask and that is super important.

One of the major challenges in homesteading is just having the confidence to take on such a large, lifestyle-changing project.  What I love about homesteading podcasts is that you can really get a sense for the challenges and successes of those who have been doing it for a long time.  Many of the podcasts that I listen to primarily focus on the host’s challenges and successes of their homestead.  Some also showcase guests who can further provide insight into the reality of homesteading.  This insight is so valuable as it provides the listener with confidence and encouragement that they can also achieve such a goal.

This list is comprised of the best Homesteading and Gardening podcasts that I have found.  I have listened to several episodes of each one of them and have chosen the best ones in my opinion to share with you!

Here is a list of Homesteading/Gardening podcasts that could really help you out as you start on your homesteading journey.

Homesteading Podcasts

Pioneering Today Podcast with Melissa K. Norris

The Pioneering Today Podcast with Melissa K. Norris was also one that I started listening to a while ago when I really started to plan and research starting a homestead.  I love how she covers a variety of topics with her episodes.  I feel as though I come away from each one with many actionable tips and tricks. 

One of my favorite aspects of the Pioneering Today Podcast is the amount of episodes dedicated to homestead kitchen topics. From baking ingredient substitutions, to meal planning, to how to build your homestead pantry, a behind the scenes look into a homesteader’s kitchen is not a perspective that I have found in any other podcast.  I also love how you really get the sense of the pride and honor Melissa has in sharing her family’s recipes and traditions.

Here are some of my favorite episodes:

Episode 155: Batch & Freezer Cooking – 12 Time Saving Tips for Homemade Meals

Episode 131: Homesteading for Beginners – 9 Transition Tips from City Life

Episode 119: How to make soap at home – Beginners Guide to Soap Making

Old-Fashioned On Purpose

I have been a fan and follower of Jill Winger ever since I got the first urge to start a garden.  So when she started a podcast, I was all about it!  As with all of her content, her podcast, Old-Fashioned On Purpose, is well done, informative, relatable, and inspiring.

She really has a way of making all of the things homesteading and self-sufficiency seem attainable and doable regardless of who you are!  So much good content, she really is your one-stop shop for homesteading and gardening.  One of my favorite aspects is learning how she weathers the harsh winters of Wyoming and how she makes the most of her garden regardless of her short growing season.

Dreaming of Having a Vegetable Garden this year?

Grab the Your Dream Vegetable Garden Plan for FREE to get you started today!  Start growing your groceries this year!

Rural Women Inspired with Mindy Young

One of the things that I love about homesteaders producing their own podcasts is that after listening to them for a while, you really get a feeling that you are along for the ride with them on their homesteading journey.  That is how I feel when I listen to Rural Women Inspired with Mindy Young.  She is an impressive homesteader.  When she talks about her market garden, I swoon!  Who wouldn’t love a market garden?

She has been doing the homesteading thing her whole life and she offers some really awesome tips and insights for inspiring homesteaders.  She just seems so sweet and friendly!  I also love real stories that she tells because it is always great to hear how even seasoned homesteaders struggle with aspects of the lifestyle and it really helps me relax and slow down a little!  The topics covered are great for beginners, they are not so advanced that they do not seem attainable and doable which I think is so important for podcasters and bloggers who are targeting new homesteaders.  Homesteading can be intimidating!

Farmish Kind Of Life with Amy Dingman

Amy Dingman is the host of the Farmish Kind of Life Podcast.  Amy podcasts about her Minnetosa homestead and gives the listeners an honest and transparent view of homesteading.  This candid look into an established homestead is so helpful for any new homesteader.  What I really like is that while her episodes are concise, usually less than 30 minutes, she manages to pack a lot of information into each episode without too much filer.  After listening to her for a while, I really value her advice.  She finds a nice balance between illustrating the tough reality of homesteading while also maintaining a funny and encouraging tone.  Some unique topics she has covered in the past include; weather prediction tips, rendering lard, and hatching chicks.

Episode 47: Old Fashioned Weather Prediction Tips

Episode 41: Two Ways to Render Lard… And What to Use it For

Episode 43: Hatching Chicks? Incubator Vs. Broody Hen

Dreaming of Having a Vegetable Garden this year?

Grab the Your Dream Vegetable Garden Plan for FREE to get you started today!  Start growing your groceries this year!

Mother Earth News and Friends Podcast

Professional production quality and engaging hosts and guests are only some of the strengths of the Mother Earth News and Friends Podcast.  This is a really awesome podcast.  I love how they tend to find unique homesteading, gardening, and small farm topics that are not commonly covered by other podcasts.  One of my favorite episodes is focused on grant opportunity for small farms and homesteads.  I am willing to bet that there are SO many people who have never even considered this option.

I also love how they really create the feel of a homesteading community, one in which is not just open to experts, but welcomes anyone interested in learning more about self-sufficiency!

Small Farm Nation with Tim Young

While the Small Farm Nation Podcast with Tim Young primarily focuses on the business aspects of managing a small farm, Tim provides so much valuable information that serious homesteaders will find useful and exciting.  Even though I do not have a farm business nor do I ever really plan to have one, I find his tips on marketing your farm, leasing your land, and product pricing so interesting that it makes me want to start a farm business!  I highly recommend listening to his podcast if you even have the inkling of wanting to sell your homestead products.  Not only is the podcast super informative, I haven’t found one that gets so deep in the weeds about farm business, but it is also very professionally done and easy to listen to. Highly recommend!


Gardening Podcasts

Epic Gardening

The Epic Gardening Podcast with Kevin has quickly become one of my favorites.  The Epic Gardening podcast consists of a pretty large library of awesome short episodes on very focused topics.  These are usually on topics that I didn’t know that I needed or wanted to know more about.

Kevin drops a new episode everyday,  listening to the newest episode has become a daily ritual for me.  Some examples of topics are: the science of poison ivy, seed starting tips, perennial edibles, grafting and how to grow plants in the bathroom, just to name a few.  As a guest based podcast, the guests are always knowledgeable.  I am enjoying catching up on past episodes. Check it out!

The Daily Gardener with Jennifer Ebeling

If you are looking for something that blends history and intellect with your love of nature and gardening, you cannot miss The Daily Gardener with Jennifer Ebeling.  This podcast is showcases daily episodes releasing every week day, Monday – Friday.  Jennifer offers gardening thoughts and breveties that are sure to help educate and inspire her listeners.  I am also in love with the historical and modern looks at how gardening has evolved and shapes our lives. It really is such a unique focus of this podcast. If you are a garden lover you can’t miss this one!

While you are getting hooked on The Daily Gardner Podcast, don’t miss out on Jennifer’s previous podcast: The Still Growing Podcast.  Even though this podcast is not still in production, there is still a huge library of episodes with really valuable information available.

The Still Growing Podcast fouses on helping listeners to make the most out of their gardens, as well as, to live a more natural life.  This show covers flower, vegetable, and herb gardening in great detail.  It is a very organized and well produced show.  Most episodes showcase an interview with an expert guest on a particular topic.

Gardenerd Tip of the Week

The Gardenerd Tip of the Week podcast is another well done podcast that covers a wide variety of gardening topics.  This podcast showcases a different garden expert each week. They generally discuss a topic and then the expert gives the audience a gardening tip of the week.  The upbeat and lively conversations between the host and her guests are always very indepth and useful.  Some of my favorite topics covered in this podcast are cooking from the garden, foraging, and growing squash.


Dreaming of Having a Vegetable Garden this year?

Grab the Your Dream Vegetable Garden Plan for FREE to get you started today!  Start growing your groceries this year!

Tending Seeds: Adventures in Farming, Gardening, and Herbalism

Tending Seeds is a podcast that I have been listening to and really love.  Her main focus is herbalism but she also talks about other topics like flower gardening.  I think it is awesome to start listening to a podcast at its very beginning.  I definitely feel like I am along for the ride with her.  Her episodes are really well done and fun to listen to.  I recommend checking it out, it will be awesome to follow the progress of her gardening journey!

The Joe Gardner Show with Joe Lamp’l

The Joe Gardener Show with Joe Lamp’l  is a very well done podcast.  It is very focused on the ins and outs of vegetable gardening.  There is not much straying from the primary topic which is really great because Joe goes into so much detail in his episodes that you can’t help but find real actionable tips and tricks in every one.

As the host of Fresh from the Garden on the DIY Network and Growing and Greener World on PBS, Joe has ample experience in broadcasting.  He is so easy to listen to, sometimes I just tune in to listen for a few minutes and end up listening to a a whole show because his show is so immersive.  He is the ultimate expert in organic gardening and you really can’t miss his show if you are looking for guidance in the garden.

Sustainable World Radio

Sustainable World Radio with Jill Cloutier is much more than just another gardening or homesteading podcast.  This podcast focuses on the topics of ecology and permaculture.  One aspect that I love about this podcast is that the topics often focus on environment projects from around the world.  Jill does a great job spreading positive awareness on taking care of the earth through permaculture and provides the audience with some great ideas on how to live a greener life.

My favorite episode so far is a recent one focusing on growing Paw Paws.  I am sad to say that I have never heard of Paw Paws before but after listening to this episode, it made me want to just run out and plant one in my garden.  This is definitely a project that will be added to my list.

Dreaming of Having a Vegetable Garden this year?

Grab the Your Dream Vegetable Garden Plan for FREE to get you started today!  Start growing your groceries this year!

Archived Podcasts not currently producing content but have an awesome library of episodes

Living Homegrown Podcast with Theresa Loe

The Living Homegrown Podcast with Theresa Lowe is the first homesteading podcast that I started routinely listening to.  Theresa has an impressive background as a canning and food preservation expert and focuses her podcast on small space homesteading.  She delivers her podcast with such a welcoming and supportive tone that I always finish her episodes with a much higher sense of confidence and drive to pursue new projects and challenges.

She also features a wide range of guests on the podcast. I have learned a lot about from other’s experiences. While she is not currently uploading podcasts and the last upload was in 2019, there is still a huge collection of super helpful episodes.  Here are some of my favorite episodes:

Episode 142: Farming on 5 Acres or Less

Episode 166: Backyard Chicken Keeping Hacks

Episode 120: How to make Natural Household Cleaners

The Modern Homesteading Podcast with Harold Thornbro

The Modern Homesteading Podcast with Harold Thornbro is an all inclusive homesteading podcast which covers everything you need to help you start your homestead.  He focuses of animal husbandry, food preservation, gardening, and other many other self-sufficient skills.  His show is primarily guest based, featuring a wide range of homesteading experts.  I also love hearing about his family’s journey on thier homestead.  Most of his shows are right around a half hour, making it so easy to put on in the car while you are doing errands or driving to work.  This is a must have in your weekly lineup if you are looking to really immerse yourself if the homesteading lifestyle.  While the episodes are not currently being produced, two of my favorite episodes are:

Episode 99: What to Do First to Turn A New Home Into a Homestead

Episode 114: Family Homesteading with Guest Teri Page

Homesteady Podcast

The Homesteady Podcast is such a unique and interesting homesteading podcast that I just had to include it!  Even though new episodes are not being produced right now, I love catching up to all of thier older episodes.  Often times podcasters, bloggers, and writers portray homesteading as a picture perfect endeavor.  The host, Aust makes a point to show homesteading from all angles, the good and the ugly.  Not to mention, his show is really funny and honest.  While he sometimes gets off on tangents about a topic that especially excites him, it is always entertaining, refreshing, and authentic.

His series of episodes on homestead side hustles was extremely insightful and helpful.  As a new homesteader, I found his realistic and honest approach to homesteading very encouraging; as it makes homesteading seem much more attainable when you remove the “magazine cover” feeling.  Check it out!

What is your favorite homesteading or gardening podcast?

Are there any great podcasts that are missing from this list?

Dreaming of Having a Vegetable Garden this year?

Grab the Your Dream Vegetable Garden Plan for FREE to get you started today!  Start growing your groceries this year!

We participate in the Amazon Associates Program. Please assume that all Amazon links are affiliate links. Affiliate links are links to third-party products and services. If you use those links and make a purchase, we will receive a small commission. Using these links will not cost you any extra money. An affiliate relationship does not change or influence the nature of the recommendation or opinion.
How to Choose the Right Garden Soil for any Project

How to Choose the Right Garden Soil for any Project

If there was one thing that I recommend to a beginner gardeners it would be to make sure you choose the right garden soil for your project.

Choosing the wrong type of soil can be a huge and costly mistake and deterimental to the survival of your plants.

The decision of which type of soil to use for your current project may seem overwheming.  Step into a garden center and you will find many different types of soil, soil amendments, and plant food that choosing the right one may seem daunting.

Here you will find a breakdown of the different types of garden soil and how you can ensure you choose the right garden soil for your plants.

mint extract pin

Garden Soil Basics

Some soils are formulated to provide the most ideal conditions for a specific type of plant.  Whether you are starting seeds, planning in a garden bed, potting indoor plants, or creating an in-ground garden plot, the type of soil you choose could make or break you success.

There are several different types of soil such as; native soil, organic soil, synthetic soil, potting soil, seed starter, compost, etc.  Knowing which one is the best for your project could be the difference in having thriving, fruitful plants, or having an unsuccessful garden.

Read on for a simple breakdown for the different types of soils you may see and when and how you should use them.

Dreaming of Having a Vegetable Garden this year?

Grab the Your Dream Vegetable Garden Plan for FREE to get you started today!  Start growing your groceries this year!

Native Soil

Native soil is quite simply, the natural soil from your backyard or landscape.  This is what you may be using if you are planting directly in the ground or in a garden plot.

One thing you DO NOT want to do is take native soil from outside and try to use it for indoor plants.  Native soil can house and harbor insect eggs which will hatch and release pests once it come indoors and reaches a warmer temperature.  Make sure you are only using potting soil for indoor plants.

Before planting in your native soil, it will be important to determine the type and quality of your soil so that you can decide if additional nutrients need to be added, which can be done through testing.

native soil

Types of Native Soil

hauThere are many aspects to your native soil which will greatly determine the success of your garden.  First, you will want to determine wether your soil is sandy, clay, silty, or loamy.  Some of these  consistencies are better than others and if it is not conducive to a healthy garden, you may need to build it out with store bought soil and amendments.

To find out what kind of soil consistency you have, you can conduct what is called the “squeeze test”.

To conduct a squeeze test, first pick up a handful of dirt (make sure the dirt isn’t soaking wet) and rub it between your ungloved fingers.

The consistency and ability to hold its shape will determine which category it is in:

  • Clay – slippery and maintains a ball shape
  • Sand – gritty and crumbly, dry
  • Loam – crumbly but maintains a loose ball.
  • Silty – light and powdery and does not hold shape.

It is so interesting because I actually have multiple types of soil in my yard.  My front garden plot has very wet soil, which definitely consists of heavy clay.  Another area has beautiful loamy soil which has been wonderful for many types of plants.  A few other areas are sandy soil, which usually needs some amendments.

A breakdown of the benefits and negative aspects of each type are as follows:

  • Sandy soil – Water and nutrients drain easily but the soil is less fertile.  Easy to dig but will dry out easy.  Good for root vegetables but not great for vegetables that need more nutrients.
  • Clay soil – Heavy soil that doesn’t drain water easily.  Plants can get waterlogged or root rot since there is no drainage.  You may want to consider raised beds for better drainage if you are looking to grow root vegetables.  Brassicas will grow well in clay soil.
  • Silty soil – Soft and powdery, finer than sandy soil.  Shallow root vegetables such as beets, onions, herbs, are a great option.
  • Loamy soil – The best soil to have!  Loamy soil is somewhat of a mixture of the other types.  Holds moisture well, but also drains well.  Loamy soil will contain and retain nutrients.

Getting your soil tested

For a more serious gardener, knowing what type of soil you have is only the beginning.  The best way to really gauge the quality of your garden soil and how successful it will be in growing your chosen vegetables is to conduct a soil test.  A soil test will tell you what nutrients are missing or what nutrients are in excess.  Having this information will allow you to determine any additives, fertilizer, or amendments that may need necessary.

Two easy ways to conduct a soil sample are to purchase an at-home kit or to collect samples and send them to a local soil testing laboratory.

An at-home soil testing kit will be less complicated but it may also be less accurate and comprehensive.  At-home kits will give you information on your soil’s pH and levels of nitrogen, phosphorus, and potash.  These tests can be purchased at any garden supply center.

An at-home soil test is a great option for your yearly soil upkeep, but it is important to at least conduct one laboratory level test when first starting.  This will give you a really great idea of what you are working with.

I was able to do a soil test through a local university.  Check out the universities and colleges in your area and see if they offer a soil testing program.  You can also check out your state’s extension agriculture office to see if they have any programs in your area.

soil

Seed Starting Soil

If you have decided to start your own plants from seeds indoors you will want to make sure that you are using a seed starter.

Seed starting mixtures are specifically desifned to be extremely light weight.  The purpose of a seed starting mix is to allow the seed to sprout and reach the surface of soil.  If the soil is too heavy or dense, the delicate seedling will not be able to push it’s way to the top.

In addition to having a light and airy texture, a seed starting mix also has nutrients and food that allow the seed to germinate.

Once a seedling has emerged from the surface, and has developed leaves, it will be transplanted to a larger pot with potting soil.

seed starting soil

Dreaming of Having a Vegetable Garden this year?

Grab the Your Dream Vegetable Garden Guide for FREE to get you started today!  Start growing your groceries this year!

Gardening Soil vs Potting Mix

One of the biggest questions I get about soil is: “What is the difference between gardening soil and potting mix?”.

Garden soil is typically top soil, or natural soil mixed with amendments that make it suitable for the average outdoor plant.  You may see bags of these advertised at a garden center as flower garden soil or vegetable garden soil.

Garden soil is ideal if you are filling raised beds or adding soil back into your in-ground garden beds.  You do not want to use garden soil for indoor plants as there may be insect eggs that will hatch once it is inside.

Potting mix is typically a mix of ingredients that are not from natural soil.  Instead it uses a mixture of peat moss, vermiculite, perlite, bark, among other things.  The purpose of these ingredients is to allow for good drainage which makes potting soil the best options for containers and indoor plants.

Some potting mixes may contain synthetic materials so if you are trying to keep your plants and garden organic, you will want to double check the formula that you are purchasing.  In addition, potting mix can be more expensive than other soils so you will want to do a cost assessment if you are filling a lot of containers or pots.

garden pots

Top Soil

Top soil is the top layer of soil.  If you are trying to build out your garden and need to add structure, you will want to add top soil.  If you are purchasing it in bulk, you can usually get screened or unscreened.  Screened topsoil has been sifted to remove rocks and other debris and typically has an even consistency.

Top soil does not have additional nutrients or amendments as gardening soil does.  Top soil is your typical material for landscaping and can be used as fill dirt.

If you are planning on growing in the purchased top soil, you will most likely need to add nutrients to allow for a better garden medium.  Gardening soil is basically top soil with the nutrients and amendments already added.

garden soil shovel

Compost

Compost is not a stand alone planting medium.  It is a material that is added to provide nutrients, food, and minerals back into the chosen soil.

Compost is a natural mixture made typically made of waste that decomposes to create a nutrient rich material that is very beneficial to plants.  Compost provides structure to the soil, as well as, allows for better drainage.  Compost is made of organic materials such as leaves, tree needles, fruit and vegetable waste, and garden waste (as long as it does not have any disease).

compost

While choosing the right garden soil may seem complicated, as you can see there are circumstances where one soil will be superior to the others.

Choosing the right garden soil for you specific garden project is one of the most important decisions you can make and choosing incorrectly could hinder your ability to grow a beautiful and abundant garden.

If you are planning a garden this year and are not sure where to start, don’t miss our FREE Your Dream Vegetable Garden Guide.  This guide will get you started with all of the beginning steps to creating a beautiful, bountiful garden.  Get yours here: Your Dream Vegetable Garden Guide

Dreaming of Having a Vegetable Garden this year?

Grab the Your Dream Vegetable Garden Guide for FREE to get you started today!  Start growing your groceries this year!

We participate in the Amazon Associates Program. Please assume that all Amazon links are affiliate links. Affiliate links are links to third-party products and services. If you use those links and make a purchase, we will receive a small commission. Using these links will not cost you any extra money. An affiliate relationship does not change or influence the nature of the recommendation or opinion.
Freezing Fresh Herbs

Freezing Fresh Herbs

Growing herbs is an easy way to get started with gardening and is often one of the easiest types of plants to grow.  Herbs can grow fast and if you are not using them frequently, they may go to waste. Freezing frozen herbs is a quick and easy preservation method.

There are many ways to preserve herbs so that you can enjoy fresh herb flavors all year round. Drying herbs is not the only method for preservation. One method that is quick and easy and does not require a ton of extra tools or equipment is freezing.  Freezing herbs is essentially making herb ice cubes for use in cooking later in the year.


mint extract pin

Types of Herbs to Freeze

There are many different kinds of herbs that you can preserve with the freezing method, as well as several different freezing methods that can be utilized.  The delicacy of the herb’s leaves can cause some herbs to freeze well in water while others freeze better with flash freezing.

Some of these herbs are:

  • Basil
  • Lemongrass
  • Mint
  • Oregano
  • Sage
  • Dill
  • Chives
  • Thyme
  • Tarragon

Your 1st Step to a Simple Living Lifestyle!

A great place to start with Simple Living is to start making your own cleaning and personal products!

With this FREE eBook, you can easily get started with over 10 quick but effective recipes that use ingredients you already have in your house!

Flash Freezing Method

The flash freezing method is so easy and can be applied to so many fruits and vegetables.  I use this method when I am freezing bananas and strawberries that are past thier prime for use in smoothies.

I also use this method for vegetables, like tomatoes and peppers that have ripened but I do not have enough to make an actual batch of sauce or salsa.

Flash freezing is simply just laying the fuit, vegetables, or herb leaves out flat on a cookie sheet and popping them right in the freezer for a few hours. Once frozen you can relocate them to a freezer bag for long term storage.

The flash freeze method is a great candidate for freezing herbs like dill, mint, basil, oregano, and cilantro.

Freezing Herbs in Water

Freezing herbs in water is an awesome option for herbs such as mint, lemon balm, lavender, and other dried flowers.

This method is so easy, just put the herbs or flowers into the ice trays and fill with water.  Put the ice cube trays in the freezer and let sit until completely frozen.  

Herb ice cubes are awesome to add to a pitcher of iced water, lemonade or punch.  Utilize these ice cubes all year round for a fresh and pretty touch to your holiday cocktails and punch!

Freezing Herbs in Oil

For herbs that you will use in cooking such as you can chop them and freeze in olive oil instead of water! This works wonderfully with herbs like sage, oregano, thyme, and basil.

Measure out 1tsp or 1Tbl of chopped herbs, the measurement for chopped fresh herbs is the same for chopped frozen herbs, and add to ice cube tray.  Fill ice cube trays with olive oil and place in the freezer.  After frozen solid, you can remove from tray and place in freezer bag for long term storage.


Your 1st Step to a Simple Living Lifestyle!

A great place to start with Simple Living is to start making your own cleaning and personal products!

With this FREE eBook, you can easily get started with over 10 quick but effective recipes that use ingredients you already have in your house!

Storing Frozen Herb Cubes

As mentioned above, once herb leaves or herb cubes are frozen completely, you can transfer them to plastic ziplock freezer bags for long term storage.

This option allows you to utilize space in your freezer and to continue using the ice cube trays to make more frozen cubes as your harvest continues!

These cubes should be good for quite a while, up to 12 months which is great for getting fresh herb flavor even in the winter months.

Herb Freezing Method Instructions

Step 1. Harvest the herbs

Harvest herbs from the plant by cutting the stems from the plant.

There are correct ways of pruning your herb plants when harvesting in order to encourage more growth on the plant.  This depends on the plant and depends on if you are done for the year or still plan on harvesting.

Step 2. Wash leaves and pick leaves from the stems.

Rinse the harvested stems and leaves to remove any dirt or bugs. Dry leaves thouroughly and disgard the stems.

This is a great job for little kids!

mint leaves

Step 3. Crush or chop the herb leaves

For herbs in oil, coarsely chop the herb leaves with a sharp knife.

If you are flash freezing the leaves, just place whole leaves on the cookie sheet and place in the freezer.

When prepping mint or lemon balm, you can stick with whole leaves to be frozen in water for drinks.

chopped mint leaves

Step 4. Measure out your desired amount of herbs per cube


The measurement of fresh herbs is the same as frozen herbs.  You can make whatever ratio of herbs to water/oil as you would like, just take note of the herb measurements, 1tsp or 1 Tbl so that when adding to a dish, you know what you are working with.  

Add the chopped herbs to the ice cube trays.

mint leaves in tray

Step 5. Add water or oil to your ice cube trays

Fill each ice cube containing herbs with either water or olive oil.  Make sure that the herbs are submersed as well as possible. 

herbs in oil

Step 6. Place in freezer

Once put together, you can place the ice cube trays or cookie sheet in the freezer.  Allow to freeze for several hours until frozed solid.

Step 7. Remove from freezer and transfer to freezer bags

Once frozen solid, remove from ice cube tray and transfer to freezer bag for long term storage.  Make sure you are using freezer bags and not regular storage bags to make sure that you are not getting freezer burn.

Step 8. Use in cooking all year round

Add olive oil cubes to your cooking when making sauces, sauteing vegetables, roasted vegetables or meats.  Add your ice cubes to punch, lemonade, cocktails any drink that could use an extra bit of pizazz!

There are so many possibilities!

Your 1st Step to a Simple Living Lifestyle!

A great place to start with Simple Living is to start making your own cleaning and personal products!

With this FREE eBook, you can easily get started with over 10 quick but effective recipes that use ingredients you already have in your house!

How to Use Frozen Herb Cubes

Directions

Step 1: Harvest the herb leaves.

Step 2: Wash leaves and remove from stems.

Step 3: Crush or coarsely chop herb leaves.

Step 4: Measure out your desired amount of herbs per cube.

Step 5: Add water or oil to your ice cube trays.

Step 6: Place in freezer.

Step 7. Remove from freezer and transfer to freezer bags.

Step 8. Use in cooking all year round.

Your 1st Step to a Simple Living Lifestyle!

A great place to start with Simple Living is to start making your own cleaning and personal products!

With this FREE eBook, you can easily get started with over 10 quick but effective recipes that use ingredients you already have in your house!

We participate in the Amazon Associates Program. Please assume that all Amazon links are affiliate links. Affiliate links are links to third-party products and services. If you use those links and make a purchase, we will receive a small commission. Using these links will not cost you any extra money. An affiliate relationship does not change or influence the nature of the recommendation or opinion.
Homemade Mint Extract

Homemade Mint Extract

Do you have an abundance of mint?

Mint is one of those plants that while extremely useful and great to grow, can take over other plants due to its ability to grow with little maintenance.

We have always been successful in growing mint, it does really well in most environments.  Even when mint starts to struggle, little adjustments to the amount of sunlight, heat, water, etc can bring it back pretty easily.

For this reason, it is very easy to end up with an abundance of mint in the summer.  Aside from drying or freezing, another great method for preserving mint for use the rest of the year is by making an extract.

mint extract pin

What is an extract?

An extract is a preservation method in which you are soaking your intended harvest in alcohol in order to draw out all of the flavor and beneficial properties of the plant.

While you can buy different extracts at the store, they are also really easy to make at home.  Vanilla and mint are some of the most common variations but you can make an extract with many plants that you harvest.

Why make a mint extract?

Extracts have many uses, particularly in baking and cooking.  Many holiday baking recipes call for mint extract.

You can also use it for cocktails and alcoholic drinks that require a minty flavor.

Mint extract can also be a really nice gift if you package it in a cute jar.

What kind of mint?

You can really use any type of mint you have growing as there are a ton of different varieties.

My favorite is Spearmint but you could always use varieties such as chocolate, lemon, orange, etc.

What type of alcohol?

You can really use any alcohol to perform an extraction but the best would be a clear alcohol such as vodka.

I definitely recommend that you a cheap alcohol for this, especially if you are only using the mint extract for cooking.


Homemade Mint Extract Recipe

Step 1. Harvest the mint

Harvest mint from plant by cutting the stems from the plant.

This is really a great way to preserve your mint leaves.  You can do it in a large batch which will use up a large amount of leaves.

Step 2. Wash leaves and pick leaves from the stems.

Rinse the harvested stems and leaves to remove any dirt or bugs. Dry leaves thouroughly and disgard the stems.
mint leaves

Step 3. Crush or chop the mint leaves

Coarsely chop the mint leaves with a sharp knife. You can even use whole leaves without chopping, just make sure that you crush them to release the mint oils
chopped mint leaves

Step 4. Mix alcohol and mint

Combine your choice of consumable alcohol, preferably a clear alcohol with the chopped mint.  Vodka works best.  This is a great project to use your cheaper alcohol.

There is not an exact ratio, it will depend on your preference. For the batch in the pictures, I used 1/4 cup mint leaves to 3/4 cups of alcohol.  Consider what volume of extract you need and go from there. Add as much mint as needed for the desired flavor. It may take a few batches to get a flavor that you like.

Just make sure that there is enough alcohol to cover the leaves so that mold does not start growing.


mint extract ingredients

Step 5. Place tightly sealed glass jar in a dark place.

Tightly seal a glass jar or container and store in a dark place for 1-2 months. Taste test after a month to check the flavor.

Step 6. Strain the mint leaves from the alcohol.

Once the desired flavor is achieved, strain the mint leaves from the alcohol.

Store the mint extract in a glass jar and use as needed.  You can also give them away as gifts!

Easy Homemade Mint Extract

Directions

Step 1: Harvest the mint leaves.

Step 2: Wash leaves and remove from stems.

Step 3: Crush or coarsely chop mint leaves.

Step 4: Add mint leaves to alcohol.

Step 5: Place tightly sealed jar in a dark place.

Step 6: Strain out mint leaves and enjoy!

Do you want a simple life? Don’t forget to get your free Simple Living Starter Kit now!

We participate in the Amazon Associates Program. Please assume that all Amazon links are affiliate links. Affiliate links are links to third-party products and services. If you use those links and make a purchase, we will receive a small commission. Using these links will not cost you any extra money. An affiliate relationship does not change or influence the nature of the recommendation or opinion.