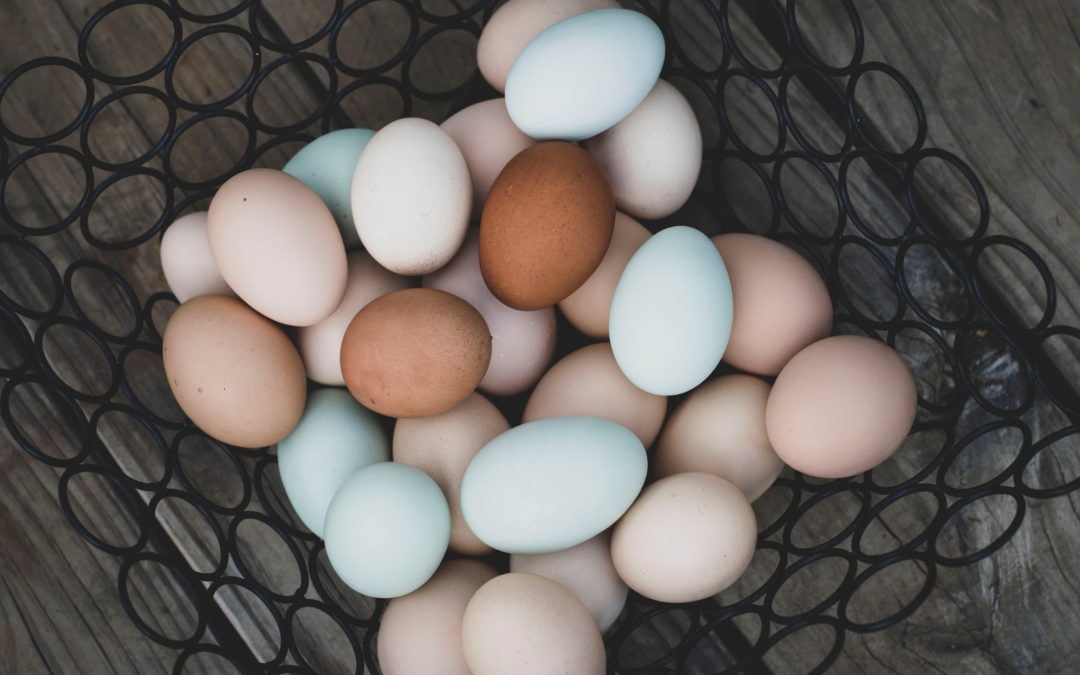
Fresh eggs: Common practices for your newly laying hens

Fresh eggs: Common practices for your newly laying hens

You got your first homegrown, fresh egg!  Nothing quite beats the satisfaction and excitement of finding the first eggs from a newly laying hen.  My hens have just started laying and it has been a learning experience.  I have done a lot of research on wat needs to be done to ensure that bothe the fresh eggs and your hens are clean, safe, and healthy during this exciting time.  I share all of it here with you!

properly store preserved food

Preparing for the arrival of fresh eggs

It can seem like forever when waiting for that first egg! A lot of time and effort goes into raising chicks and the payoff usually takes some time to occur in the form of fresh eggs.  The typical laying hen can expect to start producting fresh eggs around 18-20 weeks old, or about 4.5 – 5 months.

I got my chickens the very beginning of April when they were only 1 day old so I was expecting to start seeing eggs late August – early September.  Our first eggs were right on time!

To prepare for the arrival of fresh eggs, I did some research but was honestly caught alittle off guard.  I had been feeding the chickens a medicated chick starter since birth as recommended by the feed store person.  I did not think that I needed to switch them prior to laying.  It is important that the medicated feed is out of thier system prior to comsuming thier eggs.

All of my research said to give it at least 2 weeks to get out of the chickens system.  In the meantime, my chickens produced 17 eggs during that time and since I did not want to waste them, I scrambled them up and fed them back to the chickens, which they thouroughly enjoyed.

This is something you may want to consider, make sure that once you start approaching the first egg milestone, you start feeding your hens a feed that is free of medication and is suitable for encouraging good egg production.

Signs that your hens are ready to start laying

There are several indicators that you can look out for that may suggest that your hens will start laying soon.

  1. Thier wattles and combs will start to become redder and larger.  If this occurs really early than you may have a rooster on your hands.  From what I have read there is actually a 10% chance of incorrect sexting amount baby chicks sold in feed stores so there defintely is a chance of that!
  2. An increase in appetite can occur when it is getting close to laying time.  I did not necessaryily notice this, my chickens always eat fast, aggressively, and a lot so I am not sure an increase in this would be so clear.
  3. They talk more!  I definitely noticed this one.  A few weeks leading up to laying time, I noticed that they started sounding more and more like chickens.  I hard squarks, clucks, and normal adult chicken sounds than the normal bird sounds that you tend to hear from a younger chicken.  The coop as a whole started getting a lot noiser.
  4. They spend more time in the coop during the day.  My chickens were noticebly spending more time in the coop sitting in the nesting boxes.

I know that there was real anticipation in our family for that first egg sighting so these indicators were a real help that it was coming soon.


Stop wasting your fruits and vegetables!

Grab the Ulimate Fruit and Vegetable Seasonal Guide for FREE to start properly storing your produce so you can stop throwing it away and start enjoying it longer.

How to handle and store fresh eggs

Homegrown eggs can and should be handled a little differently than your storw-bought eggs.  Homegrown eggs do not have to be refrigerated if you don’t wast them immediately.  Unwashed, fresh eggs can sit on the countertop for a few days to a couple of weeks. If you wash them or are unsure, store them in the fridge.

Homegrown, fresh eggs have what is called a protective “bloom” which is a cuticle layer that protects the eggs from bacteria.  It completely covers the pores of the egg so if you keep that intact, they are perfectly safe to store on the countertop.  When you wash them, this layer is washed off and will be needed to be stored in the fridge until use.

I have been storing in on the countertop unless I get a particularly dirty egg, then I wash them and keep them in the fridge.  Sometimes I will find eggs covered in mud and/or poo and will wash them once I find them.

When you decide to wash your eggs, make sure you are using warm water instead of cold or hot.  Then dry carefully and store in the fridge.  I have been saving egg cartons leading up to this point so that I can easily store them.

dried pasta

Tips for encouraging good egg production

There are a few things that you are able to control that may help encourage your chickens to maintain a good egg production.  

Happy chickens will produce the most eggs so it is important to make sure that they are comfortable and healthy. 

Periodicaly checking them for ailments or injury is necessary, especially once they start laying.  You do not want the to become impacted or have injury.

The egg production and the amount of eggs that a laying chicken will produce is dependant on breed, environment, diet, comfort, health, and age.  You want to provide them with an environment that will be encouraging for laying.  Make sure they have plenty of room and that thier nesting boxes stay clean and dry. 

If chickens are scared or constantly at threat from predators, they will have trouble producting to thier full potential.

Chickens are good for full production for about 2-3 years and then they start to slow down.  Chickens will also slow down production in the winter months or when the temperature drops.  

The most important aspect is to just provie a safe, clean, and roomy environment for your chickens to thrive and you will enjoy all of the amazing benefits they provide!

For more information, listen to the podcast epsiode – Epsiode 20: When your Hen Starts Laying.

baking ingredients

Stop wasting your fruits and vegetables!

Grab the Ulimate Fruit and Vegetable Seasonal Guide for FREE to start properly storing your produce so you can stop throwing it away and start enjoying it longer.

We participate in the Amazon Associates Program. Please assume that all Amazon links are affiliate links. Affiliate links are links to third-party products and services. If you use those links and make a purchase, we will receive a small commission. Using these links will not cost you any extra money. An affiliate relationship does not change or influence the nature of the recommendation or opinion.
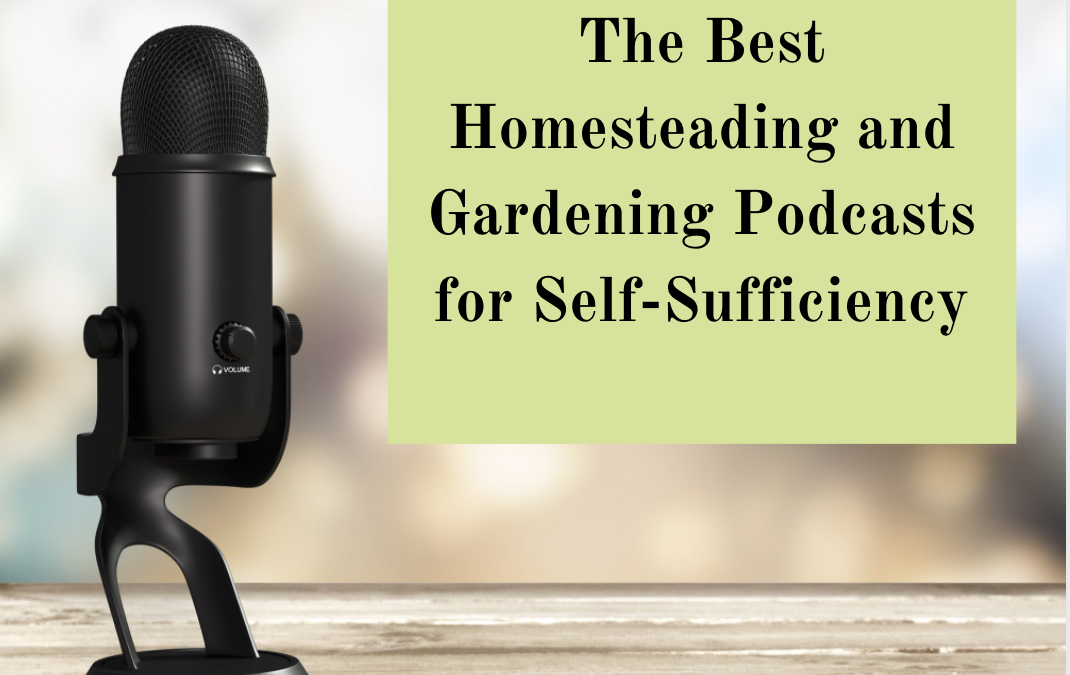
The Best Homesteading and Gardening Podcasts for Self-Sufficiency

The Best Homesteading and Gardening Podcasts for Self-Sufficiency

One of the first steps to starting a homestead is conducting a LOT of research.  When we really started entertaining the idea of becoming more self-sufficient, I read many articles, watched lots of  videos, and listened to many podcasts.  What I love about homesteading podcasts are that they are typically FREE and that I can utilize dead time, like doing dishes, folding laundry or commuting, by listening to them.  Podcasts allow me to mutiltask and that is super important.

One of the major challenges in homesteading is just having the confidence to take on such a large, lifestyle-changing project.  What I love about homesteading podcasts is that you can really get a sense for the challenges and successes of those who have been doing it for a long time.  Many of the podcasts that I listen to primarily focus on the host’s challenges and successes of their homestead.  Some also showcase guests who can further provide insight into the reality of homesteading.  This insight is so valuable as it provides the listener with confidence and encouragement that they can also achieve such a goal.

This list is comprised of the best Homesteading and Gardening podcasts that I have found.  I have listened to several episodes of each one of them and have chosen the best ones in my opinion to share with you!

Here is a list of Homesteading/Gardening podcasts that could really help you out as you start on your homesteading journey.

Homesteading Podcasts

Pioneering Today Podcast with Melissa K. Norris

The Pioneering Today Podcast with Melissa K. Norris was also one that I started listening to a while ago when I really started to plan and research starting a homestead.  I love how she covers a variety of topics with her episodes.  I feel as though I come away from each one with many actionable tips and tricks. 

One of my favorite aspects of the Pioneering Today Podcast is the amount of episodes dedicated to homestead kitchen topics. From baking ingredient substitutions, to meal planning, to how to build your homestead pantry, a behind the scenes look into a homesteader’s kitchen is not a perspective that I have found in any other podcast.  I also love how you really get the sense of the pride and honor Melissa has in sharing her family’s recipes and traditions.

Here are some of my favorite episodes:

Episode 155: Batch & Freezer Cooking – 12 Time Saving Tips for Homemade Meals

Episode 131: Homesteading for Beginners – 9 Transition Tips from City Life

Episode 119: How to make soap at home – Beginners Guide to Soap Making

Old-Fashioned On Purpose

I have been a fan and follower of Jill Winger ever since I got the first urge to start a garden.  So when she started a podcast, I was all about it!  As with all of her content, her podcast, Old-Fashioned On Purpose, is well done, informative, relatable, and inspiring.

She really has a way of making all of the things homesteading and self-sufficiency seem attainable and doable regardless of who you are!  So much good content, she really is your one-stop shop for homesteading and gardening.  One of my favorite aspects is learning how she weathers the harsh winters of Wyoming and how she makes the most of her garden regardless of her short growing season.

Dreaming of Having a Vegetable Garden this year?

Grab the Your Dream Vegetable Garden Plan for FREE to get you started today!  Start growing your groceries this year!

Rural Women Inspired with Mindy Young

One of the things that I love about homesteaders producing their own podcasts is that after listening to them for a while, you really get a feeling that you are along for the ride with them on their homesteading journey.  That is how I feel when I listen to Rural Women Inspired with Mindy Young.  She is an impressive homesteader.  When she talks about her market garden, I swoon!  Who wouldn’t love a market garden?

She has been doing the homesteading thing her whole life and she offers some really awesome tips and insights for inspiring homesteaders.  She just seems so sweet and friendly!  I also love real stories that she tells because it is always great to hear how even seasoned homesteaders struggle with aspects of the lifestyle and it really helps me relax and slow down a little!  The topics covered are great for beginners, they are not so advanced that they do not seem attainable and doable which I think is so important for podcasters and bloggers who are targeting new homesteaders.  Homesteading can be intimidating!

Farmish Kind Of Life with Amy Dingman

Amy Dingman is the host of the Farmish Kind of Life Podcast.  Amy podcasts about her Minnetosa homestead and gives the listeners an honest and transparent view of homesteading.  This candid look into an established homestead is so helpful for any new homesteader.  What I really like is that while her episodes are concise, usually less than 30 minutes, she manages to pack a lot of information into each episode without too much filer.  After listening to her for a while, I really value her advice.  She finds a nice balance between illustrating the tough reality of homesteading while also maintaining a funny and encouraging tone.  Some unique topics she has covered in the past include; weather prediction tips, rendering lard, and hatching chicks.

Episode 47: Old Fashioned Weather Prediction Tips

Episode 41: Two Ways to Render Lard… And What to Use it For

Episode 43: Hatching Chicks? Incubator Vs. Broody Hen

Dreaming of Having a Vegetable Garden this year?

Grab the Your Dream Vegetable Garden Plan for FREE to get you started today!  Start growing your groceries this year!

Mother Earth News and Friends Podcast

Professional production quality and engaging hosts and guests are only some of the strengths of the Mother Earth News and Friends Podcast.  This is a really awesome podcast.  I love how they tend to find unique homesteading, gardening, and small farm topics that are not commonly covered by other podcasts.  One of my favorite episodes is focused on grant opportunity for small farms and homesteads.  I am willing to bet that there are SO many people who have never even considered this option.

I also love how they really create the feel of a homesteading community, one in which is not just open to experts, but welcomes anyone interested in learning more about self-sufficiency!

Small Farm Nation with Tim Young

While the Small Farm Nation Podcast with Tim Young primarily focuses on the business aspects of managing a small farm, Tim provides so much valuable information that serious homesteaders will find useful and exciting.  Even though I do not have a farm business nor do I ever really plan to have one, I find his tips on marketing your farm, leasing your land, and product pricing so interesting that it makes me want to start a farm business!  I highly recommend listening to his podcast if you even have the inkling of wanting to sell your homestead products.  Not only is the podcast super informative, I haven’t found one that gets so deep in the weeds about farm business, but it is also very professionally done and easy to listen to. Highly recommend!


Gardening Podcasts

Epic Gardening

The Epic Gardening Podcast with Kevin has quickly become one of my favorites.  The Epic Gardening podcast consists of a pretty large library of awesome short episodes on very focused topics.  These are usually on topics that I didn’t know that I needed or wanted to know more about.

Kevin drops a new episode everyday,  listening to the newest episode has become a daily ritual for me.  Some examples of topics are: the science of poison ivy, seed starting tips, perennial edibles, grafting and how to grow plants in the bathroom, just to name a few.  As a guest based podcast, the guests are always knowledgeable.  I am enjoying catching up on past episodes. Check it out!

The Daily Gardener with Jennifer Ebeling

If you are looking for something that blends history and intellect with your love of nature and gardening, you cannot miss The Daily Gardener with Jennifer Ebeling.  This podcast is showcases daily episodes releasing every week day, Monday – Friday.  Jennifer offers gardening thoughts and breveties that are sure to help educate and inspire her listeners.  I am also in love with the historical and modern looks at how gardening has evolved and shapes our lives. It really is such a unique focus of this podcast. If you are a garden lover you can’t miss this one!

While you are getting hooked on The Daily Gardner Podcast, don’t miss out on Jennifer’s previous podcast: The Still Growing Podcast.  Even though this podcast is not still in production, there is still a huge library of episodes with really valuable information available.

The Still Growing Podcast fouses on helping listeners to make the most out of their gardens, as well as, to live a more natural life.  This show covers flower, vegetable, and herb gardening in great detail.  It is a very organized and well produced show.  Most episodes showcase an interview with an expert guest on a particular topic.

Gardenerd Tip of the Week

The Gardenerd Tip of the Week podcast is another well done podcast that covers a wide variety of gardening topics.  This podcast showcases a different garden expert each week. They generally discuss a topic and then the expert gives the audience a gardening tip of the week.  The upbeat and lively conversations between the host and her guests are always very indepth and useful.  Some of my favorite topics covered in this podcast are cooking from the garden, foraging, and growing squash.


Dreaming of Having a Vegetable Garden this year?

Grab the Your Dream Vegetable Garden Plan for FREE to get you started today!  Start growing your groceries this year!

Tending Seeds: Adventures in Farming, Gardening, and Herbalism

Tending Seeds is a podcast that I have been listening to and really love.  Her main focus is herbalism but she also talks about other topics like flower gardening.  I think it is awesome to start listening to a podcast at its very beginning.  I definitely feel like I am along for the ride with her.  Her episodes are really well done and fun to listen to.  I recommend checking it out, it will be awesome to follow the progress of her gardening journey!

The Joe Gardner Show with Joe Lamp’l

The Joe Gardener Show with Joe Lamp’l  is a very well done podcast.  It is very focused on the ins and outs of vegetable gardening.  There is not much straying from the primary topic which is really great because Joe goes into so much detail in his episodes that you can’t help but find real actionable tips and tricks in every one.

As the host of Fresh from the Garden on the DIY Network and Growing and Greener World on PBS, Joe has ample experience in broadcasting.  He is so easy to listen to, sometimes I just tune in to listen for a few minutes and end up listening to a a whole show because his show is so immersive.  He is the ultimate expert in organic gardening and you really can’t miss his show if you are looking for guidance in the garden.

Sustainable World Radio

Sustainable World Radio with Jill Cloutier is much more than just another gardening or homesteading podcast.  This podcast focuses on the topics of ecology and permaculture.  One aspect that I love about this podcast is that the topics often focus on environment projects from around the world.  Jill does a great job spreading positive awareness on taking care of the earth through permaculture and provides the audience with some great ideas on how to live a greener life.

My favorite episode so far is a recent one focusing on growing Paw Paws.  I am sad to say that I have never heard of Paw Paws before but after listening to this episode, it made me want to just run out and plant one in my garden.  This is definitely a project that will be added to my list.

Dreaming of Having a Vegetable Garden this year?

Grab the Your Dream Vegetable Garden Plan for FREE to get you started today!  Start growing your groceries this year!

Archived Podcasts not currently producing content but have an awesome library of episodes

Living Homegrown Podcast with Theresa Loe

The Living Homegrown Podcast with Theresa Lowe is the first homesteading podcast that I started routinely listening to.  Theresa has an impressive background as a canning and food preservation expert and focuses her podcast on small space homesteading.  She delivers her podcast with such a welcoming and supportive tone that I always finish her episodes with a much higher sense of confidence and drive to pursue new projects and challenges.

She also features a wide range of guests on the podcast. I have learned a lot about from other’s experiences. While she is not currently uploading podcasts and the last upload was in 2019, there is still a huge collection of super helpful episodes.  Here are some of my favorite episodes:

Episode 142: Farming on 5 Acres or Less

Episode 166: Backyard Chicken Keeping Hacks

Episode 120: How to make Natural Household Cleaners

The Modern Homesteading Podcast with Harold Thornbro

The Modern Homesteading Podcast with Harold Thornbro is an all inclusive homesteading podcast which covers everything you need to help you start your homestead.  He focuses of animal husbandry, food preservation, gardening, and other many other self-sufficient skills.  His show is primarily guest based, featuring a wide range of homesteading experts.  I also love hearing about his family’s journey on thier homestead.  Most of his shows are right around a half hour, making it so easy to put on in the car while you are doing errands or driving to work.  This is a must have in your weekly lineup if you are looking to really immerse yourself if the homesteading lifestyle.  While the episodes are not currently being produced, two of my favorite episodes are:

Episode 99: What to Do First to Turn A New Home Into a Homestead

Episode 114: Family Homesteading with Guest Teri Page

Homesteady Podcast

The Homesteady Podcast is such a unique and interesting homesteading podcast that I just had to include it!  Even though new episodes are not being produced right now, I love catching up to all of thier older episodes.  Often times podcasters, bloggers, and writers portray homesteading as a picture perfect endeavor.  The host, Aust makes a point to show homesteading from all angles, the good and the ugly.  Not to mention, his show is really funny and honest.  While he sometimes gets off on tangents about a topic that especially excites him, it is always entertaining, refreshing, and authentic.

His series of episodes on homestead side hustles was extremely insightful and helpful.  As a new homesteader, I found his realistic and honest approach to homesteading very encouraging; as it makes homesteading seem much more attainable when you remove the “magazine cover” feeling.  Check it out!

What is your favorite homesteading or gardening podcast?

Are there any great podcasts that are missing from this list?

Dreaming of Having a Vegetable Garden this year?

Grab the Your Dream Vegetable Garden Plan for FREE to get you started today!  Start growing your groceries this year!

We participate in the Amazon Associates Program. Please assume that all Amazon links are affiliate links. Affiliate links are links to third-party products and services. If you use those links and make a purchase, we will receive a small commission. Using these links will not cost you any extra money. An affiliate relationship does not change or influence the nature of the recommendation or opinion.
2 Homemade Toilet Cleaners that Really Work

2 Homemade Toilet Cleaners that Really Work

When it comes to cleaning the house with little kids, being able to whip together a cleaner in just a few seconds is a lifesaver.  I have been looking for any way to eliminate toxic cleaners and use more natural ingredients.  A homemade toilet cleaner was at the top of my list.

I love being able to take a few ingredients, usually 2-3 and some essential oils and make a cleaner that can be used immediately.

I have come to realize that the store-bought cleaners that I used to spend $3-$5 dollars a bottle on are dangerous, harsh, and just unnecessary for daily cleaning.

These homemade concoctions are so easy and inexpensive to make, you will never want to buy a commercial brand toilet cleaner again.

I love having options and being aware of possible ingredient substitutions for the recipes that I use regularly. 

While most of the ingredients that are included in these super simple recipes are things that I have on hand at all times, it is great to have an alternative if necessary.

Cleaning your toilet, is not fun.  I also find that I am cleaning my toilet way more frequently than I do a whole bathroom cleanup, so I needed a method that was easy and quick.

Fortunately, these simple and easy recipes are so effective to use, they really get the job done quickly.

1. Vinegar Version Toilet Bowl Cleaner

iiIngredients for vinegar version:

  • 1/2 cup Vinegar
  • 1 cup Baking Soda
  • 3 – 5 drops Essential Oils (Lemon, Lavender, Tea Tree, or Clove are great choices to disinfect and freshen) My absolute favorite essential oils are Jubilee of Wellness. You can find their awesome line of oils here: Jubilee of Wellness Essential Oils. 


Directions:

  1. Add ingredients to the toilet bowl First add the vinegar, then sprinkle the backing soda over top.  Finally add the essential oils.
  2. Let sit for 15 minutes.
  3. Scrub with a toilet brush and and rinse by flushing.

Your 1st Step to a Simple Living Lifestyle!

A great place to start with Simple Living is to start making your own cleaning and personal products!

With this FREE eBook, you can easily get started with over 10 quick but effective recipes that use ingredients you already have in your house!

2) Hydrogen Peroxide Version

Ingredients:

  • 1/4 to 1/2 cup Hydrogen Peroxide
  • 1 cup Baking Soda
  • 3 – 5 drops Essential Oils (Lemon, Lavender, Tea Tree, or Clove are great choices to disinfect).  My absolute favorite essential oils are Jubilee of Wellness. You can find thier awesome line of oils here: Jubilee of Wellness Essential Oils

Directions:

  1. Add ingredients to the toilet bowl. First add hydrogen peroxide to the toilet, then sprinkle baking soda over top.  Finally add the essential oils.
  2. Let sit for 15 minutes.
  3. Scrub and rinse by flushing.

Of these two methods, I much prefer the vinegar method.  Hydrogen peroxide will do in a pinch but vinegar is cheaper and I always have it on hand.

Typically I keep a small jar of vinegar (which I fill and refill from a larger bulk bottle), a mason jar of baking soda with a sprinkle lid (a lid from a parmesan cheese container works great), a bottle of lemon essential oils, and a toilet brush in my bathroom closet at all times.

The job is easy which is great because I hate cleaning the bathroom!

Love these super easy, homemade recipes?  Check out our easy, effective, and homemade ant killer

If so, grab the Simple Living DIY ebook by signing up below!

Your 1st Step to a Simple Living Lifestyle!

A great place to start with Simple Living is to start making your own cleaning and personal products!

With this FREE eBook, you can easily get started with over 10 quick but effective recipes that use ingredients you already have in your house!

We participate in the Amazon Associates Program. Please assume that all Amazon links are affiliate links. Affiliate links are links to third-party products and services. If you use those links and make a purchase, we will receive a small commission. Using these links will not cost you any extra money. An affiliate relationship does not change or influence the nature of the recommendation or opinion.
How to Make Vintage Dried Orange Slices

How to Make Vintage Dried Orange Slices

Can you relate?

I tend to swoon for anything vintage or traditional especially when it comes to decorating for the holidays.  Have you ever seen those beautiful dried orange slices that are typically found during the holidays? They are often associated with vintage, old-fashioned Christmas decor. Good news, they are SO easy to make!

mint extract pin

Why Dry Orange Slices?

Dried Orange slices are very easy to make, very versitle and add a wonderful homemade element to crafts and cooking.

Believe it or not, oranges and other citrus fruits are in season during the winter months, which is why it is so commonly used in holiday decor.

Traditionally, people utilized fruits and vegetables as they were in season. In the winter, they also use preserved foods from thier spring/summer harvests.

This is typically why we see so many oranges and cranberries both in Christmas decor and seasonal winter recipes.

There are many different uses for dried orange slices. Some of them are:

  • Holiday decor – Ornaments, garlands, or  embelishments for homemade gifts.
  • Potpouri – Simmer on the stove with other seasonal ingredients to make your whole house smell wonderful.
  • Garnish for fancy dishes

Your 1st Step to a Simple Living Lifestyle!


A great place to start with Simple Living is to start making your own cleaning and personal products!

With this FREE eBook, you can easily get started with over 10 quick but effective recipes that use ingredients you already have in your house!

What Type of Oranges?

You will notice that during the winter seasons, oranges and other citrus fruits may be on sale.  Since they are in season, this is a great time to grab a bag or two. One to enjoy and one to preserve.

There are several different types of oranges that you may find in the grocery store. Clementines, tangerines, blood oranges, valencia, and cara cara are just a few that are in season during the winter. The Spruce does a really great breakdown of the types of oranges that you can find in season during the winter months. You can find it here: Winter Citrus.

As far as making dried orange slices, stay clear of tangerines or clementines and look for a large slicing orange with a thick peel.  I typically buy a large bag of naval oranges for about $2.00.


What you need

A dehydrator is a really great option or drying fruits and vegetables quickly.  They can be pricey, although you can probably find a decent one for around $30.  You do not need one though!

I simply use an oven at low temp will get you very similar results.

A cookie sheet and oven safe rack is also necessary.

That is pretty much it!

What you need:

  • Dehydrator or oven
  • Cookie sheet
  • Oven safe rack (optional)
  • Knife
  • Oranges
  • Powdered sugar (optional)


Slice oranges about 1/4 inch thick

The most important thing to make sure you do is to cut the orange slices consistently for even baking.

Having slices of difference thickness will cause some to cook faster and possibly burn.

Bake at 250 degrees F

If you have a dehydrator, use it according to directions. I have not purchased a dehydrator so I do not know the exact settings necessary.

For drying without a dehydrator, set your oven to 250 degrees F.

Lay out your slices on the rack on the cookie sheet. I did not use a cookie sheet so it is not absolutely necessary.

Sprinkle slices with powdered sugar.

Cook the slices for 2.5 -3 hours.


I recommend to start with cooking the orange slices for about 2 hours.  Isn’t that fresh orange smell that is filling your kitchen just wonderful!

After 2 hours, check them and flip them.

Let them go another 1/2 hour.  Typically you can let them go another hour but check them first to be sure.

Your 1st Step to a Simple Living Lifestyle!


A great place to start with Simple Living is to start making your own cleaning and personal products!

With this FREE eBook, you can easily get started with over 10 quick but effective recipes that use ingredients you already have in your house!

Do not let them turn brown

I have made the mistake of letting them go until they dry completely. Once that happens, they have usually turned brown and have an overcooked appearance to them.

You want the peels to be dry but the fruit can still be slightly moist.  You can let them air dry the rest of the way.

Once done cooking, pull them out and lay them on a kitchen towl to finish drying for a few hours.

Perfect for the Christmas season!

Vintage dried orange slices are so versatile and definitely worth the minimal time and effort required to make them.  If you can take advantage of oranges while they are season, you can save a lot of money.

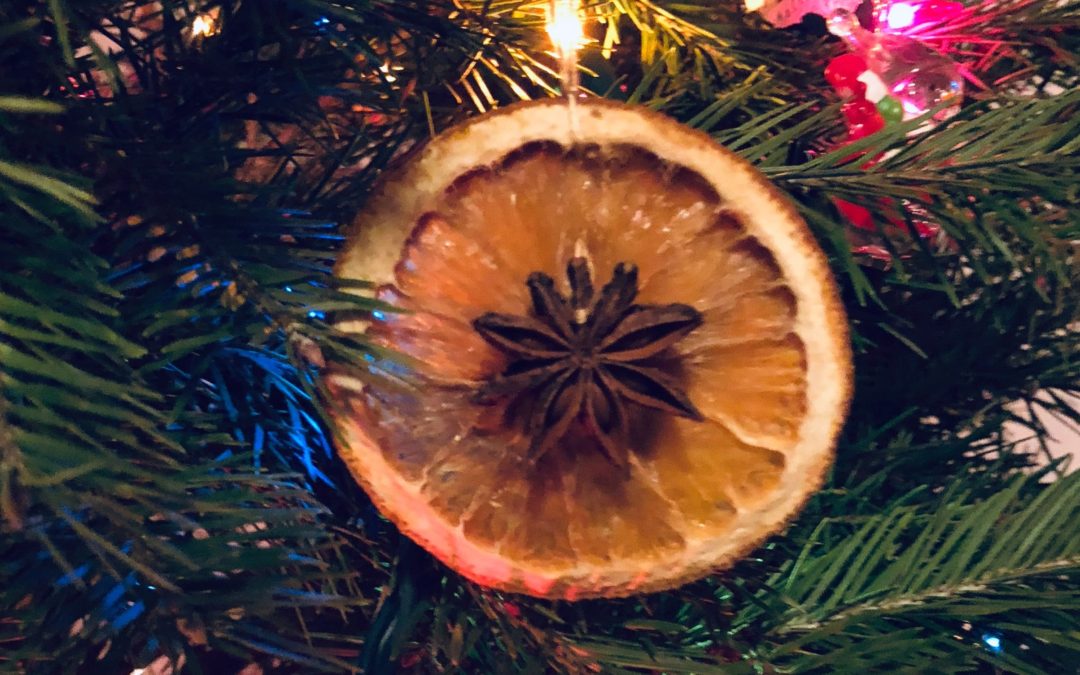
Christmas decor is one of the most common uses.  I like to incorporate it onto wreaths, garlands for the tree, and ornaments.

Potpourri is also a really great use for dried orange slices.  Add oranges, cranberries, cinnamon sticks, whole cloves, pine/juniper needles, or whatever you have on hand to a small sauce pan.  Cover with water and simmer on low heat on the back burner. Delicious holiday smells adds such wonderful atmosphere to your Christmas season.  This is so easy to do and is a great way to use up scraps that would otherwise be thrown away.


holiday potpourri

How to store them

Before storing them, make sure that they have completely air dried.  If you package them up before they are completely dry, they can start to mold.

I like to store them in mason jars, which make beautiful decor all on thier own.

Vintage Dried Orange Slices

What you need:

  • Dehydrator or oven
  • Cookie sheet
  • Oven safe rack (optional)
  • Knife
  • Oranges
  • Powdered sugar (optional)


Easy Drying Technique

  1. Preheat oven to 250 degrees F.
  2. Cut Oranges into 1/4 in slices.
  3. Lay Orange Slices on oven safe rack onto of cookie sheet.
  4. Sprinkle with powdered sugar.
  5. Cook for 2 hours.
  6. Check and flip orange slices.
  7. Cook for another 1/2 hour to 1 hour until almost dried.
  8. Remove from oven and lay on towel to finish drying.
  9. Use in decor and cooking as desired.
  10. Store in mason jars after completely dried to avoid mold.

Your 1st Step to a Simple Living Lifestyle!


A great place to start with Simple Living is to start making your own cleaning and personal products!

With this FREE eBook, you can easily get started with over 10 quick but effective recipes that use ingredients you already have in your house!

Enjoy doing your own projects and making it yourself?

Don’t miss my FREE Simple Living DIY eBook.

We participate in the Amazon Associates Program. Please assume that all Amazon links are affiliate links. Affiliate links are links to third-party products and services. If you use those links and make a purchase, we will receive a small commission. Using these links will not cost you any extra money. An affiliate relationship does not change or influence the nature of the recommendation or opinion.
Freezing Fresh Herbs

Freezing Fresh Herbs

Growing herbs is an easy way to get started with gardening and is often one of the easiest types of plants to grow.  Herbs can grow fast and if you are not using them frequently, they may go to waste. Freezing frozen herbs is a quick and easy preservation method.

There are many ways to preserve herbs so that you can enjoy fresh herb flavors all year round. Drying herbs is not the only method for preservation. One method that is quick and easy and does not require a ton of extra tools or equipment is freezing.  Freezing herbs is essentially making herb ice cubes for use in cooking later in the year.


mint extract pin

Types of Herbs to Freeze

There are many different kinds of herbs that you can preserve with the freezing method, as well as several different freezing methods that can be utilized.  The delicacy of the herb’s leaves can cause some herbs to freeze well in water while others freeze better with flash freezing.

Some of these herbs are:

  • Basil
  • Lemongrass
  • Mint
  • Oregano
  • Sage
  • Dill
  • Chives
  • Thyme
  • Tarragon

Your 1st Step to a Simple Living Lifestyle!

A great place to start with Simple Living is to start making your own cleaning and personal products!

With this FREE eBook, you can easily get started with over 10 quick but effective recipes that use ingredients you already have in your house!

Flash Freezing Method

The flash freezing method is so easy and can be applied to so many fruits and vegetables.  I use this method when I am freezing bananas and strawberries that are past thier prime for use in smoothies.

I also use this method for vegetables, like tomatoes and peppers that have ripened but I do not have enough to make an actual batch of sauce or salsa.

Flash freezing is simply just laying the fuit, vegetables, or herb leaves out flat on a cookie sheet and popping them right in the freezer for a few hours. Once frozen you can relocate them to a freezer bag for long term storage.

The flash freeze method is a great candidate for freezing herbs like dill, mint, basil, oregano, and cilantro.

Freezing Herbs in Water

Freezing herbs in water is an awesome option for herbs such as mint, lemon balm, lavender, and other dried flowers.

This method is so easy, just put the herbs or flowers into the ice trays and fill with water.  Put the ice cube trays in the freezer and let sit until completely frozen.  

Herb ice cubes are awesome to add to a pitcher of iced water, lemonade or punch.  Utilize these ice cubes all year round for a fresh and pretty touch to your holiday cocktails and punch!

Freezing Herbs in Oil

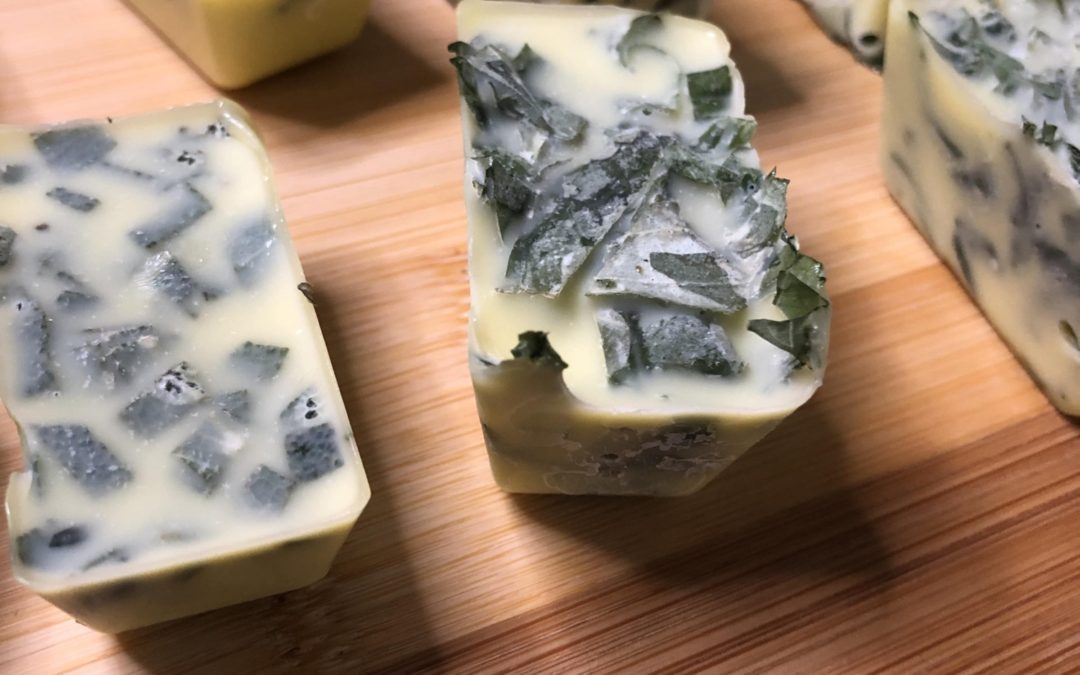
For herbs that you will use in cooking such as you can chop them and freeze in olive oil instead of water! This works wonderfully with herbs like sage, oregano, thyme, and basil.

Measure out 1tsp or 1Tbl of chopped herbs, the measurement for chopped fresh herbs is the same for chopped frozen herbs, and add to ice cube tray.  Fill ice cube trays with olive oil and place in the freezer.  After frozen solid, you can remove from tray and place in freezer bag for long term storage.


Your 1st Step to a Simple Living Lifestyle!

A great place to start with Simple Living is to start making your own cleaning and personal products!

With this FREE eBook, you can easily get started with over 10 quick but effective recipes that use ingredients you already have in your house!

Storing Frozen Herb Cubes

As mentioned above, once herb leaves or herb cubes are frozen completely, you can transfer them to plastic ziplock freezer bags for long term storage.

This option allows you to utilize space in your freezer and to continue using the ice cube trays to make more frozen cubes as your harvest continues!

These cubes should be good for quite a while, up to 12 months which is great for getting fresh herb flavor even in the winter months.

Herb Freezing Method Instructions

Step 1. Harvest the herbs

Harvest herbs from the plant by cutting the stems from the plant.

There are correct ways of pruning your herb plants when harvesting in order to encourage more growth on the plant.  This depends on the plant and depends on if you are done for the year or still plan on harvesting.

Step 2. Wash leaves and pick leaves from the stems.

Rinse the harvested stems and leaves to remove any dirt or bugs. Dry leaves thouroughly and disgard the stems.

This is a great job for little kids!

mint leaves

Step 3. Crush or chop the herb leaves

For herbs in oil, coarsely chop the herb leaves with a sharp knife.

If you are flash freezing the leaves, just place whole leaves on the cookie sheet and place in the freezer.

When prepping mint or lemon balm, you can stick with whole leaves to be frozen in water for drinks.

chopped mint leaves

Step 4. Measure out your desired amount of herbs per cube


The measurement of fresh herbs is the same as frozen herbs.  You can make whatever ratio of herbs to water/oil as you would like, just take note of the herb measurements, 1tsp or 1 Tbl so that when adding to a dish, you know what you are working with.  

Add the chopped herbs to the ice cube trays.

mint leaves in tray

Step 5. Add water or oil to your ice cube trays

Fill each ice cube containing herbs with either water or olive oil.  Make sure that the herbs are submersed as well as possible. 

herbs in oil

Step 6. Place in freezer

Once put together, you can place the ice cube trays or cookie sheet in the freezer.  Allow to freeze for several hours until frozed solid.

Step 7. Remove from freezer and transfer to freezer bags

Once frozen solid, remove from ice cube tray and transfer to freezer bag for long term storage.  Make sure you are using freezer bags and not regular storage bags to make sure that you are not getting freezer burn.

Step 8. Use in cooking all year round

Add olive oil cubes to your cooking when making sauces, sauteing vegetables, roasted vegetables or meats.  Add your ice cubes to punch, lemonade, cocktails any drink that could use an extra bit of pizazz!

There are so many possibilities!

Your 1st Step to a Simple Living Lifestyle!

A great place to start with Simple Living is to start making your own cleaning and personal products!

With this FREE eBook, you can easily get started with over 10 quick but effective recipes that use ingredients you already have in your house!

How to Use Frozen Herb Cubes

Directions

Step 1: Harvest the herb leaves.

Step 2: Wash leaves and remove from stems.

Step 3: Crush or coarsely chop herb leaves.

Step 4: Measure out your desired amount of herbs per cube.

Step 5: Add water or oil to your ice cube trays.

Step 6: Place in freezer.

Step 7. Remove from freezer and transfer to freezer bags.

Step 8. Use in cooking all year round.

Your 1st Step to a Simple Living Lifestyle!

A great place to start with Simple Living is to start making your own cleaning and personal products!

With this FREE eBook, you can easily get started with over 10 quick but effective recipes that use ingredients you already have in your house!

We participate in the Amazon Associates Program. Please assume that all Amazon links are affiliate links. Affiliate links are links to third-party products and services. If you use those links and make a purchase, we will receive a small commission. Using these links will not cost you any extra money. An affiliate relationship does not change or influence the nature of the recommendation or opinion.
Homemade Mint Extract

Homemade Mint Extract

Do you have an abundance of mint?

Mint is one of those plants that while extremely useful and great to grow, can take over other plants due to its ability to grow with little maintenance.

We have always been successful in growing mint, it does really well in most environments.  Even when mint starts to struggle, little adjustments to the amount of sunlight, heat, water, etc can bring it back pretty easily.

For this reason, it is very easy to end up with an abundance of mint in the summer.  Aside from drying or freezing, another great method for preserving mint for use the rest of the year is by making an extract.

mint extract pin

What is an extract?

An extract is a preservation method in which you are soaking your intended harvest in alcohol in order to draw out all of the flavor and beneficial properties of the plant.

While you can buy different extracts at the store, they are also really easy to make at home.  Vanilla and mint are some of the most common variations but you can make an extract with many plants that you harvest.

Why make a mint extract?

Extracts have many uses, particularly in baking and cooking.  Many holiday baking recipes call for mint extract.

You can also use it for cocktails and alcoholic drinks that require a minty flavor.

Mint extract can also be a really nice gift if you package it in a cute jar.

What kind of mint?

You can really use any type of mint you have growing as there are a ton of different varieties.

My favorite is Spearmint but you could always use varieties such as chocolate, lemon, orange, etc.

What type of alcohol?

You can really use any alcohol to perform an extraction but the best would be a clear alcohol such as vodka.

I definitely recommend that you a cheap alcohol for this, especially if you are only using the mint extract for cooking.


Homemade Mint Extract Recipe

Step 1. Harvest the mint

Harvest mint from plant by cutting the stems from the plant.

This is really a great way to preserve your mint leaves.  You can do it in a large batch which will use up a large amount of leaves.

Step 2. Wash leaves and pick leaves from the stems.

Rinse the harvested stems and leaves to remove any dirt or bugs. Dry leaves thouroughly and disgard the stems.
mint leaves

Step 3. Crush or chop the mint leaves

Coarsely chop the mint leaves with a sharp knife. You can even use whole leaves without chopping, just make sure that you crush them to release the mint oils
chopped mint leaves

Step 4. Mix alcohol and mint

Combine your choice of consumable alcohol, preferably a clear alcohol with the chopped mint.  Vodka works best.  This is a great project to use your cheaper alcohol.

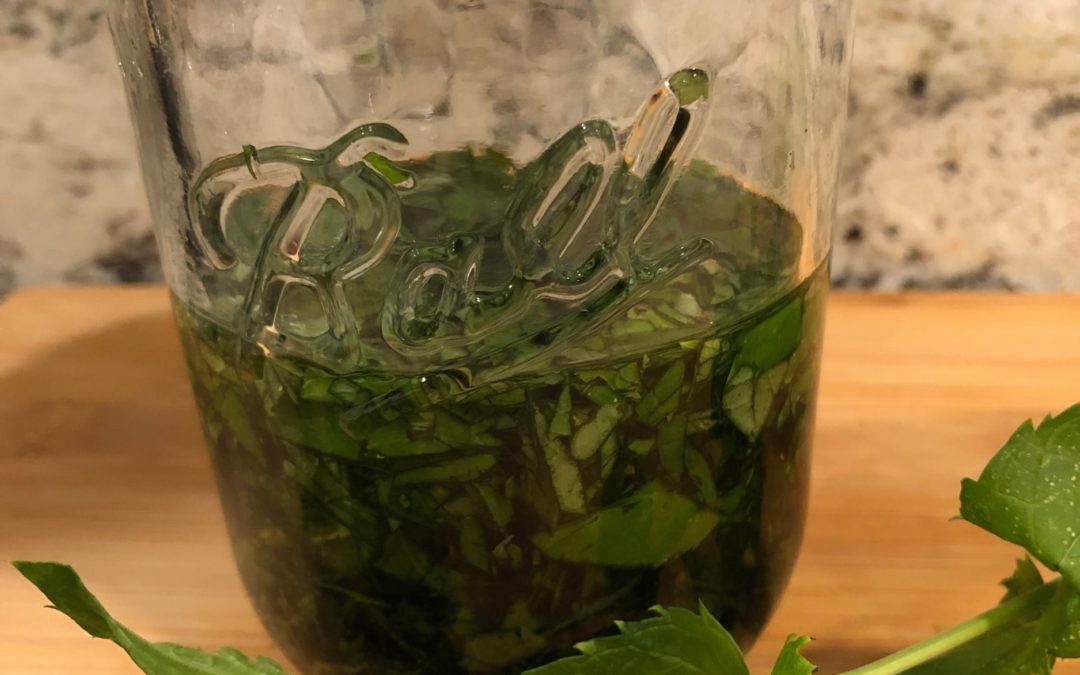
There is not an exact ratio, it will depend on your preference. For the batch in the pictures, I used 1/4 cup mint leaves to 3/4 cups of alcohol.  Consider what volume of extract you need and go from there. Add as much mint as needed for the desired flavor. It may take a few batches to get a flavor that you like.

Just make sure that there is enough alcohol to cover the leaves so that mold does not start growing.


mint extract ingredients

Step 5. Place tightly sealed glass jar in a dark place.

Tightly seal a glass jar or container and store in a dark place for 1-2 months. Taste test after a month to check the flavor.

Step 6. Strain the mint leaves from the alcohol.

Once the desired flavor is achieved, strain the mint leaves from the alcohol.

Store the mint extract in a glass jar and use as needed.  You can also give them away as gifts!

Easy Homemade Mint Extract

Directions

Step 1: Harvest the mint leaves.

Step 2: Wash leaves and remove from stems.

Step 3: Crush or coarsely chop mint leaves.

Step 4: Add mint leaves to alcohol.

Step 5: Place tightly sealed jar in a dark place.

Step 6: Strain out mint leaves and enjoy!

Do you want a simple life? Don’t forget to get your free Simple Living Starter Kit now!

We participate in the Amazon Associates Program. Please assume that all Amazon links are affiliate links. Affiliate links are links to third-party products and services. If you use those links and make a purchase, we will receive a small commission. Using these links will not cost you any extra money. An affiliate relationship does not change or influence the nature of the recommendation or opinion.