Easy Homemade Ant Killer that Works Immediately

Easy Homemade Ant Killer that Works Immediately

It never fails, every year in the late winter, early spring – or February/March, we get ants.  They primarily show up in our kitchen and I hate them.

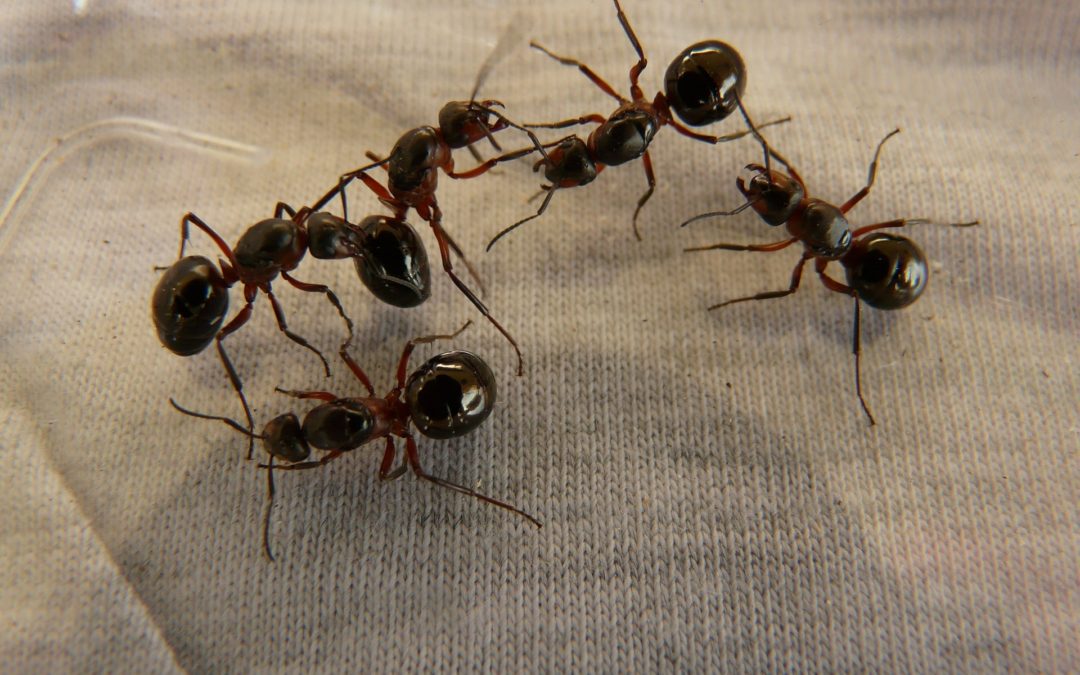
They are the most annoying thing when you are trying to cook.  Dodging the ants when cutting vegetables and having to remember to wipe down counters after doing ANYTHING is just plain annoying!

I really try not to use any toxic chemicals when cleaning my house but when it comes to pest control, I have a hard time resisting the urge to wipe them out with whatever means are necessary.

A few days ago, I had just had it with the ants that had started showing up in my kitchen.  For a few weeks I dealt with them but I just couldn’t take it anymore.

I searched for natural any killer and found a few solutions.

This easy solution worked wonders for me.  A few days later and I have yet to see a single ant.  This beats calling an exterminator any day!

When I first found this solution, I was a little worried about using borax because it can be toxic in large doses.

For this reason, I try not to use it in cleaning solutions and for other purposes that extend to rooms and surfaces that my kids have access to. However, this recipe calls for a small amount and since I will only (hopefully) be using it once a year, it is definitely worth it.

Borax, also known as sodium borate, can be found in cleaners such as laundry detergent boosters.  It can be toxic in very large dosages.

For more information about the safety of borax, this article from Wellness Mama does a good job breaking down the reality of using borax so that you can make the best decision for your house.

Grab the Printable Ant Killer Recipe

This Ant Killer is SO effective, you WILL want to share it with a friend or use it for future outbreaks!

Get the printable version delivered right to your inbox so you don’t have to find it again!

Step 1. Mix together a 3:1 ratio of sugar to borax

I do not like making more than I need and you really don’t need to much. I used 3 tablespoons of sugar to 1 tablespoon of borax.  You can find borax in the grocery story or any at drug store and it is relatively inexpensive.

Step 2. Add a little water at a time to create a paste like consistency.

I did not really measure the water before adding.  I simply added a little at a time until I got a consistency that was paste like but could be soaked up my the cotton balls.

Step 3) Soak Cotton balls in the solution

Step 3: Soak cotton balls in the solution. Make sure they are covered in the paste.  I did four cotton balls so that I could test where the ants were coming from.

Step 4) Place cotton balls on plate or other surface that ants can easily get to.

Place cottonballs on plate or other surface that ants can easily get to.  I place several in different areas of my kitchen counter.  I even put one in my dishwasher because I could swear that was where they were coming from.

Step 5) Determine where the ants are coming from

After maybe a couple of hours, you should start to see the ants swarming.  It is pretty gross but luckily ants pretty much stick to a single file line.  The idea behind this method is that the ants are attracted to the sugar but will take pieces of borax back to the nest and feed to to the others, this should kill the entire nest.

Once the ants start to swarm, it should be pretty easy to determine where they are coming from.

I could have sworn that our ants were coming in from around out dish washer but we could quickly tell that they were actually coming in through a crack in our wood floor.

Step 6) Plug their entryway with cinnamon

I know.. it sounds crazy.  But it really works!

Cinnamon repels ants so if you plug thier entryway with it, they won’t return.

We found that the ants were coming in around trim of a doorway where it meets the floor boards.  I just spinkled some cinamon into those cracks and it worked like magic!

A week later and I haven’t seen a single ant! What a relief, hopefully the results are long term but even as a short term fix, this method really works!

Ultimate Homemade Ant Killer Recipe

Directions

Step 1: Mix together a 3:1 ratio of sugar to borax.

I do not like making more than I need and you really don’t need to much. I used 3 tablespoons of sugar to 1 tablespoon of borax.

Step 2: Add a little water at a time to create a paste like consistency.

Step 3: Soak cottonballs in the solution. Make sure they are covered in the paste.

Step 4: Place cottonballs on plate or other surface that ants can easily get to.  I place several in different areas of my kitchen counter.  I even put one in my dishwasher because I could swear that they were coming in through it.

Step 5: Determine where the ants are coming from.

Step 6: Plug their entryway with cinnamon.

Grab the Printable Ant Killer Recipe

This Ant Killer is SO effective, you WILL want to share it with a friend or use it for future outbreaks!

Get the printable version delivered right to your inbox so you don’t have to find it again!

We participate in the Amazon Associates Program. Please assume that all Amazon links are affiliate links. Affiliate links are links to third-party products and services. If you use those links and make a purchase, we will receive a small commission. Using these links will not cost you any extra money. An affiliate relationship does not change or influence the nature of the recommendation or opinion.
3 Hot Chocolate Recipes for Every Occasion

3 Hot Chocolate Recipes for Every Occasion

If you are anything like me, the winter season basically means “hot drink season”, and for my kids, that means hot chocolate.

We all love hot chocolate in my family and up until recently, that meant stocking up on packaged powdered hot chocolate.  If I am feeling really fancy, I might pick up a more expensive brand than Swiss Miss but that was always our go to.

Since I have really been trying to replace store bought products with from scratch versions, I thought that hot chocolate would be an awesome one to try this winter.


In my hunt for the best hot chocolate recipe, I came across so many!

What I found is that the recipe that you use really depends on how many people you are serving and how much time you have!

I found three awesome hot chocolate recipes that I am sharing with you here.  Regardless of the event or how many people you are serving, I have a recipe for you.

I am sharing a powdered mix to keep on hand, a stovetop version, for a few cups on a special evening, and a slow cooker version to prepare for a larger amount of people just perfect for your holiday party!

Whether you are serving for a large group at a party, or want to make a quick cup for your kids, there is a recipe here!

Enjoy!

1. Powdered Pantry Version

The first recipe that I am sharing is a great recipe to substitute your powdered packaged mix.  With little kids, I do not want to make a large batch of stovetop hot chocolate to only hand out ½ cups of lukewarm chocolate milk.

This recipe is great to mix up at the beginning of the season and have on hand.

I originally found this from scratch recipe over at Little House Living but I feel like it is still a little bitter so you can add gradulated sugar or powdered sugar to each cup to up the sweetness if needed.


  • 1 cup unsweetened Cocoa Powder

  • 2/3 cup sugar

  • 1/2 teaspoon Salt

I doubled the recipe and put it in a Mason Jar for the season. Add 1-2 Tbls to a cup of warm milk and whisk until blended.

While I am not a fan of powdered sugar hot chocolate, sometime it is hard to wisk in without leaving chucks, and it is never really creamy, this recipe definitely serves the purpose of a quick hot chocolate for the kids.

It does help to sift the mix before putting it into the milk, this breaks up the powder and removes large chucks.

Powdered Hot Chocolate

Ingredients

  • 1 cup Unsweetened Cocoa Powder
  • 2/3 cup Sugar
  • 1/2 tsp Salt

Instructions

  1. Mix together ingredients and place in mason jar.

  2. Can stay on self for several months.

  3. Add 1 T to 1 cup of warm milk and wisk.

  4. To prevent clumps, sift the mixture while adding to milk.

Your 1st Step to a Simple Living Lifestyle!


A great place to start with Simple Living is to start making your own cleaning and personal products!

With this FREE eBook, you can easily get started with over 10 quick but effective recipes that use ingredients you already have in your house!

2) Stove top Version

Now if I want to enjoy some hot chocolate, I go for the stove top version.

This recipe is super easy and so good.  If you don’t have heavy cream on hand, you can leave it out but it does give a really great creaminess to the drink.

This is not my original recipe, I found it and have been using it for awhile.  I am not sure where I found it but I did make a few adjustments along the way.

  • 2 cups milk

  • ¼ cup heavy cream

  • 1 cup semi-sweet chocolate chips

  • 1 tsp vanilla

  • Powdered sugar

Bring milk and heavy cream to heat, just under a boil.

Melt chocolate chips in the microwave and add to the heated milk

Wisk until blended

Add vanilla

Add powdered sugar if it needs to be sweetened.

Pour into mugs and enjoy!

Stove Top Hot Cocoa

Servings 4 servings

Ingredients

  • 2 cups Milk
  • 1/4 cup Heavy Cream
  • 1 cup Semi-sweet Chocolate Chips
  • 1 tsp Vanilla extract
  • Powdered sugar

Instructions

  1. Bring milk and heavy cream to heat, just under a boil. Do not let it boil.

  2. Melt chocolate chips in the microwave and add to the heated milk.

  3. Wisk until blended.

  4. Add vanilla extract.

  5. Add powdered sugar if it needs to be sweetened.

Your 1st Step to a Simple Living Lifestyle!


A great place to start with Simple Living is to start making your own cleaning and personal products!

With this FREE eBook, you can easily get started with over 10 quick but effective recipes that use ingredients you already have in your house!

3) Slow Cooker Hot Chocolate

This slow cooker recipe, perfect for a party or large number of people and has been a real hit the time I have made it.


  • 1 1/2 c. semi-sweet chocolate chips

  • 1/4 c. cocoa powder

  • 1/2 c. sugar

  • 1 tsp. vanilla extract

  • 1 c. heavy cream

  • 6 c. whole milk

Put all ingredients in a slow cooker and put on high for the first hour. Stir it occasionally and lower the heat if it is getting too hot.

I kind of had to monitor it a little because low did not allow it to get warm enough but putting in on high was too much after awhile.

Once chocolate is melted and it is warm, serve. Initially, it was just a tad too bitter for my taste so add some powdered sugar until the sweetness is too your liking, not too much though!

Add whipped cream, marshmallows, peppermint schnapps

Can store for a few days in the fridge.

Slow Cooker Hot Chocolate

Cook Time 2 hours

Ingredients

  • 6 Cups Whole milk
  • 1 Cup Heavy Cream
  • 1/2 Cup Sugar
  • 1 1/2 Cup Semi-sweet Chocolate chips
  • 1/4 Cup Cocoa Powder
  • 1 tsp Vanilla extract

Instructions

  1. Put all ingredients in a Slow Cooker and put on high for the first hour.

  2. Stir it occasionally and lower the heat if it is getting too hot.

  3. I had to monitor it a little because low did not allow it to get warm enough but putting in on high was too much after awhile.

  4. Once chocolate is melted and it is warm, about two hours. Serve in mugs.

  5. Initially, it was just a tad too bitter for my taste so add some powdered sugar until the sweetness is too your liking, not too much though!

  6. Add whipped cream, marshmallows, peppermint schnapps, or peppermint sticks.

  7. Can store for a few days in the fridge.

Your 1st Step to a Simple Living Lifestyle!


A great place to start with Simple Living is to start making your own cleaning and personal products!

With this FREE eBook, you can easily get started with over 10 quick but effective recipes that use ingredients you already have in your house!

We participate in the Amazon Associates Program. Please assume that all Amazon links are affiliate links. Affiliate links are links to third-party products and services. If you use those links and make a purchase, we will receive a small commission. Using these links will not cost you any extra money. An affiliate relationship does not change or influence the nature of the recommendation or opinion.
Grow your own Tea with these 7 Herbs

Grow your own Tea with these 7 Herbs

One of my major goals for our homestead is to grow my own tea garden.  Herbs are such wonderful and easy plants to grow.  They are versatile and useful.  For uses such as teas, infused water, essential oils, cooking, first aid, the possibilities are endless!

Learning to grow and use herbs is something that I am currently focusing a lot of my attention.

Growing herbs for use in teas and infused water couldn’t be easier.  Typically harvesting herbs can involve drying the plant and seeping the dried leaves or flowers in hot water.  The part of the plant to be used is dependent on the type of herb and can include flowers, leaves, fruit, or seeds of the herb.  Knowing what part of the herb will be harvested is one of the important aspects to learn.

When you start to grow your own tea, there are several herbs that are great options to start with since they are relatively easy to grow and have a variety of uses.

Grow your own tea with these 7 herbs.

Mint

mint tea

Mint is one of my favorite plants to grow, period.  For one, it is so hearty and easy to grow.  It is pretty impossible to kill, which is great for new gardeners like me.  It grows so easily that when you decide to grow it, you really want to keep it in a container instead of planting it directly into the ground.  Planting it into the ground you run the risk of letting it take over your garden/lawn.

In a healthy plant, the mint is such a deep beautiful green color and it really does put out a really great sweet mint smell to your patio or porch.  To harvest, just pinch off stems and leaves.  Clip back branches as it grows just to maintain shape.

For more information on how to grow meet check out this article by The Spruce: Mint Plant Profile, A Hardy That Only Needs Your Control

It is one of my favorites because I love adding it to a pitcher of water to give some extra flavor.  Mint is the best plant to start with especially when you start to grow your own tea.

There are so many different types of mint to try.  Some examples are; apple mint, lemon mint, pineapple mint, and chocolate mint.  The possibilities are endless!

You can find seeds for planting your own mint at Botanical Interests using the link below:


Common Mint Seeds - $1.89
The aroma of mint will make you close your eyes as your thoughts drift to a summer day. Mint not only enhances iced tea and mixed drinks, it is also a wonderful surprise flavor in savory dishes, including meats, stews, and vegetable fritters. Tiny flowers are loved by bees.

Lavender

lavender tea

Lavender is actually a member of the mint family.  There are so many uses for lavender, infusing for tea is just the beginning!  It is a must have for any gardener and is a staple to grow your own tea.

This is the first year that I am growing lavender and I am so excited!  I can’t wait for it to start flowering.  Lavender will stay around for several years if you prune and water it properly and give it full sun.

Lavender might seem like an odd choice for using in teas but if you take a walk down the tea aisle at the store, you will find many brands offer lavender tea.  Lavender vanilla and lavender lemon are two popular flavors for tea blends.

For more information about growing lavender, Check out this article by Gardener’s Path: How to Grow Lavender in Every Climate.

A few tips for harvesting:

– If you are using it for cooking, choose an English lavender.

– The essential oils in lavender are at the strongest right before the buds of the flower open.  Harvest them at this point for best results.

– You can use both the buds and the leaves in a variety of dishes from cakes, baked chicken, cocktails, and salads.

Lavender Seeds from Botanical Interests:


English Tall/Vera Lavender Seeds - $1.99
This is the tall, old-fashioned, wonderfully fragrant lavender that is an extremely valuable and easy to use household herb, an important ingredient in fragrance sachets and potpourris, an excellent cut and dried flower for arrangements, and a most useful component of innumerable craft projects. Add the flowers to a simple syrup to make craft cocktails/mocktails or lavender lemonade. Bake into bread, cookies, or scones and use to flavor jellies. Perfect for rock gardens, or as a short hedge, and attracts pollinators.

Dreaming of Having a Vegetable Garden this year?

Grab the Your Dream Vegetable Garden Plan for FREE to get you started today!  Start growing your groceries this year!

Chamomile

chamomile tea

Chamomile is such a beautiful plant. It is so simple and dainty but has so many holistic properties, it is a must have for your functional tea garden.

There are two types of chamomile, Roman Chamomile, a spreading ground cover, and German Chamomile, a small daisy-like flower that is commonly harvested to use in making tea.  Chamomile is a relatively easy to grow plant, it does well in either full sun or partial sun.  It is not super picky about soil quality or pH so it is a plant that can be planted easily directly in the ground or in a pot.

Chamomile is also an awesome garden pest deterrent.

Harvest chamomile when petals are lying flat and are slightly bending down from the center.  Harvest by clipping the flower heads from the stems.  Lay out to dry or use a dehydrator to dry out the flowers.  Keep dried flowers in an air tight jar. When making tea, seep dried flowers in boiling water.

For some additional information on making Chamomile Tea, check out this article by Cup & Leaf: Chamomile Tea Benefits for Skin, Hair, Sleep and More

Chamomile Seeds from Botanical Interests:


German Chamomile Seeds - $1.89
What could be more soothing than curling up at bedtime with a good book and a cup of chamomile tea made from flowers fresh from your garden? The flowers can also be dried for floral arrangements, pressed for crafts, or woven into charming wreaths, and their edible petals can be tossed into salads. In the garden, chamomile attracts beneficial insects and pollinators.

Lemon Balm

lemon balm tea

Lemon balm is part of the mint family, in fact it looks very similar.  To me, the only way to tell the difference is to smell it.  The scent of lemon balm is refreshing and light.  Adding lemon balm to tea has a similar effect as adding lemon juice.

Similar to mint, it is a very easy plant to grow and should be planted in a pot or in a boxed off  area of a garden bed because it will grow and easily take over your garden.  It is a must for growing your own tea.

Harvesting the leaves and crushing them or seeping them in water is the most common way to use them in drinks.

Lemon Balm seeds from Botanical Interests:


Lemon Balm Seeds - $1.99
Due to its beauty and fragrance, the medieval Frankish king, Charlemagne, had lemon balm planted in every monastery garden. Add to tea, use as a cooking herb to impart lemony flavor, or enjoy its aromatherapeutic qualities in a relaxing bath. Used by herbalists for insomnia and to soothe upset stomachs. A good container variety.

Ginger

ginger root tea

One of my favorite ingredients for tea is ginger.  Ginger provides a spicy flavor for any dish or drink.  A flavor staple for Asian cuisine, it also used in many herbal remedies and anti-inflammatory properties to help treat certain ailments.  It is known for its health benefits for the treatment of nausea, indigestion, and high cholesterol levels, and infections.

When using ginger for culinary purposes, you will want to harvest the root of the plant.  The root can then be ground up or grated to use in tea blends.

For more information on the many uses of ginger root check out this article by Wellness Mama: 10+ Ways to Use Ginger (& Get Its Amazing Benefits)

I am planning to add some ginger to my tea garden, there are so many possibilities! Plus, I really hate having to think about having fresh ginger on hand, I never have it when I need it and I always forget to add it to my grocery list when I need it for a dish.

Dreaming of Having a Vegetable Garden this year?

Grab the Your Dream Vegetable Garden Plan for FREE to get you started today!  Start growing your groceries this year!

Calendula

calendula tea

Calendula is a plant that has really risen in popularity lately.  I actually had never heard of it until a few months ago.  Since then, the topic of growing and using calendula has been pretty prevalent.

After doing some of my own research, I found that there were SO many benefits and uses for calendula that I decided I had to purchase a plant to have in my garden.   I looked in several local garden stores and after no luck, I hopped onto Botanical Interests and placed an order.

Some of the uses of calendula are pest control, attracts good insects, and health benefits. 

For some more information on the benefits and uses of calendula, check out this article by The Free Range Life: Calendula: 30 Amazing Benefits and Uses

When making tea, the flower of calendula would be harvested similar to chamomile.  Calendula tea is made by drying the flowers and seeping them in boiling water.

Calendula seeds from Botanical Interests:


Pacific Beauty Blend Calendula (Pot Marigold) Seeds - $1.89
The calendula, an old, English-cottage-garden flower is a long-blooming addition to any modern garden. Its gold and orange flowers bloom from spring to fall on fairly drought- and heat-tolerant plants. Grow it for attracting pollinators and its sunny beauty in the garden, then save some blooms for fresh or dried floral arrangements; dried petals can be used in baking or teas. Calendula gets its common name, pot marigold, because the flower resembles a marigold, and has often been used in pots of soup or stew for both color and flavor.

Rose Hips

rose hip tea

Rose Hips are basically the fruits of a rose plant. They usually can be found at the end of the season, after the roses are done blooming.  At this point, the plant will produce a fruit which is often overlooked.

Harvesting these fruits allows for a variety of uses.  Jams, jellies, wines, and teas are just the beginning of the possibilities of using rose hips in the kitchen. 

While rose bushes are a little more difficult to plant and maintainace than your ordinary herb, they make a wonderful addition when you are looking to grow your own tea.

Tea Garden FAQS

How do you dry herbs for tea?

Drying herbs and flowers are one of the easiest food preservation means.  I use this method frequently as it doesn’t require a ton of special equipment to do.

You can purchase a dehydrator for pretty cheap and that will help you cut down your drying time immensely, but you can really just hang your plants for a few weeks and allow them to dry.  

Depending on the flower or herb, you may remove the leaves or petals in a different manner but the overall process is the same.

Where to buy tea plants or seeds?

There are many option for seeds when you are trying to grow your own tea.  My favorite place to buy seeds of any kind is Botanical Interests. 

They have a huge collection of plants, everything from vegetables to flowers to herbs.  Thier wide variety has a wonderful collection of organic seeds.  They are also a really great resource for other garden products and resources and growing guides.

Dreaming of Having a Vegetable Garden this year?

Grab the Your Dream Vegetable Garden Plan for FREE to get you started today!  Start growing your groceries this year!

Love tea? Check out our article all about hot toddies: 7 Cozy Hot Toddy Recipes to Enjoy This Winter

You can also get inspiration from my favorite little tea merchant: Farmhouse Teas.  My absolutely favorite is the Peppermint Patty Mint. 

We participate in the Amazon Associates Program. Please assume that all Amazon links are affiliate links. Affiliate links are links to third-party products and services. If you use those links and make a purchase, we will receive a small commission. Using these links will not cost you any extra money. An affiliate relationship does not change or influence the nature of the recommendation or opinion.
Beautiful Holiday Decor Ideas From Your Backyard

Beautiful Holiday Decor Ideas From Your Backyard

It is Christmas time! My FAVORITE time of the year.

Since this is the first year that we are really focusing on our homesteading lifestyle, I thought it would be great to look at what we can find in our backyard to use for decorations.

We have a section of evergreens and we actually have a few different varieties of bushes and trees that we could experiment with.

Why purchase expensive evergreen wreaths and garland when you can so easily make them at home?

They create such a cozy and inviting atmosphere, and they smell amazing!

This is the first year we are doing this, so we are experimenting with several different natural materials.

These materials were either found for free in our backyard or are seasonal fruit that we were already purchasing at low prices at the grocery store.

These materials include:

  • oranges
  • cranberries
  • evergreens

What I found so interesting about these natural decorations, is that they really bring an old-fashioned, vintage feel to your decor. Also, while they are so simple and easy to put together, they are also so elegant and classic.

Your 1st Step to a Simple Living Lifestyle!


A great place to start with Simple Living is to start making your own cleaning and personal products!

With this FREE eBook, you can easily get started with over 10 quick but effective recipes that use ingredients you already have in your house!

Oranges and Boxwood Centerpieces

I have these two bushes that line a small set of steps that we use daily when walking too and from our cars.  I never noticed them much and I think we have only trimmed them back once or twice.  In preparation for this post, I did some research and surveyed our property for any evergreen trees or bushes that could be used.

These two bushes are known as “Boxwoods” and are commonly used in holiday decor arrangements, centerpieces, and wreaths.  After some quick trimming (killing two birds with one stone!)  I brought some cuttings inside.  Boxwood is great for this type of project because the braches don’t really wilt.  Instead, after about a week they will dry out and get brittle but for the most part look fresh for some time.

Who would have thought that I have one of the most common plants used in decorations right outside my back door!

Oranges are in season around the holidays and have always been a staple in natural decor.  Add the bright orange color to the deep, fresh green of the boxwoods and you have a cheery, vintage, and cozy centerpiece.

If you want to get really fancy with your oranges, pop some whole cloves into the oranges in various patterns.  Not only does this combination smell amazing, but it also looks classy.

I only had a cranberry colored tablecloth but I think that a deep forest green one would be really beautiful against the milk glass!

Cranberries and Juniper Centerpiece

I don’t have a cranberry bush on my property but you can easily find bags of whole cranberries at the grocery store.

For this centerpiece, I reused a glass jar from a Yankee Candle and filled it with whole cranberries.  Add some water and a floating candle and you have an elegant centerpiece.  The aroma that the cranberries have when floating in water is so festive.

Juniper and I have a love-hate relationship. I have so much of it in our backyard and I HATE weeding it.  I keep saying that I am going to rip it all out so, in the meantime, I will try to enjoy it!

I actually like using it in decorating so I will probably leave at least one bush for that purpose.

Juniper also has a strong pine/evergreen smell to it.  Be careful trimming and arranging juniper branches because they are very sharp and prickly.

I really do love the silver/green tints of the needles, coupled with the colors of the cranberry, this combination really does make for a beautiful centerpiece.

Dried Oranges

I never really thought about orange slices before but while I was researching for decorating ideas, images of them kept popping up.  I realized that they are actually a common decor for an old-fashioned, Victorian Christmas.

They are also really easy to make.

Here is step by step instructions on how we made ours:

  1. Cut Oranges into 1/4 inch slices
  2. Preheat oven to 180 degrees
  3. Line baking sheet with parchment paper
  4. Lay out orange slices flat on a tray
  5. Bake orange slices for 2.5 hours and then flip slices
  6. Bake for another 2 hours
  7. Timing might vary depending on the thickness of orange slices

This worked great for us, and they smell amazing when baking!  However, even after 4.5 hours of baking, there was still some moisture left in the slices.  I pulled them out because they were starting to brown.  Give them an extra day to lay out and they will be ready to use!

Once ready, I just took some embroidery thread that I had easily accessible and strung the slices together in a garland.  If I had any extra cranberries on hand I would have included them in the garland as well.  I then put the garland on our tree but it would look great alongside any greenery that you have in your Christmas decor.

The result is a vintage looking garland that you made yourself with natural ingredients!

I had some extra slices so I made some individual ornaments by adding some star annis.  I thought they turned out very nicely!

They will also last for quite awhile.  Try it for yourself!

Simple Red, White and Evergreen

Sometimes I just really love some classic red, green, and white decor for the holidays.

We were originally going to use some of the branches that we trimmed off of our Christmas tree, but I did not put this together in enough time and they were not as fresh as I would have liked.  In the future, I will try to save those branches for decorations.

The evergreen in these pictures come from what is called a “Weeping Norway Spruce”.  It is a strange tree and I really cannot decide if I like it.  It “weeps” over so that the branches are leaning towards the ground.  It has beautiful, vibrant green branches and really nice sized pinecones.  It is ugly and beautiful at the same time and I have come to appreciate that!  It certainly is an interesting tree.  The Missouri Botanical Garden has some of the best information on this type of tree that I have found.

Any spruce or evergreen would be great for these types of centerpieces. Working with small pieces will make it easier to arrange and get the look that you desire.

Additional Natural Decor Ideas

While the ideas for natural decorations are endless, a few great ones that you could use today are;

  • Pinecones
  • Branches
  • Leaves
  • Holly and other berry bushes

I really wanted to incorporate some pinecones into the decor this year, but I had a difficult time finding any quality ones to use.  I think that next year, I will start trying to forage for them earlier.

I do not have a holly bush on our property.  How awesome would it be to have a holly bush accessible for cuttings?!

However, as much as my boys love berries of all kinds, incorporating them in the decorations would probably have to wait until they are older.  With that said, I might try to plant a holly bush next year so that it can have time to grow for when we do want to use it.

The possibilities are really endless! Go check out your backyard to see what kinds of materials you can incorporate into your decor this year.

Merry Christmas and Happy Holidays from the Leaf Family!

Your 1st Step to a Simple Living Lifestyle!


A great place to start with Simple Living is to start making your own cleaning and personal products!

With this FREE eBook, you can easily get started with over 10 quick but effective recipes that use ingredients you already have in your house!

We participate in the Amazon Associates Program. Please assume that all Amazon links are affiliate links. Affiliate links are links to third-party products and services. If you use those links and make a purchase, we will receive a small commission. Using these links will not cost you any extra money. An affiliate relationship does not change or influence the nature of the recommendation or opinion.
7 Cozy Hot Toddy Recipes to Enjoy This Winter

7 Cozy Hot Toddy Recipes to Enjoy This Winter

Like many of you, I drink several cups of coffee a day.  I don’t typically drink hot tea, however when the weather starts to get chilly (here in Maryland that is around the end of September) you really can’t beat an awesome cup of hot tea.

A Hot Toddy to be exact.

A Hot Toddy is traditionally a hot drink of honey and herbs mixed with liquor such as scotch, bourbon, or whiskey. An evening Hot Toddy  is one of my favorite things about fall and winter.

My go to for a long time has always Celestial’s Sleepytime tea with some sugar or honey and a shot of bourbon. It is an awesome nightcap. However, after discovering that the main ingredient, Chamomile, is a natural blood thinner,  I decided to try some alternative recipes to change it up a bit.

One of my FAVORITE Companies to buy looseleaf tea from is Farmhouse Teas.

Read on for some awesome hot toddy recipes to make your fall/winter cozy and warm!


Your 1st Step to a Simple Living Lifestyle!


A great place to start with Simple Living is to start making your own cleaning and personal products!

With this FREE eBook, you can easily get started with over 10 quick but effective recipes that use ingredients you already have in your house!

1) Hot Cinnamon Chai

Cinnamon Chai tea truely encompasses the essence of fall for me. It is just the perfect fall drink, alcohol or not.

Don’t forget to add the milk! It is a chai tea if it isn’t brewed with both hot water and hot milk.

Let me know what you think!

 Hot Cinnamon Chai

Ingredients

  • 12 oz Hot Water
  • 2 Twinings Chai tea bags
  • 2 tbsp sugar
  • 1 splash milk
  • 1 oz Cinnamon Liquor We used Fireball

Instructions

  1. Add boiling water to a mug.

  2. Seep tea bags in hot water according to directions.

  3. Add sugar, liquor, and milk.

  4. Garnish with star anise and cinnamon sticks.

Click image above to check it out on Amazon

2) Traditional Hot Toddy

Traditionally used as a cold remedy, I was a little skeptical because it is essentially hot watered down bourbon, which isn’t too appealing.

However, with the lemon and honey, it really transforms into an soothing and refreshing hot drink.

I could see it working wonders for a cold.

Give it a try!

Traditional Hot Toddy

Servings 1

Ingredients

  • 12 oz Hot water
  • 1 1/2 oz Bourbon We used Jim Beam
  • 1 tbsp honey
  • 1 lemon slice
  • 4 drops lemon juice

Instructions

  1. Add boiling water to a mug.

  2. Add bourbon

  3. Add honey, lemon slice, and lemon juice

3) Refreshing Mint

I expected not to like this one. I was worried that it would be too minty but it was DELICIOUS. The perfect amount of sweet mint, not harsh mint flavor.

I DEFINITELY recommend. In fact, this has become a regular for me. Hope you enjoy!

Refreshing Mint Hot Toddy

Ingredients

  • 12 oz Hot water
  • 1 Bigelow Mint Medley tea bag
  • 1 1/2 oz Peppermint Schnapps We used Leroux Peppermint Schnapps
  • 2 tsp sugar

Instructions

  1. Add boiling water to a mug.

  2. Seep tea bag in boiling water according to directions.

  3. Add Peppermint Schnapps and sugar.

Click image above to find Bigelow Mint Medley Tea on Amazon

4) Soothing Night Cap

This is my original go-to recipe and one that I still have quite often.  It is soothing, relaxing and sweet.  It really adds a cozy feel to your evening.

Soothing Night Cap Hot Toddy

Ingredients

  • 12 oz Hot water
  • 1 Bigelow Sweet Dreams tea bag
  • 1 oz Honey Irish Mist
  • 2 tsp sugar

Instructions

  1. Add boiling water to a mug

  2. Seep tea bag in boiling water according to instructions.

  3. Add Honey Irish Mist and sugar.

Click image above to find Celestial Sleepytime Tea on Amazon

Your 1st Step to a Simple Living Lifestyle!


A great place to start with Simple Living is to start making your own cleaning and personal products!

With this FREE eBook, you can easily get started with over 10 quick but effective recipes that use ingredients you already have in your house!

5) Egyptian Licorice

I really did not know what to expect with this one. I hear “licorice” and I am it to taste like black jelly beans. This did not! It was surprising sweet with a little bite but very pleasant!

Let me know what you think!

 Egyptian Licorice Hot Toddy

Ingredients

  • 12 oz Boiling water
  • 1 Yogi Egyptian Licorice tea bag
  • 2 tsp honey
  • 1 oz Jim Bean Bourbon

Instructions

  1. Add boiling water to a mug.

  2. Seep tea bag in boiling water according to instructions.

  3. Add honey and bourbon.

Click image above to find Yogi Egyptian Licorice Tea on Amazon

6) Lemon Lavender Hot Toddy

While I love the smell of lavender, I don’t know if I have ever TASTED it. I wasn’t sure how this one would go but I was pleasantly surprised.

It has a refreshing, floral scent as you would expect and was really quite nice.

The Disaronno is sweet on its own, so you do not need to add additional sweetener.

Try the recipe!

Lemon Lavender Hot Toddy

Ingredients

  • 10 oz Hot water
  • 1 Celestial Lemon Lavender Lane tea bag
  • 1 oz Ameretto Liqueur (Disaronno)

Instructions

  1. Add boiling water to a mug.

  2. Seep tea bag in boiling water according to instructions.

  3. Add Disaronno.

  4. Stir thoroughly.

Click image above to find Celestial Lemon Lavender Lane Tea on Amazon

7) Spicy Ginger Hot Toddy

Wow, I really enjoyed this one!

It was spicy, but not HOT spicy.

The ginger in this tea is flavorful and adding some cinnamon whiskey creates another layer of spice.

This recipe will become a regular evening treat.

Give it a try!

Spicy Ginger Hot Toddy

Ingredients

  • 10 oz Hot water
  • 1 Yogi Ginger tea bag
  • 1 oz Cinnamon Whiskey We used Fireball.
  • 2 tsp honey

Instructions

  1. Add boiling water to a mug.

  2. Seep tea bag in hot water according to instructions.

  3. Add Cinnamon Whiskey and honey.

Click image above to find Yogi Ginger Tea on Amazon

Your 1st Step to a Simple Living Lifestyle!


A great place to start with Simple Living is to start making your own cleaning and personal products!

With this FREE eBook, you can easily get started with over 10 quick but effective recipes that use ingredients you already have in your house!

We participate in the Amazon Associates Program. Please assume that all Amazon links are affiliate links. Affiliate links are links to third-party products and services. If you use those links and make a purchase, we will receive a small commission. Using these links will not cost you any extra money. An affiliate relationship does not change or influence the nature of the recommendation or opinion.
Gardening with small children: 6 tips to be successful

Gardening with small children: 6 tips to be successful

Gardens are hard work and are time-consuming.  Add a few small children to the mix and you might find that you haven’t had time to look at your garden in days.  If you work full-time the weekends are used to catchup on all of the gardening work you didn’t get to during the week.  Sometimes having kids involved can make a project last forever, however it is so worth it. I have definitely struggled with it tending to a garden with two kids under 3. However, the skills they learn and the memories they build is definitely worth the craziness.

While gardening with children may be a little more difficult, there are so many wonderful reasons why to pursue it and make it apart of your while family’s life.  Let me share a few tips that have helped me survive the chaos and still be productive in the garden.

Dreaming of Having a Vegetable Garden this year?

Grab the Your Dream Vegetable Garden Plan for FREE to get you started today!  Start growing your groceries this year!

1. Plan your garden as close to the house as possible.

Just being able to observe what is happening once a day can be really helpful.  Being able to pass by the garden daily on your way to the car or being able to sneak out really quickly for 5 minutes can make all the difference.  A lot of the problems come from not seeing an issue develop early on and having to play catch up as a result.  This recently happened to me with our broccoli plants.  I didn’t notice that we had cabbage worms for a few days and once I finally observed the damage they had caused it was too late.  Those cabbage worms are fast!

2. Fence in your garden.

Pest prevention is a major way that you can be proactive in the care of your garden.  Although many insect pests will still be able to access your garden, other highly destructive animals such as deer and rabbits will not.  Deer can cause so much damage because of the number of plants they will eat in one visit, as well as, the damage they do due to trampling.

One night of deer activity can result in entire plants being eaten to the ground.  This happened to us with our pepper plants.  Right before they started producing fruit, the deer came and ate them to the ground.  A simple fence will prevent these major headaches.

Gardening with children can be difficult, that is why automating tasks or finding ways to make some aspects easier for yourself is so important.  Taking the time to build a fence will provide you with so much piece of mind in the long term.

garden fence

3. Let them explore the garden

Next time you are outside working in the garden, bring your small walking children with you.  Not only is this a wonderful outdoor activity, but it also allows them to be exposed to and observe what you are doing in the garden.  This is another reason why a fence around your garden will really save you some time and headache. 

If your kids are beyond the age where they are constantly putting things in their mouth then they should be pretty safe to let roam and explore the garden if there is a fence in place.  Having an eye on them inside the garden but allowing them to explore will give you some time to address any minor issues and maintenance.

Dreaming of Having a Vegetable Garden this year?

Grab the Your Dream Vegetable Garden Plan for FREE to get you started today!  Start growing your groceries this year!

4. Plan a place for the kids to play outside.

When planning where the garden will be, also plan somewhere safe that you can have the children while you spend some time gardening.  Is there a small area that you can fence in or place a play yard that is visible from your garden?  Or somewhere shady where you can set up a pack and play or play yard? Even if you have really small children or babies, bringing them outside with you while you garden is always beneficial.  We use this play yard for my oldest:

Click image above to check it out on Amazon.

For our youngest, we used this one because it is so easy to put up and it doesn’t let them have access to the ground.  Not having access to the ground is important when they are still putting things in thier mouth.  I love using this for babies and small toddlers, plus they come with a shade attachment so you can make sure they are not directly in the sun. 

Click image above to check it out on Amazon.

These truly  have been a lifesaver for outside gardening with children.

5. Give them a task

Small children love to be involved in tending to the garden.  My two year old loves going out with me to pick tomatoes (although sometimes he gets carried away and only picks the greens ones).  Having them look for pests, pick fruit, pull out rocks, etc. is a great way to indoctrinate them into the gardening work at an early age.  The task doesn’t even have to be purposeful, just something that will keep thier little minds and hands busy.  

Another reason I love gardening with children is that there really is a task for everyone at any age.  You can use it as a way to encourage and reward children as they grow. For example, once they master a certain task, they can get to use a small trowel or rake or some other type of age-appropriate tool.  Older kids can be given more responsibilities as thier skills and knowledge progress. 

child watering garden

6. Garden at nap time or right after bedtime

Afternoon naps are essential to getting things done when you have small children.  Once they fall asleep, make the most of your time and spend it doing tasks that require full attention.  This is another reason why you want to plant your garden as close to the house as possible.  Make sure the monitor signal will reach you while you are in the garden and that you are close enough to the house that you feel comfortable gardening while they are napping.  If the garden is too far from the house, you will not want to spend your precious nap time in the garden.  Also, summer time means longer days, which will hopefully provide you with some extra time right after you put them down for bed.  This will afford you some daily time in the garden to make sure that everything is going smoothly.


Gardening with small children is definitely difficult but being able to use the fresh homegrown produce in your family’s meals is so awesome.  Teaching your children gardening skills will encourage hard work, patience, resiliency, and problem-solving.  Sharing the love of gardening with your children will provide your family with precious memories and knowledge and appreciation for where their food comes from. Start gardening with your children from the very beginning!

Check out the podcast episode all about Gardening with Children. You can listen to it below!

Dreaming of Having a Vegetable Garden this year?

Grab the Your Dream Vegetable Garden Plan for FREE to get you started today!  Start growing your groceries this year!

We participate in the Amazon Associates Program. Please assume that all Amazon links are affiliate links. Affiliate links are links to third-party products and services. If you use those links and make a purchase, we will receive a small commission. Using these links will not cost you any extra money. An affiliate relationship does not change or influence the nature of the recommendation or opinion.