7 Easy Steps for Homemade Apple Cider Vinegar

7 Easy Steps for Homemade Apple Cider Vinegar

Making vinegar is not something that I have ever really thought about doing.  If you had asked me before how to make vinegar, I really wouldn’t have known where to start.  However, I have recently learned how to make it and it seemed so easy so I thought I would give it a shot!

This is the first time I am going to attempt to make it so we will see how it goes!

A little science lesson


Vinegar can be made in two ways.

1) The first way is done by taking an alcohol such as wine, beer, or cider and fermenting it with bacteria. The product of this reaction is vinegar.

2) The second way is done by making the alcohol with fruit scrapes first and then turning that alcohol into vinegar by fermenting it with a bacteria.

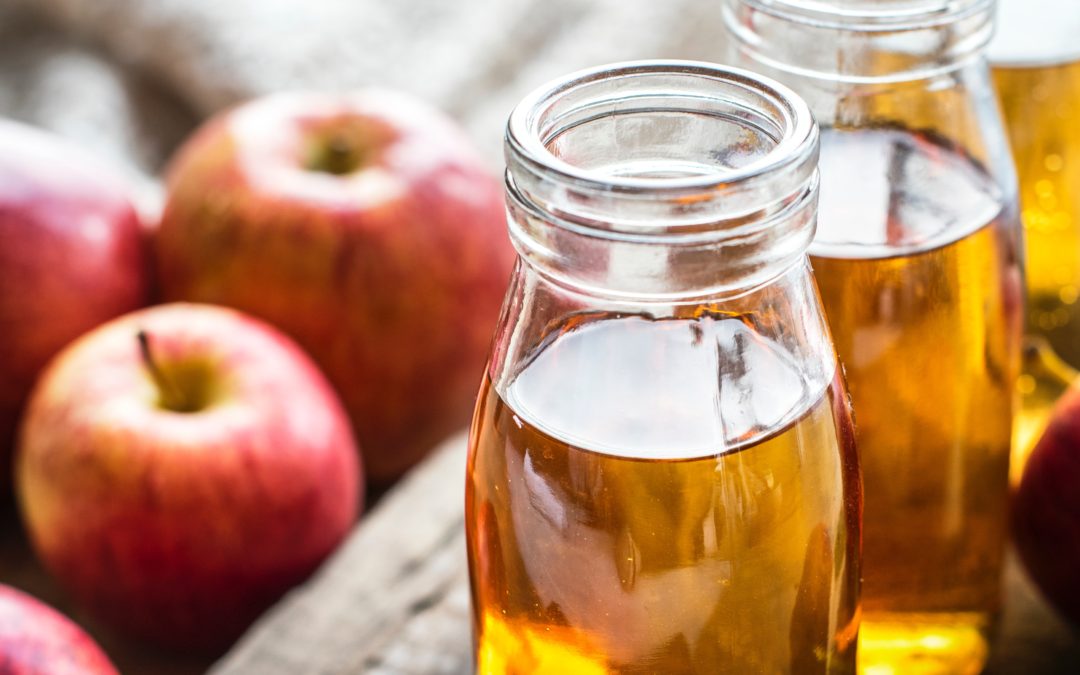
While I am using the first process this time, I definitely plan on making vinegar starting with fruit scraps at some point.  For my first attempt at making vinegar, I chose to use an old apple cider beer that has been sitting in my fridge for about 2 years.  Sounds like a great way to use something that I would normally throw away (and should have thrown away a long time ago) into something useful!

Once you have chosen your alcohol, you will need to have it undergo a process called fermenting.  In order to ferment it, you need a bacteria culture that will do the work.  This bacteria is often referred to as  scobys or symbiotic cultures of bacteria and yeast.  When the scoby is added,  it will work to eat the sugars in the alcohol. It then produces carbon dioxide and acetic acid. What you end up with as a  final product is a vinegar.

A scoby is also referred to as a mother.  It is called a mother because once you have grown a scoby, you will continue to use it as you make batch after batch of vinegar. The scoby becomes a mother that you use to produce more vinegar. I find this concept so interesting because as a mother grows, it becomes more and more active.  Apparently the older and more used a mother is, the better!

In the old times, an established mother of vinegar was considered a kitchen essential.  Women would pass down their vinegar mothers to their children and grandchildren and they would be treated as treasured heirlooms.  I love that idea! I am going to start my mother now and by the time my children are out of the house, they will have a vinegar mother of epic proportions to take with them. I am only half joking, however, I do think that it is a very sweet tradition and I wish it was still around today.

Let’s talk about this scoby thing.  It looks like a gross jellified alien floating in your bottle. If I didn’t know better I would think it was moldy and throw the whole bottle out.

There are really only a few materials that will be needed to make a batch of vinegar.

Materials:

1) Alcohol (We used apple cider ale, 2 years past expiration)

Red/White wine – Red/White wine vinegar

Beer – Malt vinegar

2)  Vinegar with mother (established scoby)  I purchased this at the grocery store

3) Mason jars

4) Paper towel or cheesecloth

5) pH strips

Step 1) Pour old alcohol into mason jar

Put some of the old alcohol into mason jar with a little bit of water.  I could not find a specific measurement for the amount of water to add so I added 2 tblspoons of water to a 12 oz beer.

I also testing the beer/water  with the pH strips to determine what our starting pH was. It was 3.0.

Step 2) Remove mother from store bought Vinegar

I bought the vinegar with mother from a local grocery store.  The vinegar bottle had a very small mouth and I was not able to remove the mother directly from the bottle.  I decided to pour the vinegar into another mason jar so that I could easily remove the mother.

We also took the pH of the vinegar to see what that was at. It was a 3.5

Step 3) Cover mason jar with paper towel or cheesecloth.

You want to cover the mason jar with either a paper towl or cheesecloth so that dirt and dust will not get into the vinegar, but oxygen can still get to the mixture.

Step 4) Place jar in pantry or somewhere out of direct sunlight.

I chose to put the jar on a shelf in our pantry.  It is dark but it is not hidden away in a place where I will forget.  You will be checking it every so often so you want it accessible.

Step 5) Let scoby do the work!

You will want to leave the jar in your dark spot for a period of time. It could be 1 month or it could be 3 months before it is ready. The only time you want to open the vinegar is to change out the paper towel when necessary.

Step 6) Test for pH periodically to see if it is ready.

How do you know when it is ready?  There are a few signs that the scoby is busy working.

– You should be seeing bubbles in the jar and the liquid should turn cloudy.

– It should smell like vinegar.

– A pH test should be at a 3.0  and no more than 4.0.

Step 7) Stabilize vinegar by boiling

Your next steps will depend on how you plan to use the vinegar.  Raw or active vinegar is unstable and will continue to ferment.  If you are planning to keep the vinegar raw, you should store it in the refrigerator so that it will keep the bacteria alive but will slow down the fermenting process.  If you are planning on giving the vinegar as gift or store in the pantry, you should stabilize (pasteurize) it so that the fermenting process is halted.  If you try to store unstable vinegar, it can continue to produce carbon dioxide which could burst the lid off of the bottle if not packaged properly.

In order to stabilize it, you should first separate out about a 1/2 cup of vinegar with the mother and put it in a glass jar with a clamp top. You want to make sure this is stored properly.

– Start with a stainless steel stock pot.  Do not use aluminum.

– Bring the vinegar to a temperature of 185 degrees

– Hold the vinegar at that temperature for 10 – 15 minutes.

– Turn off the heat and let it cool down.

– Transfer to the desired storage container.

It is recommended to avoid using any homemade vinegar if your canning process, especially if you are just learning and starting out. If your vinegar is too unstable, it can really cause problems if it is used in your food preservation.  Preserving food through the canning process can be tricky enough and adding another unstable element can be unpredicatable.

Our Next Steps

We are in the waiting stage with our vinegar.  I plan to monitor the vinegar pretty regularly by observing the jar and making sure that bubbles are forming.  In one month, I plan to pH test the vinegar and see where we are.  Stay tuned for an update and some great tips, gift idea, and recipes on all using that awesome homemade vinegar!

We participate in the Amazon Associates Program. Please assume that all Amazon links are affiliate links. Affiliate links are links to third-party products and services. If you use those links and make a purchase, we will receive a small commission. Using these links will not cost you any extra money. An affiliate relationship does not change or influence the nature of the recommendation or opinion.
7 Kid Friendly Ways To Use Your Zucchini Surplus

7 Kid Friendly Ways To Use Your Zucchini Surplus

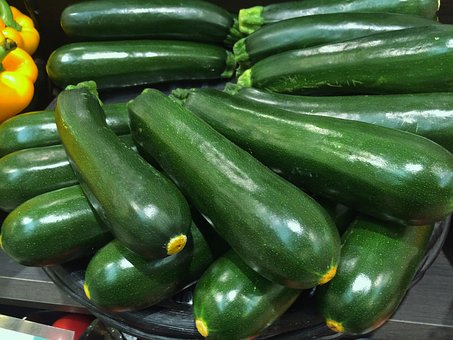
Zucchini is one of my family’s favorite plants to grow.  In my experience, growing zucchini has been very easy because the plant is so resilient and prolific.  Having a zucchini plant that produces several zucchinis a week is awesome!  However, if you are like me, grilled zucchini every night will get tiresome and the kids will quickly protest.  It is hard to use all of them especially if the kids won’t eat them. Here are some kid-friendly ways to enjoy your surplus of zucchinis:

Baked Zucchini Fries

So awesome!  A great way to get kids to eat their zucchini.  Recipe here:

Baked Zucchini Fries

Prep Time 10 minutes
Cook Time 25 minutes
Total Time 35 minutes

Ingredients

  • 3 zucchini halved and cut into 1/2 in. strips
  • 2 eggs beaten
  • 3/4 cups Italian seasoned breadcrumbs
  • 1/4 cups grated Parmesan cheese
  • 1/4 tsp seasoned salt

Instructions

  1. Preheat oven to 425 degrees

  2. Combine Parmesan cheese, breadcrumbs, and salt together in a bowl

  3. Dip zucchini strips into egg, shake to remove excess, roll strips into breadcrumb mixture.

  4. Place strips onto cookie sheet lined with aluminum foil

  5. Bake at 425 degrees on cookie sheet lined with aluminum foil for 20-24 minutes, turning once.

Zucchini Boats

Such an easy side to any meal.  For a complete meal idea check out this recipe:

Zucchini Boats

Prep Time 10 minutes
Cook Time 30 minutes
Total Time 40 minutes
Servings 4 people

Ingredients

  • 2 medium zucchinis cut lengthwise
  • 1/2 cup pizza sauce
  • 1 cup shredded mozzarella cheese
  • 1 lb cooked meat, ground beef, ground sausage, ground turkey,or pepperoni your preference

Instructions

  1. Preheat oven to 350 degrees F.

  2. Scoop out zucchini insides with a teaspoon. Put zucchini shells aside.

  3. Add olive oil to a pan and saute zucchini pulp until tender, about 8 minutes over medium heat.

  4. Add pizza sauce to the pan, combine with zucchini and heat through.

  5. Add cooked meat to the mixture and heat through if cold.

  6. Fill the zucchini shells with the zucchini mixture.

  7. Top each boat with mozzarella cheese.

  8. Bake in over at 350 degrees F. for about 20 - 25 minutes

Zucchini Noodles

This is a great way to use that oversized zucchini that went unnoticed for a few days! Large zucchinis have large seeds so eating them isn’t always the most flavorful. Using a spiral slicer to make zucchini noodles is a great way to use those large zucchinis. Pair it with marinara and other vegetables, it makes a delicious meal. Here is a recipe:

Zuchinni Noodles

Prep Time 35 minutes
Cook Time 10 minutes
Total Time 45 minutes
Servings 4

Ingredients

  • 2 Medium zucchinis
  • 1 tsp Olive oil
  • 1 jar Spagehtti sauce
  • Grated parmesan cheese

Instructions

  1. Julienne the zucchinis or use a mandolin to cut the zucchinis into noodles

  2. Sprinkle zucchini with some salt and place in a colander over the sink.

  3. Squeeze moisture out of zucchini and let drain for 30 minutes. It is necessary to get as much water out of the zucchini as possible.

  4. Heat olive oil in a skillet on low heat.

  5. Add zucchini noodles to skillet and saute for 5 minutes stirring frequently.

  6. Add tomato sauce to noodles just as you would with regular pasta.

  7. Serve on a plate sprinkled with parmesan cheese.

Zucchini Bread

Zucchini Bread is a great way to use zucchini and making them into muffins seems even more kid acceptable. Here is a recipe for zucchini bread.

Zucchini Bread

Prep Time 10 minutes
Cook Time 1 hour
Total Time 1 hour 10 minutes

Ingredients

  • 3 eggs
  • 2 cup sugar
  • 1 cup vegetable oil
  • 1 tsp vanilla
  • 2 cups coarsely grated zucchini
  • 2 cups flour
  • 1 tsp cinnamon
  • 2 tsp baking soda
  • 1/4 tsp baking powder
  • 1 cup chopped nuts optional

Instructions

Preheat oven to 350 degrees.

  1. Beat eggs, sugar, oil, and vanilla until thick.

  2. Stir in zucchini.

  3. Add remaining ingredients.

  4. Pour in greased bread pans.

  5. Bake at 350 degrees for 1 hour.

  6. Baked bread can be frozen.

Zucchini Fritters

Zucchini Fritters

Ingredients

  • 2 medium zucchinis
  • 1/4 cup flour
  • 1/4 cup parmesan cheese
  • 1 tsp salt
  • 1 egg beaten
  • olive oil

Instructions

  1. Grate zucchini using a mandolin.

  2. Drain zucchini. Put zucchini in a paper towel and squeeze dry. There will be a lot of water. Make sure it is as dry as possible.

  3. In a large bowl, mix flour, parmesan cheese, salt, egg, and grated zucchini.

  4. Form the mixture into small thin patties.

  5. Heat olive oil over medium heat. Make sure you are using enough oil to cover the entire pan in a thin layer.

  6. Add fritters to the pan and fry until the bottoms are a golden brown, about 2 minutes.  Flip and cook on the other side for another 2 minutes.

Ratatouille

Ratatouille

Prep Time 15 minutes
Cook Time 45 minutes
Total Time 1 hour
Servings 4 people

Ingredients

  • 1 6oz can tomato paste
  • 1/4 cup minced garlic
  • 3/4 cup water
  • 1 small eggplant trimmed and very thinly sliced
  • 1 yellow squash trimmed and very thinly sliced
  • 1 zucchini trimmed and very thinly sliced
  • 1 red bell pepper cored and very thinly sliced
  • olive oil
  • 1 tsp thyme leaves
  • 3 tbl shredded parmesan cheese
  • 1 tbl crushed red pepper flakes

Instructions

  1. Preheat oven to 375 degrees.

  2. Spread tomato paste into the bottom baking dish.

  3. Sprinkle minced garlic into tomato paste.

  4. Mix water and 1 tablespoon of olive oil and stir into the tomato paste.

  5. Line the outer edge of the dish with alternating slices of eggplant, yellow squash, zucchini, and red bell pepper.  Work from one end spiraling towards the center. 

  6. Drizzle with olive oil, sprinkle with salt and pepper.

  7. Sprinkle with thyme leaves and crushed red pepper flakes

  8. Cover dish with parchment paper. Put in oven for 45 minutes.

  9. Sprinkle with parmesan cheese.

Give some away!  

One of my favorite ways to use up extra zucchinis is to give them away!

We participate in the Amazon Associates Program. Please assume that all Amazon links are affiliate links. Affiliate links are links to third-party products and services. If you use those links and make a purchase, we will receive a small commission. Using these links will not cost you any extra money. An affiliate relationship does not change or influence the nature of the recommendation or opinion.
How to Clean Your Cast Iron Pans and Start Using Them Today

How to Clean Your Cast Iron Pans and Start Using Them Today

I have never used cast iron skillets for cooking until just the other week.  I was cleaning out my kitchen cabinets and came across three cast iron pans that I had tucked away.  They looked disgusting which is why I never used them.  My husband has always talked about how his grandmother made the best scrapple, fried eggs, and sausage gravy in her cast iron.  I decided that I would see if it was possible to try to clean them up and start using them.

Before I go any further, let me tell you that chances are your old cast iron pans are totally savable, easy to use, and totally worth the little time and effort needed to get them back in working order.

The materials you will need:

1.Cast Iron Pan

2. Stainless steel scouring pad

3. Mild dish soap

4. Vegetable oil

Here are 7 easy steps to refurbish your cast iron pans!

1. Scrub any rust, dirt, or food from the pans using a scouring metal brush and mild dish soap

While there were certainly rust and dust present on the pans, they were not severe.  This method will work for most degrees of rust, the elbow grease needed will vary with the severity.

I used a stainless steel scouring pad and a sponge.  I used mild dish soap and after some scrubbing, the residue and rust were removed.

2. Rinse Pans Thoroughly

Rinse the pans to remove any and all remnants of rust or old food.  You also want to make sure that all of the soap is rinsed away.  If there is any soap left on the pan when you heat it, that soap will be cooked into the pan and it will come out next time you cook.  You do not want that to happen!

3. Dry Pans Thoroughly

Make sure that you dry the pans very thoroughly also. You do not want to leave any excess water.

4. Cover pans, including outside bottom and handle with vegetable oil


We chose to use vegetable oil for seasoning the pans.  Using a paper towel, soak up some vegetable oil onto the towel and coat the entire cast iron pan with the oil.  Do not forget to get the outside, bottom, and handle.

5. Place pans face down in the oven for 1 hour at 350 degrees

Heat the oven to 350 degrees F.  Place pans face down on the middle rack.  Put a baking sheet underneath them to catch any excess oil.  Let them cook for 1 hour.  It will smell like hot metal!

6. Let pans cool in oven.

These pans will be hot!  I recommend just leaving them in the oven until you need to use the oven.  You should plan to let them sit and cool in the oven for a few hours.

7. Start Using and Enjoy!

Just start using your pans next time you would saute something. Whip out your cast iron pan next time you make breakfast.  My husband was not exaggerating!  It is great for cooking up sausage, bacon, scrapple and fried eggs and that is an easy place to start.

Here are some tips for caring for and using your cast iron:

  • Use oil when cooking. It is the oiling, heating, and cooling process that builds up the “season” on a cast iron.  The more this process is done, the more “non-stick” your pan will be and the more flavorful the food cooked in it will taste.

  • To clean, scrub any food particles out of the cast iron, rinse, and wipe clean. If soap is needed, use it sparingly.  DO NOT let the pan soak in water and DO NOT put it in the dishwasher.

  • Store your cast iron dry.  If you are stacking pans for storage keep cardboard or paper plate between them.

We participate in the Amazon Associates Program. Please assume that all Amazon links are affiliate links. Affiliate links are links to third-party products and services. If you use those links and make a purchase, we will receive a small commission. Using these links will not cost you any extra money. An affiliate relationship does not change or influence the nature of the recommendation or opinion.