Gardening with small children: 6 tips to be successful

Gardening with small children: 6 tips to be successful

Gardens are hard work and are time-consuming.  Add a few small children to the mix and you might find that you haven’t had time to look at your garden in days.  If you work full-time the weekends are used to catchup on all of the gardening work you didn’t get to during the week.  Sometimes having kids involved can make a project last forever, however it is so worth it. I have definitely struggled with it tending to a garden with two kids under 3. However, the skills they learn and the memories they build is definitely worth the craziness.

While gardening with children may be a little more difficult, there are so many wonderful reasons why to pursue it and make it apart of your while family’s life.  Let me share a few tips that have helped me survive the chaos and still be productive in the garden.

Dreaming of Having a Vegetable Garden this year?

Grab the Your Dream Vegetable Garden Plan for FREE to get you started today!  Start growing your groceries this year!

1. Plan your garden as close to the house as possible.

Just being able to observe what is happening once a day can be really helpful.  Being able to pass by the garden daily on your way to the car or being able to sneak out really quickly for 5 minutes can make all the difference.  A lot of the problems come from not seeing an issue develop early on and having to play catch up as a result.  This recently happened to me with our broccoli plants.  I didn’t notice that we had cabbage worms for a few days and once I finally observed the damage they had caused it was too late.  Those cabbage worms are fast!

2. Fence in your garden.

Pest prevention is a major way that you can be proactive in the care of your garden.  Although many insect pests will still be able to access your garden, other highly destructive animals such as deer and rabbits will not.  Deer can cause so much damage because of the number of plants they will eat in one visit, as well as, the damage they do due to trampling.

One night of deer activity can result in entire plants being eaten to the ground.  This happened to us with our pepper plants.  Right before they started producing fruit, the deer came and ate them to the ground.  A simple fence will prevent these major headaches.

Gardening with children can be difficult, that is why automating tasks or finding ways to make some aspects easier for yourself is so important.  Taking the time to build a fence will provide you with so much piece of mind in the long term.

garden fence

3. Let them explore the garden

Next time you are outside working in the garden, bring your small walking children with you.  Not only is this a wonderful outdoor activity, but it also allows them to be exposed to and observe what you are doing in the garden.  This is another reason why a fence around your garden will really save you some time and headache. 

If your kids are beyond the age where they are constantly putting things in their mouth then they should be pretty safe to let roam and explore the garden if there is a fence in place.  Having an eye on them inside the garden but allowing them to explore will give you some time to address any minor issues and maintenance.

Dreaming of Having a Vegetable Garden this year?

Grab the Your Dream Vegetable Garden Plan for FREE to get you started today!  Start growing your groceries this year!

4. Plan a place for the kids to play outside.

When planning where the garden will be, also plan somewhere safe that you can have the children while you spend some time gardening.  Is there a small area that you can fence in or place a play yard that is visible from your garden?  Or somewhere shady where you can set up a pack and play or play yard? Even if you have really small children or babies, bringing them outside with you while you garden is always beneficial.  We use this play yard for my oldest:

Click image above to check it out on Amazon.

For our youngest, we used this one because it is so easy to put up and it doesn’t let them have access to the ground.  Not having access to the ground is important when they are still putting things in thier mouth.  I love using this for babies and small toddlers, plus they come with a shade attachment so you can make sure they are not directly in the sun. 

Click image above to check it out on Amazon.

These truly  have been a lifesaver for outside gardening with children.

5. Give them a task

Small children love to be involved in tending to the garden.  My two year old loves going out with me to pick tomatoes (although sometimes he gets carried away and only picks the greens ones).  Having them look for pests, pick fruit, pull out rocks, etc. is a great way to indoctrinate them into the gardening work at an early age.  The task doesn’t even have to be purposeful, just something that will keep thier little minds and hands busy.  

Another reason I love gardening with children is that there really is a task for everyone at any age.  You can use it as a way to encourage and reward children as they grow. For example, once they master a certain task, they can get to use a small trowel or rake or some other type of age-appropriate tool.  Older kids can be given more responsibilities as thier skills and knowledge progress. 

child watering garden

6. Garden at nap time or right after bedtime

Afternoon naps are essential to getting things done when you have small children.  Once they fall asleep, make the most of your time and spend it doing tasks that require full attention.  This is another reason why you want to plant your garden as close to the house as possible.  Make sure the monitor signal will reach you while you are in the garden and that you are close enough to the house that you feel comfortable gardening while they are napping.  If the garden is too far from the house, you will not want to spend your precious nap time in the garden.  Also, summer time means longer days, which will hopefully provide you with some extra time right after you put them down for bed.  This will afford you some daily time in the garden to make sure that everything is going smoothly.


Gardening with small children is definitely difficult but being able to use the fresh homegrown produce in your family’s meals is so awesome.  Teaching your children gardening skills will encourage hard work, patience, resiliency, and problem-solving.  Sharing the love of gardening with your children will provide your family with precious memories and knowledge and appreciation for where their food comes from. Start gardening with your children from the very beginning!

Check out the podcast episode all about Gardening with Children. You can listen to it below!

Dreaming of Having a Vegetable Garden this year?

Grab the Your Dream Vegetable Garden Plan for FREE to get you started today!  Start growing your groceries this year!

7 Kid Friendly Ways To Use Your Zucchini Surplus

7 Kid Friendly Ways To Use Your Zucchini Surplus

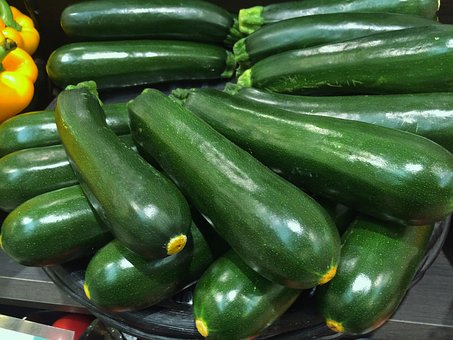
Zucchini is one of my family’s favorite plants to grow.  In my experience, growing zucchini has been very easy because the plant is so resilient and prolific.  Having a zucchini plant that produces several zucchinis a week is awesome!  However, if you are like me, grilled zucchini every night will get tiresome and the kids will quickly protest.  It is hard to use all of them especially if the kids won’t eat them. Here are some kid-friendly ways to enjoy your surplus of zucchinis:

Baked Zucchini Fries

So awesome!  A great way to get kids to eat their zucchini.  Recipe here:

Baked Zucchini Fries

Prep Time 10 minutes
Cook Time 25 minutes
Total Time 35 minutes

Ingredients

  • 3 zucchini halved and cut into 1/2 in. strips
  • 2 eggs beaten
  • 3/4 cups Italian seasoned breadcrumbs
  • 1/4 cups grated Parmesan cheese
  • 1/4 tsp seasoned salt

Instructions

  1. Preheat oven to 425 degrees

  2. Combine Parmesan cheese, breadcrumbs, and salt together in a bowl

  3. Dip zucchini strips into egg, shake to remove excess, roll strips into breadcrumb mixture.

  4. Place strips onto cookie sheet lined with aluminum foil

  5. Bake at 425 degrees on cookie sheet lined with aluminum foil for 20-24 minutes, turning once.

Zucchini Boats

Such an easy side to any meal.  For a complete meal idea check out this recipe:

Zucchini Boats

Prep Time 10 minutes
Cook Time 30 minutes
Total Time 40 minutes
Servings 4 people

Ingredients

  • 2 medium zucchinis cut lengthwise
  • 1/2 cup pizza sauce
  • 1 cup shredded mozzarella cheese
  • 1 lb cooked meat, ground beef, ground sausage, ground turkey,or pepperoni your preference

Instructions

  1. Preheat oven to 350 degrees F.

  2. Scoop out zucchini insides with a teaspoon. Put zucchini shells aside.

  3. Add olive oil to a pan and saute zucchini pulp until tender, about 8 minutes over medium heat.

  4. Add pizza sauce to the pan, combine with zucchini and heat through.

  5. Add cooked meat to the mixture and heat through if cold.

  6. Fill the zucchini shells with the zucchini mixture.

  7. Top each boat with mozzarella cheese.

  8. Bake in over at 350 degrees F. for about 20 - 25 minutes

Zucchini Noodles

This is a great way to use that oversized zucchini that went unnoticed for a few days! Large zucchinis have large seeds so eating them isn’t always the most flavorful. Using a spiral slicer to make zucchini noodles is a great way to use those large zucchinis. Pair it with marinara and other vegetables, it makes a delicious meal. Here is a recipe:

Zuchinni Noodles

Prep Time 35 minutes
Cook Time 10 minutes
Total Time 45 minutes
Servings 4

Ingredients

  • 2 Medium zucchinis
  • 1 tsp Olive oil
  • 1 jar Spagehtti sauce
  • Grated parmesan cheese

Instructions

  1. Julienne the zucchinis or use a mandolin to cut the zucchinis into noodles

  2. Sprinkle zucchini with some salt and place in a colander over the sink.

  3. Squeeze moisture out of zucchini and let drain for 30 minutes. It is necessary to get as much water out of the zucchini as possible.

  4. Heat olive oil in a skillet on low heat.

  5. Add zucchini noodles to skillet and saute for 5 minutes stirring frequently.

  6. Add tomato sauce to noodles just as you would with regular pasta.

  7. Serve on a plate sprinkled with parmesan cheese.

Zucchini Bread

Zucchini Bread is a great way to use zucchini and making them into muffins seems even more kid acceptable. Here is a recipe for zucchini bread.

Zucchini Bread

Prep Time 10 minutes
Cook Time 1 hour
Total Time 1 hour 10 minutes

Ingredients

  • 3 eggs
  • 2 cup sugar
  • 1 cup vegetable oil
  • 1 tsp vanilla
  • 2 cups coarsely grated zucchini
  • 2 cups flour
  • 1 tsp cinnamon
  • 2 tsp baking soda
  • 1/4 tsp baking powder
  • 1 cup chopped nuts optional

Instructions

Preheat oven to 350 degrees.

  1. Beat eggs, sugar, oil, and vanilla until thick.

  2. Stir in zucchini.

  3. Add remaining ingredients.

  4. Pour in greased bread pans.

  5. Bake at 350 degrees for 1 hour.

  6. Baked bread can be frozen.

Zucchini Fritters

Zucchini Fritters

Ingredients

  • 2 medium zucchinis
  • 1/4 cup flour
  • 1/4 cup parmesan cheese
  • 1 tsp salt
  • 1 egg beaten
  • olive oil

Instructions

  1. Grate zucchini using a mandolin.

  2. Drain zucchini. Put zucchini in a paper towel and squeeze dry. There will be a lot of water. Make sure it is as dry as possible.

  3. In a large bowl, mix flour, parmesan cheese, salt, egg, and grated zucchini.

  4. Form the mixture into small thin patties.

  5. Heat olive oil over medium heat. Make sure you are using enough oil to cover the entire pan in a thin layer.

  6. Add fritters to the pan and fry until the bottoms are a golden brown, about 2 minutes.  Flip and cook on the other side for another 2 minutes.

Ratatouille

Ratatouille

Prep Time 15 minutes
Cook Time 45 minutes
Total Time 1 hour
Servings 4 people

Ingredients

  • 1 6oz can tomato paste
  • 1/4 cup minced garlic
  • 3/4 cup water
  • 1 small eggplant trimmed and very thinly sliced
  • 1 yellow squash trimmed and very thinly sliced
  • 1 zucchini trimmed and very thinly sliced
  • 1 red bell pepper cored and very thinly sliced
  • olive oil
  • 1 tsp thyme leaves
  • 3 tbl shredded parmesan cheese
  • 1 tbl crushed red pepper flakes

Instructions

  1. Preheat oven to 375 degrees.

  2. Spread tomato paste into the bottom baking dish.

  3. Sprinkle minced garlic into tomato paste.

  4. Mix water and 1 tablespoon of olive oil and stir into the tomato paste.

  5. Line the outer edge of the dish with alternating slices of eggplant, yellow squash, zucchini, and red bell pepper.  Work from one end spiraling towards the center. 

  6. Drizzle with olive oil, sprinkle with salt and pepper.

  7. Sprinkle with thyme leaves and crushed red pepper flakes

  8. Cover dish with parchment paper. Put in oven for 45 minutes.

  9. Sprinkle with parmesan cheese.

Give some away!  

One of my favorite ways to use up extra zucchinis is to give them away!

How to Clean Your Cast Iron Pans and Start Using Them Today

How to Clean Your Cast Iron Pans and Start Using Them Today

I have never used cast iron skillets for cooking until just the other week.  I was cleaning out my kitchen cabinets and came across three cast iron pans that I had tucked away.  They looked disgusting which is why I never used them.  My husband has always talked about how his grandmother made the best scrapple, fried eggs, and sausage gravy in her cast iron.  I decided that I would see if it was possible to try to clean them up and start using them.

Before I go any further, let me tell you that chances are your old cast iron pans are totally savable, easy to use, and totally worth the little time and effort needed to get them back in working order.

The materials you will need:

1.Cast Iron Pan

2. Stainless steel scouring pad

3. Mild dish soap

4. Vegetable oil

Here are 7 easy steps to refurbish your cast iron pans!

1. Scrub any rust, dirt, or food from the pans using a scouring metal brush and mild dish soap

While there were certainly rust and dust present on the pans, they were not severe.  This method will work for most degrees of rust, the elbow grease needed will vary with the severity.

I used a stainless steel scouring pad and a sponge.  I used mild dish soap and after some scrubbing, the residue and rust were removed.

2. Rinse Pans Thoroughly

Rinse the pans to remove any and all remnants of rust or old food.  You also want to make sure that all of the soap is rinsed away.  If there is any soap left on the pan when you heat it, that soap will be cooked into the pan and it will come out next time you cook.  You do not want that to happen!

3. Dry Pans Thoroughly

Make sure that you dry the pans very thoroughly also. You do not want to leave any excess water.

4. Cover pans, including outside bottom and handle with vegetable oil


We chose to use vegetable oil for seasoning the pans.  Using a paper towel, soak up some vegetable oil onto the towel and coat the entire cast iron pan with the oil.  Do not forget to get the outside, bottom, and handle.

5. Place pans face down in the oven for 1 hour at 350 degrees

Heat the oven to 350 degrees F.  Place pans face down on the middle rack.  Put a baking sheet underneath them to catch any excess oil.  Let them cook for 1 hour.  It will smell like hot metal!

6. Let pans cool in oven.

These pans will be hot!  I recommend just leaving them in the oven until you need to use the oven.  You should plan to let them sit and cool in the oven for a few hours.

7. Start Using and Enjoy!

Just start using your pans next time you would saute something. Whip out your cast iron pan next time you make breakfast.  My husband was not exaggerating!  It is great for cooking up sausage, bacon, scrapple and fried eggs and that is an easy place to start.

Here are some tips for caring for and using your cast iron:

  • Use oil when cooking. It is the oiling, heating, and cooling process that builds up the “season” on a cast iron.  The more this process is done, the more “non-stick” your pan will be and the more flavorful the food cooked in it will taste.

  • To clean, scrub any food particles out of the cast iron, rinse, and wipe clean. If soap is needed, use it sparingly.  DO NOT let the pan soak in water and DO NOT put it in the dishwasher.

  • Store your cast iron dry.  If you are stacking pans for storage keep cardboard or paper plate between them.

How we Overcame our Garden’s Top 5 Challenges

How we Overcame our Garden’s Top 5 Challenges

The 2018 Gardening season has definitely been a challenging one for us. We planted our biggest garden yet and we expected to have a lot of trial and error with all of the new plants we were experimenting with. We always tend to go overboard in our initial planning (so many possibilities!).  We weeded out some plants such as potatoes and brussel sprouts.

Here are the plants that made the final cut this year:

  • 5 types of tomatoes
  • Bib lettuce
  • Lettuce Leaf
  • White Onions
  • 5 Bell Peppers
  • 5 Jalapenos
  • Cantaloupe
  • 2 Broccoli
  • Yellow Squash
  • Zucchini
  • Watermelon
  • Lima Beans
  • String Beans (pole and bush)
  • Peas

As this was only our third garden, and we have added an extra 5 x12 plot to the existing 10x 12 plot we had used in the past, there were still a lot of challenges that we faced for the first time.

Here were our top 6 challenges and how we faced them:

1) Rabbits

The first challenge we faced was rabbits. I first realized it when I went to do my routine evening garden check and I noticed that one entire pepper plant was chomped to the ground. It was only about 5 inches tall at this point and was the only one eaten. Right next to our peppers were our lettuce, and I noticed that there were about 2 heads of lettuce that were gone. I walked over to our other plot, which was dedicated to all the beans and the watermelon and out jumped 3 fat rabbits! Tummies full of watermelon leaves. In the upcoming weeks, these guys really focused on the lettuce and we only harvested about ¼ of the lettuce we planted. Looking back, I should have treated the problem with some rabbit deterrent and just replanted some lettuce. Now we know!

2) Deer

The deer were out of control this year!  We have never had problems with deer in the past.  While our backyard consists of some wooded areas, our gardens are in our front yard, not far from the road.  We never bothered to fence in our garden.  Well, let me tell you if you haven’t experienced the damage deer can cause, I can assure you it is devastating.  One day, I saw two string bean bushes full of beans, ready to be picked.  Probably two dinners worth for our family.  I decided I would pick them the next day.  Overnight, the deer must have visited because our garden was demolished.  The string bean plants were licked clean.  The bell pepper plants were eaten to the ground, leaving just a little nub.  The most damage though was to our poor tomatoes which were full of big green fruit just waiting to ripen.  The branches of every plant were chomped down.  Green tomatoes littered the garden and were trampled, smashed, and squished.

We were really upset.  We were so close to harvesting some great food but we decided that since it was only early June, we had plenty of time to try to repair bring the garden back to life.  After researching deer repellent, I decided to try the Irish spring soap method.  We had Irish soap on hand and thought it was something easy to just try.  Apparently, deer do not like the scent of Irish spring soap so if you hang them in your garden, they will stay away.  I hung 4 bars in total, 2 in each plot.  The damage seemed to taper off some deer activity but since the deer must sneak in in the dead of night, I couldn’t really tell if it was working.  So I also tried a natural animal repellant product as reinforcement called: “I Must Garden, Animal Repellant” I sprinkled this mixture throughout the garden and waited.  And then our next challenge hit!


 Amazon affiliate link

Amazon affiliate link

3) Rain

Wow, we had so much rain in such a small amount of time.  There were several weeks that consisted of 4-5 rain days and there was just too much water in the garden.  To start our zucchini and squash developed blossom rot, which is where the ends of the fruit rot before they get to size, thankfully they did eventually recover.  This uneven watering also affected the tomatoes. We had a ton of beautiful green tomatoes but they would never ripen.

4) Cabbage Worms

This was the first year we planted broccoli and we were really excited.  The plants were growing beautifully with nice bright green leaves.  That is until the cabbage worms struck, and let me tell you, they are no joke.  I swear I saw some damage one evening and checked to see if I could identify any pests.  I did not see any worms that that time.  Within a few days, the two plants were absolutely destroyed.  The leaves looked skeletonized and there were little green worms everywhere.  After some research, I found that they are called cabbage worms. I read several articles that said that they can be held at bay by sprinkling the plants with rye flour or cornmeal.  Next year, I will have my cornmeal handy!

5) Nitrogen-rich Soil

I know the experts tell you to get your soil tested prior to planting to help determine any nutrient deficiencies and acidity so that any adjustments can be made to help ensure a healthy garden.   However, I have always poo-pooed the idea.  I just never took the time or effort to get our soil tested.  Our first garden did really well, so I didn’t worry about it this year.  I will not be making that mistake again!  Through research, I found that the reason our pole bean plants (string and lima beans) and our cantaloupe plants produced ZERO fruit was because we had Nitrogen-rich soil.  Having too much nitrogen can cause plants to be beautifully green, but produce no fruit.  That was what we experienced. It was so disappointing.  Our dreams of canning endless amounts of string and lima beans (my sons’ favorite!) were crushed!  Not next year, we will be testing our soil and treat it accordingly before I plant.

6) Time

I know that everyone experiences the challenge of not having enough time to focus on their garden.  It happens every year.  Life gets in the way and it seems to be as soon as all of those plants start producing.  What has helped us is making sure that I at least do a daily walkthrough to help determine if any action needs to be taken.  Even if I am too busy to tend to things, I want to make sure I am observing the activity of the garden so that I know better for next year.

Even with our failing garden, we learned so much!  I will not let the failure of this garden deter us.  We really enjoy gardening and producing our family’s food.  I have so much to incorporate next year.  I know what actions to take if we encounter certain pests so next year, they will not be an issue.  I think this is the best way to garden when you are first learning.  You can’t possibly be prepared for everything early on so learning as we go really works for us.  After all, we are just wingin’ it!